background image

PenMount Monitor Menu Icon


The PenMount monitor icon (PM) appears in the menu bar of Windows 2000/XP system when 
you turn on PenMount Monitor in PenMount Utilities.


PenMount Monitor has the following function


PenMount Rotating Functions


The PenMount driver for Windows 2000/XP supports several display rotating software packages.


Windows Me/2000/XP support display rotating software packages such as:


•Portrait’s


Pivot   Screen   Rotation   Software


•ATI Display Driver Rotate Function


•nVidia Display Driver Rotate Function


•SMI Display Driver Rotate Function


•Intel 845G/GE Display Driver Rotate Function


Configuring the Rotate Function


1. Install the rotation software package.  


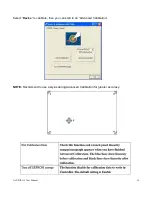
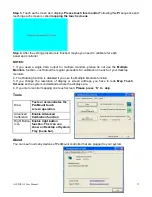
2. Choose the rotate function (0°, 90°, 180°, 270°) in the 3rd party software. The calibration 

screen appears automatically. Touch this point and rotation is mapped.  


NOTE: 

The Rotate function is disabled if you use Monitor Mapping


ACUDIS115 User Manual


18


Summary of Contents for AcuDis115

Page 1: ...AcuDis115 User Manual Acura Embedded Systems Inc...

Page 2: ...play Mode 3 Chapter 2 OSD 2 1 AD Board OSD Functions 4 2 2 OSD Controls 5 2 3 OSD Default Parameter 5 2 4 Main Menu 6 Chapter 3 Installation 3 1 Introduction to the PenMount 9036 Controller Board 9 3...

Page 3: ...key pay from connector TRANSFER BOARD OSD MEMBRANE KEYPAD LCD Max Resolution Max Color Luminance cd m Contrast Ratio 1024x768 16 2 M 350 800 1 Viewing Angle H V Backlight Lifetime Power Input 160 145...

Page 4: ...1 3 Dimensions Figure 1 4 Dimensions of AcuDis115 ACUDIS115 User Manual 2...

Page 5: ...ew of AcuDis115 Figure 2 3 Rear View of AcuDis115 Resolution H Freq kHz V Freq Hz Remark 640x350 70 31 469 70 087 VGA 640x400 70 31 469 70 087 VGA 640x480 66 35 000 66 667 MAC 640x480 72 37 861 72 809...

Page 6: ...ress don tlet them go the buttons until the AC power cord is connect of your screen Now it can be put into the burn in mode for changing colors 2 Getting Out of Burn in Mode Before getting out of the...

Page 7: ...key in the menu 3 Press Menu and then choose the item with the or key 4 Press Menu and then adjust the quality with the or key 4 If the RGB is still on the top left corner of the screen press to ente...

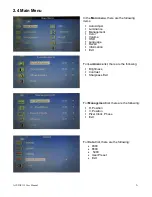
Page 8: ...ume OSD Language Recall Information Exit For Luminance list there are the following Brightness Contrast Sharpness Exit For Management list there are the following H Position V Position Pixel Clock Pha...

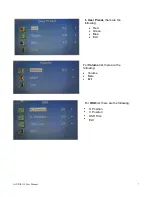
Page 9: ...r Preset there are the following Red Green Blue Exit For Volume list there are the following Volume Mute Exit For OSD list there are the following H Position V Position OSD Time Exit ACUDIS115 User Ma...

Page 10: ...e following English Francais Deutsch Italiano Espanol Portuguese P For Recall list there are the following Recall Color Recall All Exit For Information list there are the following Display Information...

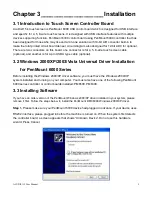
Page 11: ...pin USB A type cable optional 3 2 Windows 2000 XP 2003 Vista Universal Driver Installation for PenMount 6000 Series Before installing the Windows 2000 XP driver software you must have the Windows 2000...

Page 12: ...License Agreement appears Click IAgree and Next Step 4 Choose the folder in which to install PenMount Windows Universal Driver Click Install Step 5 Wait for installation Click Next to continue Step 6...

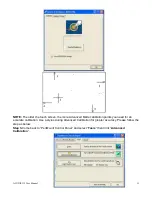
Page 13: ...In this window you can find out that how many devices are detected on your system Calibrate This function offers two ways to calibrate your touch screen Standard Calibration adjusts most touch screens...

Page 14: ...Files PenMount Universa Driver Dmcctrl exe calibration 0 Standard Calibration Dmcctrl exe calibration 0 Standard Calibration 4 Advanced Calibration 4 9 Advanced Calibration 9 16 Advanced Calibration 1...

Page 15: ...ation points you need for an accurate calibration Use a stylus during Advanced Calibration for greater accuracy Please follow the step as below Step 3 Come back to PenMount Control Panel and select To...

Page 16: ...Select Device to calibrate then you can start to do Advanced Calibration NOTE Recommend to use a stylus during Advanced Calibration for greater accuracy ACUDIS115 User Manual 14...

Page 17: ...Setting About This panel displays information about the PenMount controller and driver version ACUDIS115 User Manual 15...

Page 18: ...er installation procedures are the same as for a single monitor Multiple Monitors supports the following modes Windows Extend Monitor Function Matrox DualHead Multi Screen Function nVidia nView Functi...

Page 19: ...monitors 2 The Rotating function is disabled if you use the Multiple Monitors function 3 If you change the resolution of display or screen address you have to redo Map Touch Screens so the system und...

Page 20: ...display rotating software packages such as Portrait s Pivot Screen Rotation Software ATI Display Driver Rotate Function nVidia Display Driver Rotate Function SMI Display Driver Rotate Function Intel...

Page 21: ...er service unit has been set up specifically to cater to our esteemed customers needs Technical Support North American Technical support contact your Salesperson support acuraembedded com Mailing addr...

Reviews: