background image

AcuPanel15C1DV2 ( Model #ACUPNL15CD )                                                                                                                                            Manual 


Chapter 2 Installations 

 
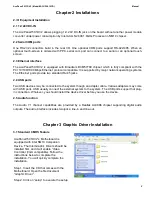
2. /O Equipment Installation  
 
2.1 12~24V DC-IN  

 
The AcuPanel15C1DV2 allows plugging 12~24V DC-IN jack on the board without another power module 
converter under power consumption by Intel Atom N2600 1.6GHz Processor in NM10 chipset.  
 

2.2 Serial COM ports  

 
One  RS-232 connectors build in the rear I/O. One optional COM ports support RS-422/485. When an 
optional touch-screen is ordered with PPC, serial com port can connect to a serial or an optional touch-
screen.  
 

2.3 Ethernet interface  

 
The AcuPanel15C1DV2  is equipped with Broadcom BCM57780 chipset which is fully compliant with the 
PCI 10/100/1000 Mbps Ethernet protocol compatible. It is supported by major network operating systems. 
The Ethernet ports provide two standard RJ-45 jacks.  
 

2.4 USB ports  

 
Two USB devices may be connected to the system though an adapter cable. Various adapters may come 
with USB ports. USB usually connect the external system to the system. The USB ports support hot plug-
in connection. Whatever, you should install the device driver before you use the device.  
 

2.5 Audio function  


The Audio 7.1 channel capabilities are provided by a Realtek ALC886 chipset supporting digital audio 
outputs. The audio interface includes two jacks: line-in and line-out. 


Chapter 3 Graphic Driver Installation 

 
3.1 Standard CMOS Feature  


AcuPanel15C1DV2's  Motherboard is 
equipped with Intel NM10 Companion 
Device. The Intel Graphic Drivers should be 
installed first, and it will enable “Video 
Controller (VGA compatible). Follow the 
instructions below to complete the 
installation. You will quickly complete the 
installation.  
 
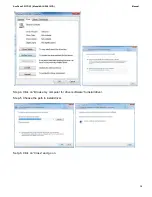
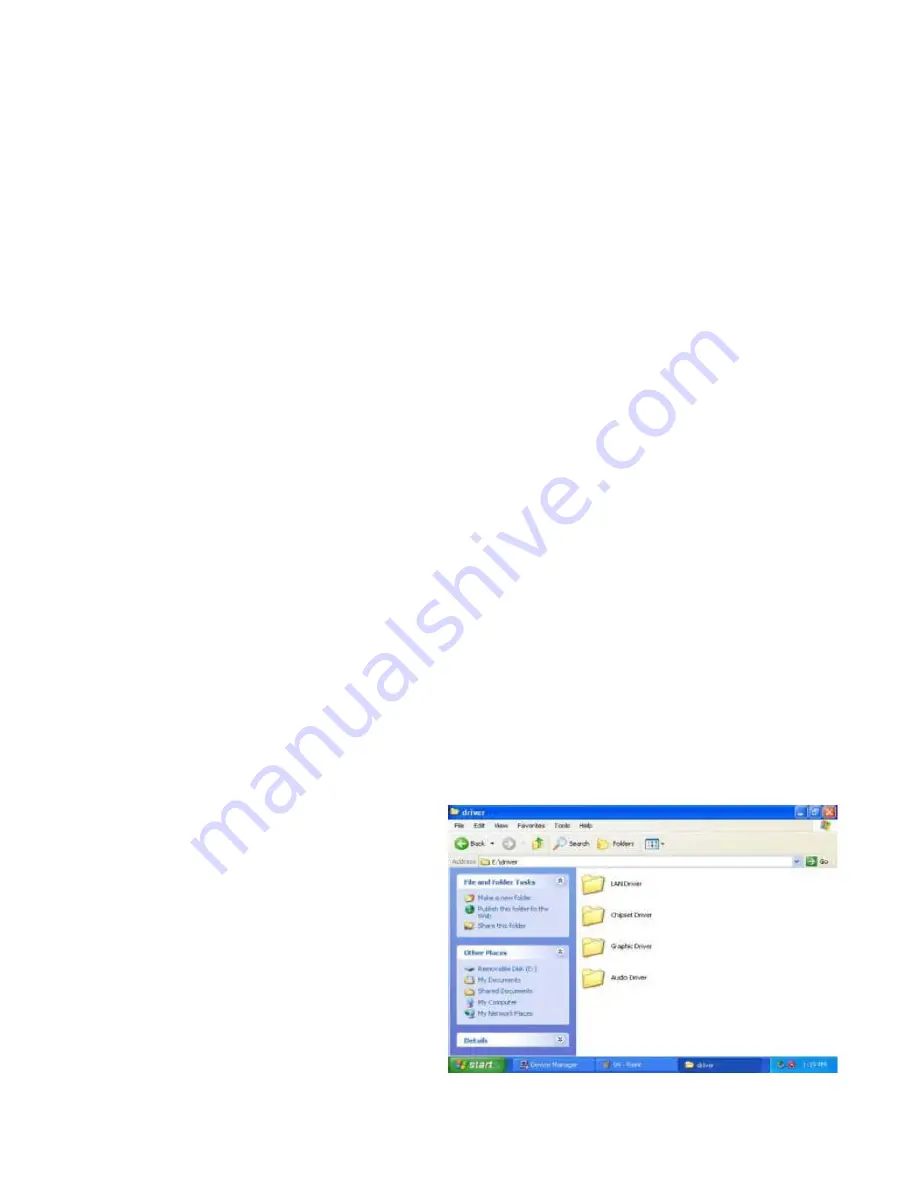
Step.1. Insert the CD that comes with the 
Motherboard. Open the file document 
“Graphic Driver “.  
 
Step.2. Click on “setup” to execute the setup.  


Summary of Contents for AcuPanel15C1DV2

Page 1: ...AcuPanel15C1DV2 Model ACUPNL15CD Manual 1 AcuPanel15C1DV2 USER MANUAL Version 2 0 Acura Embedded Systems Inc...

Page 2: ...4 1 5 AcuPanel15C1DV2 DIMENSIONS 4 CHAPTER 2 INSTALLATIONS 5 CHAPTER 3 GRAPHIC DRIVER INSTALLATION 5 3 1 STANDARD CMOS FEATURE 5 3 2 PANEL RESOLUTION SETTING 7 CHAPTER 4 CHIPSET DRIVER INSTALLATION 8...

Page 3: ...sh Graphic Intel Graphic Accelerator 3600 support DX9 OGL3 0 LCD interface Single channel 24 bit LVDS Up to 1440 x 900 60Hz Resolution VGA mode Up to 1920 x 1200 60Hz DVI 1920 x 1200 60Hz LAN 1 x Giga...

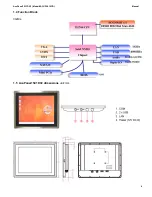
Page 4: ...AcuPanel15C1DV2 Model ACUPNL15CD Manual 4 1 4 Function Block 3GB s 1 5 AcuPanel15C1DV2 dimensions unit mm...

Page 5: ...d RJ 45 jacks 2 4 USB ports Two USB devices may be connected to the system though an adapter cable Various adapters may come with USB ports USB usually connect the external system to the system The US...

Page 6: ...CD Manual 6 Step 3 Click on Next to install Driver Step 4 Click on Yes to agree License Step 5 Click on Next to install Driver Step 6 Click on Next to install Driver Step 7 Click on Yes I want to rest...

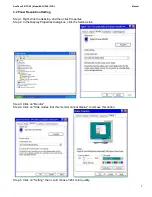
Page 7: ...ht click the desktop and then click Properties Step 2 In the Display Properties dialog box click the Settings tab Step 3 Click on Monitor Step 4 Click on Hide modes that this monitor cannot display to...

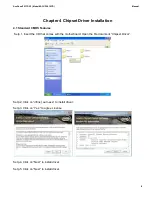
Page 8: ...1 Standard CMOS Features Setp 1 Insert the CD that comes with the motherboard Open the file document Chipset Driver Setp 2 Click on infinst_auto exe to install driver Setp 3 Click on Yes to agree Lice...

Page 9: ...tem you are using in the ACUPANEL15C1DV2 s motherboard before installing the Ethernet drivers Follow the steps below to complete the installation of the Broadcom BCM57780 Gigabit Ethernet controller L...

Page 10: ...AcuPanel15C1DV2 Model ACUPNL15CD Manual 10 Step 4 Click on Browse my computer for driver software to install driver Step 5 Choose the path to install driver Setp 6 Click on Close and go on...

Page 11: ...d feature Acoustic Echo Cancellation AEC Beam Forming BF and Noise Suppression NS technology 6 2 Installation of Audio Driver The users must make sure which operating system you are using in the IA30...

Page 12: ...EloTray program and also put a desktop icon for the EloTray program when the icon is double clicked the EloTray s popup menu shows up See Fig 1 7 2 The Configuration Program ELoTray exe This is the c...

Page 13: ...usted individually 7 3 3 Settings The setting dialog box only has two options Start EloTray program at system startup and double the size of Windows title bars and scroll bars 7 3 4 Keyboard The Keybo...

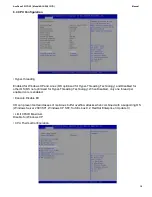
Page 14: ...uter comes with a hardware configuration program which called BIOS Setup that allows you to view and set up the system parameters The BIOS Basic Input Output System is a layer of the software called f...

Page 15: ...in BIOS setup image has two main frames The left frame displays all the options that can be configured Grayed out options cannot be configured On the contrary options in blue can be configured The rig...

Page 16: ...PCI Option ROM to launch in case Multiple Option ROMs Legacy ROM and EFI Compatible ROM are present PCI Latency Timer Use this function to select the number of PCI bus clocks to be used for the PCI la...

Page 17: ...ers Snooping Default Disabled PERR Generation Enables or Disables PCI Device to Generate PERR Default Disabled SERR Generation Enables or Disables PCI Device to Generate SERR Default Disabled 8 2 ACPI...

Page 18: ...AcuPanel15C1DV2 Model ACUPNL15CD Manual 18 ACPI Sleep State Default S3 Suspend to RAM Lock Legacy Resources Enables or Disable Lock of Legacy Resource Default Disable 8 3 S5 RTC Wake Settings...

Page 19: ...S OS not optimized for Hyper Threading Technology When Disabled only one thread per enabled core is enabled Execute Disable Bit XD can prevent certain classes of malicious buffer overflow attacks when...

Page 20: ...perature of the ACPI critical Trip point the point in which the OS will shut the system off Active Trip Point Lo Fan Speed Active Trip Point Hi Fan Speed This field enables or disables the smart fan f...

Page 21: ...C1 Value Passive TC2 Value Passive TSP Value 8 5 IDE Configuration Configure SATA as Determines how SATA controllers s operate The options are IDE and AHCI Port0 Speed Limit Select Port0 AHCI Speed Li...

Page 22: ...AcuPanel15C1DV2 Model ACUPNL15CD Manual 22 SATA Port 0 1 Enable or disable SATA Port SATA Port 0 1 Hot Plug Designates this port as Hot Pluggable Intel Fast Flash Standy iFFS Support Enable or disable...

Page 23: ...er time out The time out value for control bulk and Interrupt transfers Default 20 sec Device reset time out The USB mass storage device Start Unit command time out Default 20 sec Device power up dela...

Page 24: ...ystem Super IO Chip Parameters Serial Port 1 2 3 4 5 6 Configuration Set Parameters of Serial Ports User can Enable Disable the serial port and Select an optimal settings for the Super IO Device Enabl...

Page 25: ...ction occurs it will reset the system F81865 H W Monitor PPM Configuration EIST Enable Disable Intel SpeedStep CPU C state Report Enable Disable CPU C state report to OS C4 Exit Timing This option con...

Page 26: ...ACUPNL15CD Manual 26 Memory Frequency and Timing Intel IGD Configuration Primary Display Select which of IGFX PEG PCI Graphics device should be Primary display Internal Graphics Keep IGD enabled based...

Page 27: ...of the memory allocated to either system or graphics processor IGD Clock Source IGD clock selection LCD Panel Type Select LCD panel used by Internal Graphics Device by selecting the appropriate setup...

Page 28: ...rt Select a PCI Express High Priority Port 8 7 Boot Setup Prompt Timeout Number of seconds to wait for setup activation key 65535 0xFFFF means indefinite waiting Default 1 Bootup NumLock State Select...

Page 29: ...on selected in Boot option 1 will be the first priority followed by second third and so on Network Hard Device BBS Priorities It will list all the Boot options that are configured as Network Hard Driv...

Page 30: ...s Discard Changes and Reset Reset system setup without saving any changes Save Changes Save Changes done so far to any of the setup options Discard Changes Discard Changes done so far to any of the se...

Page 31: ...stomer friendly service A special customer service unit has been set up specifically to cater to our esteemed customers needs Technical Support For technical support contact your Salesperson support a...

Reviews: