UHF860 RFID Reader
© 2013 ACURA Global. All rights reserved
http://www.acuraglobal.com
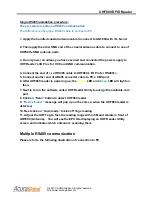
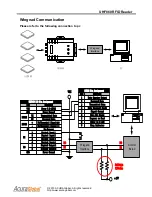
Wiegand Installation procedures
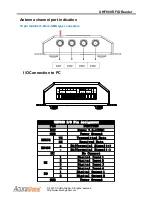
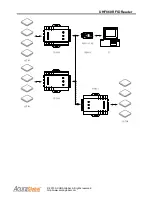
1. Apply the bundled coaxial antenna cable to connect to ANT800 with it’s N end
2. Then apply the other SMA end of the coaxial antenna cable to connect to one of
UHF860’s SMA antenna ports.
3. Do not power on before you secure the /+ current of power supply to
UHF860’s I/O VCC and GND pins.
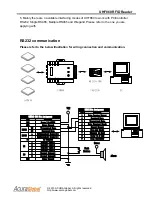
4. Connect the RS232 TX/RX wires to UHF860’s RX/TX I/O pins
.
5. Next connect the RS232 connector head to PC’s RS232 com port. If your PC is
not equipped with an RS232 com port, you need to add an RS232/USB converter for
the communication. Please also refer to RS232 communication section for the
details.
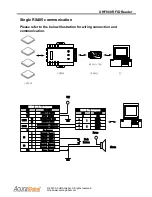
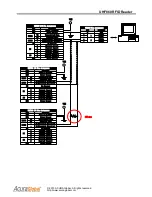
6. If you are connecting to a Wiegand interface controller, then connect UHF680 I/O
pins of DO1/DO2 to the controller’s Do/D1 port (
we suggest to add a Pullhigh
resister on D0/D1 wire as illustration on page 15.
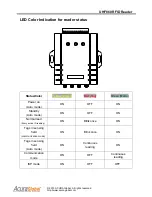
7. After UHF860 reader is powering up; the
Yellow
LED and
Green
LED will light on
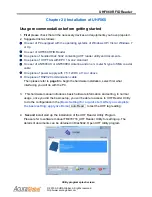
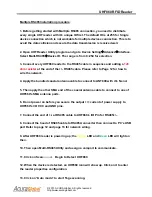
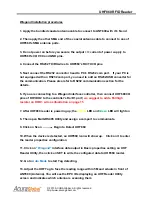
8. Then open Multi-RS485 Utility and assign a comport to communicate.
9. Click on Scan Begin to Detect UHF860
10. When the device is detected, an UHF860 icon will show up. Click on it to enter
the reader properties configuration
11. Click on
“ Wiegand”
interface data output in Basic properties setting on UHF
Reader Utility, then click on SET to write the configured data to UHF860 reader.
12. Go to
Auto Mode
to start Tag detecting.
13. Adjust the UHF Tag to face the reading range within 5M and situate in front of
ANT800 (Antenna). You will see the EPC IDs displaying on UHF Reader Utility
screen and indicates which antenna is scanning them

