background image

5

Set the Time & Date

Press and release the “SET” button, located on the back of the clock, to enter  

SET MODE. Once in SET MODE the preference you are currently setting will blink on the 

clock.
To adjust the currently selected (flashing) item, press and release the “ ” or  

“ “ buttons (press and HOLD to fast adjust).
To save your adjustments, press and release the “SET” button to adjust the next preference. 

The preference set order is as follows:
AUTO DST (ON or OFF*) 

CLOCK HOUR 

CLOCK MINUTE 

CALENDAR MONTH 

CALENDAR DAY 

CALENDAR YEAR 

TEMPERATURE UNITS (ºF or ºC)
You will automatically exit SET MODE if no buttons are pressed for 10 seconds. Enter SET 

MODE at any time by pressing AND HOLDING the “SET” button.
*If you live in an area that observes daylight saving time, DST should be set to ON.

Adjust the Backlight

This clock's color display features 5 different lighting settings: 100%, 75%, 50%, 25%, 

and 10%. When the display is powered with the power adapter, the backlight remains on 

at 100% brightness by default. Manually adjust the backlight brightness by pressing and 

releasing the " " or " " buttons when not in SET MODE.

Set the Color

This clock's display features 6 different color settings. Choose between white, blue, violet, 

magenta, red, or green, or set to auto-cycle to fit your preference. In auto-cycle mode, the 

display automatically cycles through all available colors, changing every minute. Press and 

release the Color Selection button on the front of the display to select your desired color. 

Press and hold to turn on/off auto-cycle mode.

Summary of Contents for 75160

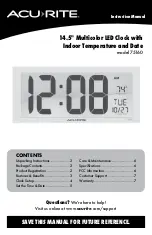
Page 1: ...w acurite com support CONTENTS Unpacking Instructions 2 Package Contents 2 Product Registration 2 Features Benefits 3 Clock Setup 4 Set the Time Date 5 Care Maintenance 6 Specifications 6 FCC Informat...

Page 2: ...ructions Remove the protective film that is applied to the LED screen prior to using this product Locate the tab and peel off to remove Package Contents 1 Digital Clock 2 Power Adapter 3 Instruction M...

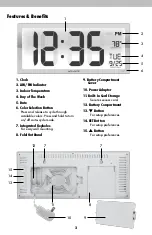
Page 3: ...lors Press and hold to turn on off auto cycle mode 7 Integrated Keyholes For easy wall mounting 8 Fold Out Stand 9 Battery Compartment Cover 10 Power Adapter 11 Built In Cord Storage Secures excess co...

Page 4: ...of batteries in fire as batteries may explode or leak DO NOT mix old and new batteries or types of batteries alkaline standard DO NOT use rechargeable batteries DO NOT recharge non rechargeable batter...

Page 5: ...ng AND HOLDING the SET button If you live in an area that observes daylight saving time DST should be set to ON Adjust the Backlight This clock s color display features 5 different lighting settings 1...

Page 6: ...n This equipment generates uses and can radiate radio frequency energy and if not installed and used in accordance with the instructions may cause harmful interference to radio communications However...

Page 7: ...IS THE SOLE WARRANTY FOR THE PRODUCTS AND IS EXPRESSLY IN LIEU OF ALL OTHER WARRANTIES EXPRESS OR IMPLIED ALL OTHER WARRANTIES OTHER THAN THE EXPRESS WARRANTY SET FORTH HEREIN ARE HEREBY EXPRESSLY DI...

Page 8: ...trademark of the Chaney Instrument Co Lake Geneva WI 53147 All other trademarks and copyrights are the property of their respective owners AcuRite uses patented technology Visit www acurite com paten...

Reviews: