background image


Deinstallation des originalen Radioteils und des ICM (Infotainment Control Module) / 

Deinstallation of the OEM headunit and the ICM (Infotainment Control Module) 


(ICM) Infotainment Control Module 


1)


Zuerst ist es wichtig vor der Installation den Fahrzeugschlüssel abzuziehen und zusätzlich den 
Minuspol der Batterie abzuklemmen, da ansonsten Fehlermeldungen im Bordsystem nicht 
vermeidbar sind! Sie benötigen für die Installation einen Schlitzschraubendreher, einen Torx-
Schraubendreher T25, sowie geeignetes Ausbauwerkzeug.                                                               

Before installation please remove the key and disconnect the battery for safety reasons and to 
avoid faults in the vehicles CanBus system. For the installation you need a slot screw-driver, a 
Torx T25 and a flat wedge tool.


2)


Wenn das Fahrzeug mit Parkdistanzkontrolle PDC ausgestattet ist, ist es absolut sinnvoll den 
Einbau des Adapters (CAN-PDC) für diese Parkdistanzkontrolle (PDC) abzuschließen und zu 
testen, bevor man mit dem Rest der Installation beginnt.                                                                                                                                                 

If the vehicle is equipped with PDC (parc distance control), please check the adaptation of the 
PDC (CAN-PDC) as early as possible to avoid incompatibility issues.


3)


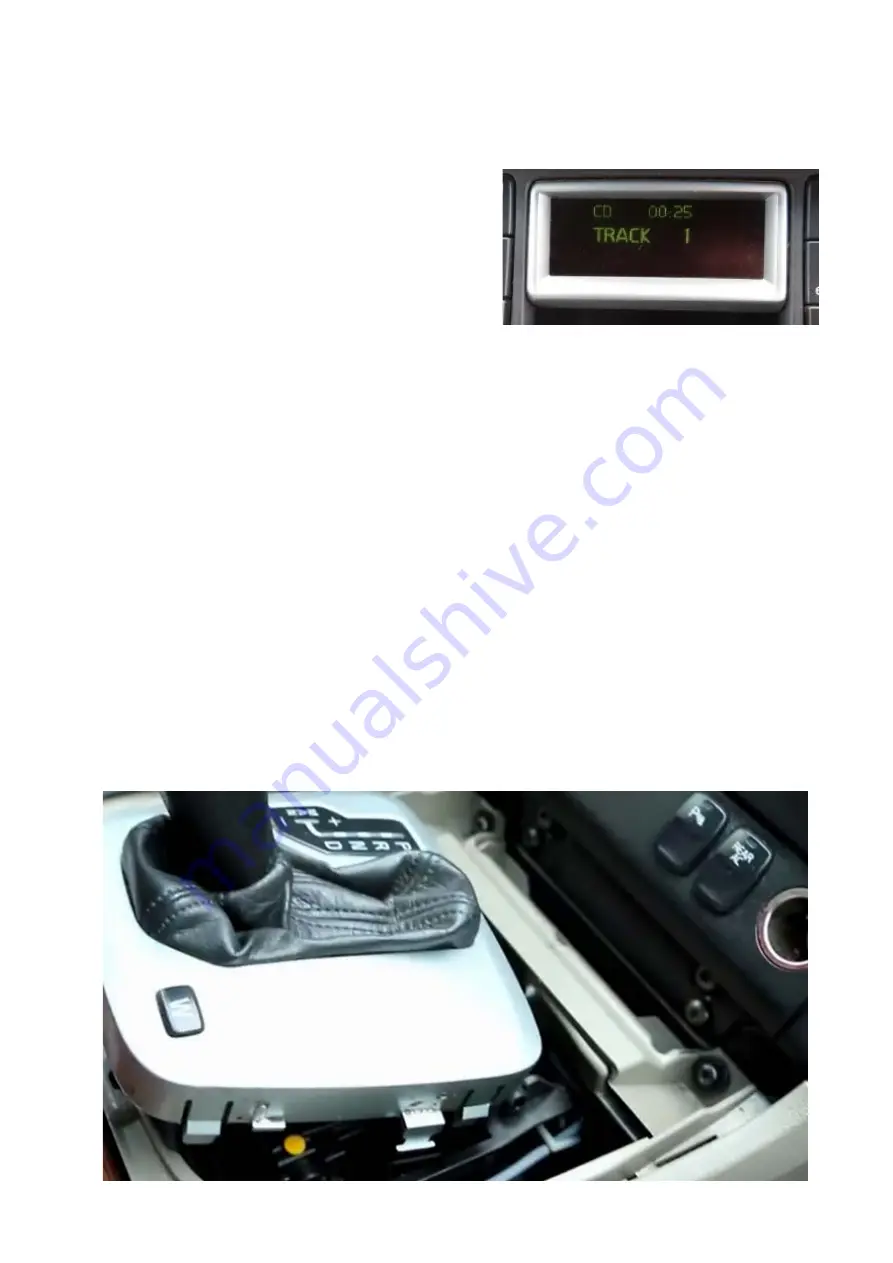
Um die Radioeinheit ausbauen zu können, hebeln Sie bitte mit einem geeigneten Ausbau-
werkzeug die Schalthebelabdeckung auf und entfernen Sie das Zierteil.                                                                                               

Please lever the gear stick cover with a suitable tool to be able to deinstall the headunit

.


Summary of Contents for 42svl-003-0

Page 1: ...it vehicles with FibreOptic MOST 25 System Soundsystem Falls das Fahrzeug mit einer PDC Parkdistanzkontrolle ausgestattet ist verwenden Sie bitte zusätzlich den Artikel CAN PDC oder direkt den Artikel 42svl004 um die Funktion aufrecht zu erhalten If the vehicle is equipped with PDC please use CAN PDC additionally or change to the product 42svl004 to try to retain the function Unter Umständen muss ...

Page 2: ......

Page 3: ...ecific lead 12 Pin microfit to the ACV interface and link the other end to the retrofitting radio This may be a 3 5mm jack plug or a wire input depending upon the head unit brand being fitted Please see the head unit installation manual for further information on where to connect 3 Schließen Sie den fahrzeugspezifischen Stecker des Kabelsatzes an die Fahrzeug stecker Radio sowie originale Endstufe...

Page 4: ...schlusskabel Nachrüstradio Aftermarket Radio Cable Harness 3 Anschlussstecker Fahrzeugdisplay ICM Vehicle Display Connectors 4 Anschlussstecker original Verstärker OEM amplifier Connectors Verlegung unter den Beifahrersitz located under the passenger seat 5 Ringschleife Lichtleiter Most Dash Ring Loop ...

Page 5: ...safety reasons and to avoid faults in the vehicles CanBus system For the installation you need a slot screw driver a Torx T25 and a flat wedge tool 2 Wenn das Fahrzeug mit Parkdistanzkontrolle PDC ausgestattet ist ist es absolut sinnvoll den Einbau des Adapters CAN PDC für diese Parkdistanzkontrolle PDC abzuschließen und zu testen bevor man mit dem Rest der Installation beginnt If the vehicle is e...

Page 6: ...ing the gear cover you can access the screws of the radio climate control panel Please loosen the lower screws T25 5 Nach dem Lösen dieser beiden Schrauben kann man das gesamte Paneel unten heraus ziehen oben heranziehen und damit komplett lösen After loosening these two screws the whole panel is loose and ready to be pulled out ...

Page 7: ...lease remove all connectors from the panel 7 Auf der Rückseite des Paneels müssen nun 4 Schrauben T25 gelöst werden um das Radioteil vom Paneel zu lösen On the backside of the panel there are 4 screws T25 holding the radio headunit Remove the screws to detach the radio module ...

Page 8: ...be necessary to install a radio or AV headunit depth Please use appropriate tools 11 Aus dem Radioteil kann nun das ICM herausgelöst werden Bitte trennen Sie alle Steckverbindungen Next step is to get the ICM out of the radio unit and disconnect all connectors 12 Hier sieht man das einzelne ICM dieses muss im System integriert bleiben Bitte auch den Lichtleiterring mit der Lichtleiterschleife 5 ab...

Page 9: ... die Original stecker stecken Bitte auch den Lichtleiterring mit der Lichtleiterschleife 5 abschließen Move seat backwards unscrew the amplifier disconnect all OEM connectors and plug them together with their matching counterparts of the stalk harness 4 Please do not forget to close the Most Dash Ring with a Fibre Optic Loop 5 16 Nun kann das Nachrüstradio zur Funktions probe angeschlossen werden ...

Page 10: ...en ISO eingepinnt Geschwindigkeitssignal pinkes Kabel Handbremse grünes Kabel Rückwärtsgangsignal lila weißes Kabel Information This adapter extracts various signals from the vehicles data bus system CAN BUS and provides those signals for further use The wires are already pinned into the ISO speed signal pink wire hand brake green wire reverse signal purple white wire ...

Page 11: ...r schon ab Werk mit einem Telefonmodul ausgestattet wird die Telefontaste voraussichtlich außer Funktion sein In diesem Fall wenden Sie sich bitte an den Support Retaining the phone button This interface supports the vehicle s phone buttons To ensure proper phone button adaptation the following conditions must be fulfilled The aftermarket headunit must provide the telephone function It can take a ...

Reviews: