background image

EN 

© Adam Equipment Company 2015 


32

             3016612482 Rev1-Aug15 

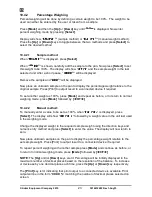
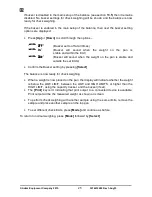
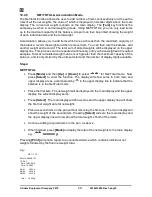
The [Print] key is lit, indicating that print output to a connected device is available. Print 
output will be the computed density “XX.XXX 

g/cc

” as shown on screen. 

 
Remove the item from the pan and press [Mode] to continue with a new sample or press 
[

0/T

] to return to normal weighing. 

10.4.6.2 

Density of a Liquid 

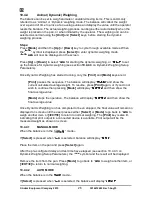
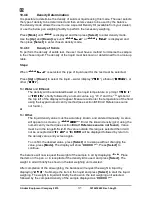
When finding the density of a liquid, it is necessary to weigh a sample of known volume in 
air and then in the liquid. The volume of the sample must be entered by the user. The last 
known volume is stored for use at any time. 
 
If using the density determination kit, the volume of the plumb is marked on its support, 
e.g. 10.123 cc
 
Steps: 
 
Press [Mode] and then [Up] and [Down] keys until “

Density 

Density 

Density 

Density 

Liquid

Liquid

Liquid

Liquid    

” is displayed and then 

press [Select] to enter this chosen density mode. 
 
The volume will be asked for by displaying “

VOLvME

VOLvME

VOLvME

VOLvME

” and a value which is the bulb volume in 

cubic centimetres (cc). Enter or change the volume if required, using the keypad numeric 
entry method (see section Error! Reference source not found.) and then press [Select] to 
continue. 
 
The balance will now request the weight in air by displaying “

AIR WT

AIR WT

AIR WT

AIR WT

”. Place the glass plumb 

supplied with the density determination kit in air on the weighing pan and press [Select] to 
start the air weighing. The value will briefly be shown in the last weighing unit selected. 
The balance will now request the weight in liquid by displaying “

LIQ Wt

LIQ Wt

LIQ Wt

LIQ Wt

”. 

 
Submerge the glass plumb in the liquid and press [Select] to start the liquid weighing. The 
weight will briefly be shown in the last selected unit, followed by the computed density of 
the sample displayed as “

DENSITY

DENSITY

DENSITY

DENSITY

 XX.XXX 

g/cc

” 

 
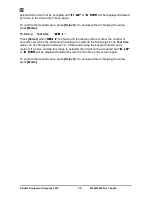
The [Print] key is lit, indicating that print output to a connected device is available. Print 
output will be the computed density “XX.XXX 

g/cc

” as shown on screen. 

 
Remove the item from the pan and press [Mode] to continue with a new sample, or press 
[

0/T

to return to normal weighing. 


Summary of Contents for Eclipse EBL Series

Page 1: ...BL FR Operating Manual Notice d utilisation For internal i and external e calibration models P N 3 01 6 6 12482 Revision 1 00 Effective Aug 2015 Software rev V1 2155 above Force Motor Analytical Models V2 1827 above Precision Load Cell Models V6 1010 above Large Pan Load Cell Models ...

Page 2: ... Adam Equipment Company 2015 ENGLISH P 1 54 FRANÇAIS P 55 111 EU DECLARATION P 112 ...

Page 3: ...G 18 10 4 FUNCTIONS 21 10 4 1 Parts Counting 22 10 4 2 Percentage Weighing 23 10 4 3 Check Weighing 24 10 4 4 Animal Dynamic Weighing 26 10 4 5 NET TOTAL Accumulation Mode 29 10 4 6 Density Determination 31 11 RS 232 INTERFACE 33 11 1 HARDWARE 33 11 2 OUTPUT FORMATS 33 11 2 1 SINGLE LINE OUTPUT FORMAT 33 11 2 2 STANDARD OUTPUT FORMAT 34 11 2 3 CUSTOM OUTPUT FORMAT 34 11 3 INPUT COMMANDS USING REMO...

Page 4: ...oting after sales service information and other important information These balances are highly accurate precision instruments and contain sensitive mechanisms and components They should be transported and handled with care When in operation be careful to place loads gently on the weighing surface and do not overload or exceed recommended maximum capacity of the instrument or damage may occur Plea...

Page 5: ...d cell technology option for stable yet highly accurate weighing Solid die cast aluminium alloy construction with 304 grade stainless steel pan for durability and easy cleaning Standard applications include weighing check weighing percentage weighing parts counting dynamic animal weighing accumulation net total and solid and liquid density determination Bi directional RS 232 interface and USB inte...

Page 6: ... 15ºC to 35ºC recommended 40 60 RH non condensing Power Supply External mains power adapter supplied as standard Input Voltage 100 240 VAC 50 60 Hz Input Voltage 18 VDC 830 mA Weighing mechanism Force Restoration Balance Motor Calibration Suffix i internal calibration mechanism e external calibration only External Calibration Mass Recommended OIML class E2 ASTM ANSI class 1 100 g Display LCD with ...

Page 7: ...age 100 240 VAC 50 60 Hz Input Voltage 18 VDC 830 mA Weighing mechanism Precision Load Cell Calibration Suffix i internal calibration mechanism e external calibration only External Calibration Mass Recommended OIML class E2 ASTM ANSI class 2 100 g 200 g Display LCD with blue backlight 7 character 24 mm high main display with symbols Secondary information line of 10mm high alpha numeric characters ...

Page 8: ...upplied as standard Input Voltage 100 240 VAC 50 60 Hz Input Voltage 18 VDC 830 mA Weighing mechanism Force Restoration Balance Motor Calibration Suffix i internal calibration mechanism e external calibration only External Calibration Mass Recommended OIML class E2 ASTM ANSI class 2 500 g 1 kg Display LCD with blue backlight 7 character 24 mm high main display with symbols Secondary information li...

Page 9: ...ded 40 60 RH non condensing Power Supply External mains power adapter supplied as standard Input Voltage 100 240 VAC 50 60 Hz Input Voltage 18 VDC 830 mA Weighing mechanism Precision Load Cell Calibration Suffix i internal calibration mechanism e external calibration only External Calibration Mass Recommended OIML class F1 ASTM ANSI class 3 500 g 1 kg 2 kg Display LCD with blue backlight 7 charact...

Page 10: ...ºC recommended 40 60 RH non condensing Power Supply External mains power adapter supplied as standard Input Voltage 100 240 VAC 50 60 Hz Input Voltage 18 VDC 830 mA Weighing mechanism Precision Load Cell Calibration External calibration only External Calibration Mass Recommended OIML class F2 ASTM ANSI class 4 2 kg Display LCD with blue backlight 7 character 24 mm high main display with symbols Se...

Page 11: ...C to 35ºC recommended 40 60 RH non condensing Power Supply External mains power adapter supplied as standard Input Voltage 100 240 VAC 50 60 Hz Input Voltage 18 VDC 830 mA Weighing mechanism Precision Load Cell Calibration External calibration only External Calibration Mass Recommended OIML class F2 ASTM ANSI class 4 5 kg 10 kg Display LCD with blue backlight 7 character 24 mm high main display wi...

Page 12: ...accuracy Avoid extremes of temperature Do not place in direct sunlight or near air conditioning vents Avoid unsuitable tables The table or floor must be rigid and not vibrate Avoid unstable power sources Do not use near large users of electricity such as welding equipment or large motors Do not place near vibrating machinery Avoid high humidity that might cause condensation Avoid direct contact wi...

Page 13: ...hours for load cell mechanisms and 12 hours for force motor mechanisms 6 1 3 Weighing Insert the power supply cable DC connector to the connector on the rear of the balance Plug the power supply module into the mains and press the power switch on the keypad to turn on the balance The display will indicate the balance serial number followed by the software revision number followed by the maximum ca...

Page 14: ...CAL OFF CAL OFF CAL OFF will be displayed followed by a beep and the busy symbol and a line of dashes A final beep will sound the end of calibration and the display should return to 0 0 0 0 000 000 000 000 g or similar Internal calibration is now complete and normal operations may proceed 6 2 3 Calibration using External Calibration mass Note The calibration mass used should be a known accurate it...

Page 15: ... the display As soon as the balance is calibrated the symbol will be turned off The Auto calibration feature can be enabled disabled or changed within the user options to meet the requirements of the users 6 2 5 Calibration Errors Occasionally during calibration an error will be detected These errors can be caused by Unstable readings Improper calibration weights being used Large shifts of zero fr...

Page 16: ...ion being used A capacity indicator bar at the bottom of the display 7 1 SYMBOLS AND TEXT The LCD has unique symbols to indicate the following 0 Zero Battery charge state if fitted Busy Stable ti Custom MM tl T lb oz dwt GN dr g cc g kg ct mg Symbols shown for units and modes Capacity indicator bar Indicators CAL When calibration is occurring or about to occur T For a time driven calibration ºC Wh...

Page 17: ...e function Also used to escape from setup functions and modes Cal Cal Starts the calibration function Print Print Instructs the balance to print data Mode Mode Enters the Mode Selection Menu Unit Unit Selects weighing units by cycling through a set of enabled units Select Select Enters the setup parameters Supervisor Menus Enters a function or saves a value while manually entering unit weight or c...

Page 18: ... 1 NUMERIC ENTRY METHOD To set a value when required use the keys as given below Up and Down symbol keys start entry process causing the active digit to flash Press Up and Down again to increase or decrease the flashing digit Once each digit is set to the required value use the Left and Right symbol keys to advance or move back through the digits and then press Up and Down to increase or decrease ...

Page 19: ...m length X 5 5mm outside diameter X 2 1mm centre diameter Centre positive RS232 and I O can be connected and used individually or simultaneously so a printer and terminal or PC can both be connected The connection is serial data format only and cannot be used for flash memory or other similar USB devices There is also a battery cover and slot for the optional rechargeable NiMH battery pack if avai...

Page 20: ... restrict certain operations to particular users Supervisor and Operator modes are available If no passcode is set then the default access is Supervisor level Setting a Supervisor passcode gives the option to lock down key parameters so that they are not available to be changed by operator level staff If a passcode has been set to limit access to the weighing functions of the balance then when res...

Page 21: ...0 01or 0 1g models 1000 0 001 3 KILOGRAMS kg not 0 0001g models 0 001 1000 4 CARATS ct All 5 0 2000 5 PENNYWEIGHTS dwt All 0 643014865 1 555174 6 GRAINS GN All 15 43236 0 0647989 7 TROY OUNCES ozt All 0 032150747 31 103476 8 OUNCES oz All 0 035273962 28 349523 9 POUNDS lb All 0 0022046 453 5924 10 DRAMS dr All 0 564383422 1 7718451 11 HK TAELS tl H All 0 026455 37 799364 12 TAIWAN TAELS tl T All 0...

Page 22: ...420g x 0 001g could weigh up to Unit Maximum d g 420 0 001 mg 420000 1 kg 0 420000 0 000001 ct 2100 000 0 005 dwt 270 0662 0 001 GN 6481 591 0 02 ozt 13 503314 0 00005 oz 14 815064 0 00005 lb 0 925940 0 00001 dr 237 041037 0 001 tl H 11 111297 0 00005 tl T 11 200015 0 00005 tl S 11 111295 0 00005 MM 112 000119 0 005 T 36 008836 0 0001 ti 25 720590 0 0001 N 4 118793 0 00001 ...

Page 23: ...on Density determination Liquid Solid The selectable functions can be enabled in supervisor mode and are selected by pressing the Mode key to enter selection mode The display will go blank and text will appear on the upper display line such as PARTS PARTS PARTS PARTS PERCENT PERCENT PERCENT PERCENT CHECK CHECK CHECK CHECK etc Use the Up and Down symbol keys to cycle through functions and press Sel...

Page 24: ...hown at the top of the display to indicate that the balance is in the parts counting mode Remove the sample and display will show 0 0 0 0 PCS Place an unknown quantity of parts on the pan The balance will then compute the number of parts based on the average piece weight The display will show the result in number of pieces This will be an integer value in the format XX PCS Pressing the Unit key wi...

Page 25: ...nt to output result to a connected device if required To set another weight as 100 press Mode and repeat as before or to return to normal weighing mode press Mode followed by 0 T 10 4 2 2 Manual method To manually enter a value to be set as 100 when Ent Ent Ent Ent W W W WWt Wt Wt Wt is displayed press Select The display will show 100 100 100 100 W W W WWt Wt Wt Wt followed by a weight value in th...

Page 26: ... displayed press the Select key to enter Check Weighing mode Press Up or Down to set the LOW LIMIT to On or OFF Press Select to proceed If the LOW LIMIT was set to On the display will show the current low limit in the unit last used in the weighing mode You may change the limit using the numeric entry method see section 8 1 Press Select to proceed NOTE Low limit must be 20 weighing divisions or hi...

Page 27: ... BUZZER BUZZER Out Out Out Out Buzzer will sound when the weight on the pan is stable and outside the set limits Confirm the Buzzer setting by pressing Select The balance is now ready for check weighing When a weight is now placed on the pan the display will indicate whether the weight is below the LOW LIMIT between the LOW and HIGH LIMITS or higher than the HIGH LIMIT using the capacity tracker a...

Page 28: ...PAvSEd and show the current calculated average weight To resume press Print again or if you do not wish to continue then pressing Mode will display StOPPED StOPPED StOPPED StOPPED and then show the final average value Mode stops the operation The balance will display StOPPE StOPPE StOPPE StOPPED D D D and then show the final average value Once Dynamic Weighing run has completed or been stopped the...

Page 29: ... THRESH THRESH For Auto mode only Press Select when THRESH THRESH THRESH THRESH is shown and the display will next show the minimum weight of the item required by the balance to start the process for dynamic weighing The value shown will be the current value in the last selected unit The minimum threshold value can be changed from 1 0 to 100 grams using the keypad numeric entry method If a value o...

Page 30: ...T Press Select when TESt t TESt t TESt t TESt t is shown and the display will next show the number of seconds over which the balance will average to compute the final weight The Test time value can be changed to between 10 99 seconds using the keypad numeric entry method If a value outside this range is selected then it will not be accepted and ER LOW ER LOW ER LOW ER LOW or ER HIGH ER HIGH ER HIG...

Page 31: ...er of display digits available Steps NET TOTAL Press Mode and then Up or Down to select NEt TOT NEt TOT NEt TOT NEt TOT for Net Total mode Now press Select to enter the function The display will show zeros in both main and upper display areas accompanied by NT NT NT NT in the upper display line to indicate that the balance is in the Net Total mode Place the first item The net weight will be displa...

Page 32: ...n display The upper display line will still show the total net weight Place a second item on the pan The main display will show the weight of the second item Pressing Select will zero the main display and the upper display line will now show the total weight of both of the items Remove the item and press 0 T to zero the main display The upper display line will still show the accumulated total weig...

Page 33: ... TEM ETH TEM ETH TEM ETH TEM shortly followed by a numeric value e g 20 0 and the C symbol at the top left of the display will appear Measure and enter the temperature of the fluid using the keypad numeric entry method see section 8 1Error Reference source not found or For Other The liquid density value must be accurately known and entered manually A value will appear on screen e g DENSITY DENSITY...

Page 34: ...OLvME and a value which is the bulb volume in cubic centimetres cc Enter or change the volume if required using the keypad numeric entry method see section Error Reference source not found and then press Select to continue The balance will now request the weight in air by displaying AIR WT AIR WT AIR WT AIR WT Place the glass plumb supplied with the density determination kit in air on the weighing...

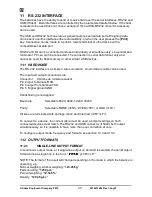
Page 35: ...ction A null modem cable can be used The input and output connections are Connector 9 pin D sub miniature socket Pin 2 input to balance RXD Pin 3 output from balance TXD Pin 5 Signal ground GND Handshaking is not applied Baud rate Selectable 4800 9600 19200 38400 Parity Selectable NONE 8N1 EVEN 7E1 or ODD 7O1 All lines are terminated with carriage return and line feed CR LF To connect to a device ...

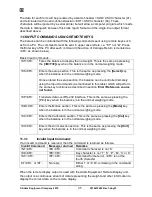
Page 36: ... output on demand is selected the user may optionally configure the serial output as a choice of 3 styles of form either in a default format or in one of two custom formats Each of the custom formats can be configured to output up to 15 lines of data The data types that can be printed are NAME TEXT PRINTED ID number ID no xxxxxxxxxxxx Serial number Serial no xxxxxxxxxxxx Date DATE dd mm yyyy Time ...

Page 37: ...rolled remotely using the Input Commands as mentioned in this table which will perform the same key functions as described in section Error Reference source not found KP CR Transmits data over RS 232 interface This is the same as pressing the Print key when the balance is in the normal weighing mode KM CR Enters the Modes section This is the same as pressing the Mode key when the balance is in the...

Page 38: ...EN Adam Equipment Company 2015 36 3016612482 Rev1 Aug15 If the remote display data stream format is required for development purposes then please contact the manufacturer for advice ...

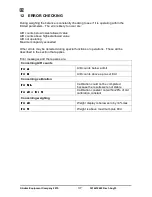
Page 39: ...ill be described in the section that applies Error messages and the reasons are Concerning A D counts ERR UL ERR UL ERR UL ERR UL A D counts below a limit ERR OL ERR OL ERR OL ERR OL A D counts above a pre set limit Concerning calibration ERR STB ERR STB ERR STB ERR STB Calibration could not be completed because the results were not stable ERR LO ERR LO ERR LO ERR LO or ERR HI ERR HI ERR HI ERR HI...

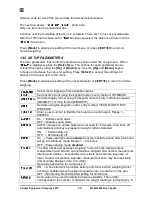
Page 40: ...ENABLE WEIGHING UNITS When vNITS vNITS vNITS vNITS is displayed press Select The right hand side of the display will show the symbol for the first unit e g carats ct together with its enable state OFF OFF OFF OFF or On On On On The Supervisor can then enable or disable the carats unit by using Up or Down Pressing Select will confirm the setting and will advance to the next weighing unit Repeat for...

Page 41: ...ms are the same as the standard form unless changed by the user as below When FORMM1 FORMM1 FORMM1 FORMM1 or FORMM 2 FORMM 2 FORMM 2 FORMM 2 is selected the user can set the information to be printed on each line of the form Pressing the Up or Down keys will cycle through the options available The options are INST ID INST ID INST ID INST ID Instrument ID number SER No SER No SER No SER No Serial N...

Page 42: ...d numeric entry method European DD MM YY or USA format MM DD YY DATE DATE DATE DATE Set date using the keypad numeric entry method YEAR MONTH DAY WEEKDAY INST ID INST ID INST ID INST ID Enter a user number to identify this balance on print output Range 1 9999999 BV BV BV BVZZER ZZER ZZER ZZER On Enable sound alerts OFF Disable sound alerts BACKLIT BACKLIT BACKLIT BACKLIT AUTO Always on unless bala...

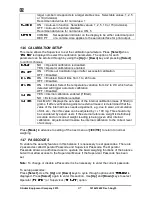
Page 43: ...CAL INT CAL INT CAL YES Internal calibration enabled if fitted NO External calibration enabled INT MAS INT MAS INT MAS INT MAS CAL MAS Displays the set value of the internal calibration mass if fitted in grams If after verification against an external mass it is determined that the value of the internal mass needs adjustment e g due to wear accumulation of dirt etc then this value can be adjusted ...

Page 44: ...by 0 0 0 0 Enter a new passcode if desired or press Mode or 0 T to leave the existing password unchanged and return to normal weighing Note A passcode set to zero will disable the security feature and allow unlimited access If a passcode is incorrectly entered then the message ER CODE ER CODE ER CODE ER CODE will flash and the display will return to PC OPER PC OPER PC OPER PC OPER or PC SV PC SV P...

Page 45: ... underfloor weighing All models in the EBL range are equipped with the facility to attach a hook below the balance and suitable hooks are available No special software is required weighing processes are otherwise performed as normal 14 5 IN USE PROTECTIVE COVER For cleanliness and hygiene reasons and to protect the keypad and display from liquids chemicals and particulates and general wear use of ...

Page 46: ...lst completing other tasks or maybe you might be visually impaired See http www adamdu com for further details and to download a free evaluation copy If you need to order any spare parts and accessories contact your supplier or Adam Equipment A partial list of such items is as follows Power Supply Module Stainless Steel top Pan Draft shield breeze shield parts Rechargeable battery pack Serial and ...

Page 47: ...ttery packs for longer life Avoid subjecting the balance to rough treatment or shocks during transport setting up and operation Do not overload the balance beyond its maximum capacity and do not drop material onto the platform which could damage the balance Do not spill liquids on the balance as it is not water resistant Liquids may damage the case and if it gets inside the balance it may cause da...

Page 48: ...d fragile mechanical devices They can be damaged by placing a weight on it which is too high for the balance or by dropping the balance or occasionally shipping it without taking care The most fragile parts are the flexures Dust dirt spills and other foreign objects in the balance can also cause problems Electronic Problems These are the rarest of the problems affecting balances If an electronic p...

Page 49: ... movement it is on a solid table It is not near sources of heat or cool air Check balance with weights if problem occurs when sample is used Static electricity on the samples can cause drifting and instability Check the area around the weighing pan for hair dust obstructions under the pan A complete inspection of the mechanics to look for sources of friction may be needed Balance is very unstable ...

Page 50: ...quired Use the Linearity Function in the service menu to reset linearity A problem in the analogue circuit board or power supplies can cause poor linearity Make sure all mechanical problems have been eliminated first OTHER PROBLEMS Cannot calibrate Zero shifted more than allowed Calibration timeout Check all flexures for damage Reset dealer calibration Verify linearity and repeatability The balanc...

Page 51: ...thods B Details of the unit purchased This part of information should always be available for any future correspondence We suggest you to fill in this form as soon as the unit is received and keep a print out in your record for ready reference Model name of the balance Eclipse________ Serial number of the unit Software revision number Displayed when power is first turned on Date of Purchase Name o...

Page 52: ...EN Adam Equipment Company 2015 50 3016612482 Rev1 Aug15 18 BALANCE MENU STRUCTURE Operator Level Access ...

Page 53: ...te Some menu options are not available or extra options may be visible depending on if the model is internal or external calibration type and whether it is an approved model Conditions of approval in some countries necessitates adding or removing some options from the user interface ...

Page 54: ...EN Adam Equipment Company 2015 52 3016612482 Rev1 Aug15 Supervisor Level Access continued ...

Page 55: ...RIAL SERIAL SERIE P serie Serial Setup DAY DIA TAG JOvR Day MODES MODOS MODvS modes Modes THvRSDA JvEvES DONNERS JEvDI Thursday vNITS vNIDADE EINHEIT vnites Units FRIDAY VIERNES FREITAG VENDRED Friday PASSCOD CONTRAS PASSWOR CODES Passcode STATvRDA SABADO SAMSTAG SAMEDI Staturday PC OPER OPERADO OPERATO OPERATE Operator mode SvNDAY DONINGO SONNTAG DIMANCH Sunday pc Svpe SvPERVI INSPEKT SvPERVI Sup...

Page 56: ...igence faulty installation unauthorised modifications or attempted repair or failure to observe the requirements and recommendations as given in this User Manual This product may include a rechargeable battery that is designed to be removed and replaced by the user Adam Equipment warrants that it will provide a replacement battery if the battery manifests a defect in materials or workmanship durin...

Page 57: ...Eclipse EBL P N 3 01 6 6 12482 Révision 1 00 Effective Août 2015 Notice d utilisation Modèles calibrage interne i et externe e Software rev V1 2155 au delà Modèles Analytiques pot magnétique V2 1827 au delà Modèles de Précision V6 1010 au delà Modèles de Précision grand plateau ...

Page 58: ...0 4 1 Comptage de pièces 77 10 4 2 Pesage en Pourcentage 78 10 4 3 Contrôle de pesée 79 10 4 4 Pesage d Animaux Dynamique 81 10 4 5 NET TOTAL Mode Accumulation 84 10 4 6 Détermination de Densité 86 11 INTERFACE RS 232 88 11 1 HARDWARE 88 11 2 FORMATS DE SORTIE 89 11 2 1 FORMAT DE SORTIE LIGNE SIMPLE 89 11 2 2 FORMAT DE SORTIE STANDARD 89 11 2 3 FORMAT DE SORTIE PERSONNALISABLE 89 11 3 COMMANDES D ...

Page 59: ...t d autres informations importantes Ces balances sont des instruments de haute précision et contiennent des mécanismes associés à des composants sensibles Elles doivent être transportées et manipulées avec soin En fonctionnement veillez à placer les charges délicatement sur le plateau de pesée et de ne pas surcharger ou dépasser la capacité maximale recommandée de l instrument ou des dommages pour...

Page 60: ...précision ultime ou technologie à jauge de contrainte pour un pesage stable et hautement précis Construction solide en alliage fonte aluminium et plateau en inox 304 pour une plus grande durabilité et facilite d entretien Applications de série pesage pesage en pourcentage comptage de pièces pesage dynamique animaux accumulation net total et détermination de densité de solide et liquide Interface b...

Page 61: ... fonctionnement Recommandé 15ºC à 35ºC 40 60 RH non condensing Alimentation Adaptateur secteur externe fourni en standard Tension entrée 100 240 VAC 50 60 Hz Tension d entrée 18 VDC 830 mA Mécanisme de pesage Pot magnétique Calibrage Suffixe i calibrage interne e calibrage externe Masse de Calibrage externe Recommandé classe OIML E2 ASTM ANSI class 1 100 g Ecran LCD avec rétro éclairage bleu 7 chi...

Page 62: ...e 100 240 VAC 50 60 Hz Tension d entrée 18 VDC 830 mA Mécanisme de pesage Jauge de contrainte Calibrage Suffixe i calibrage interne e calibrage externe Masse de Calibrage externe Recommandé classe OIML E2 ASTM ANSI class 2 100 g 200 g Ecran LCD avec rétro éclairage bleu 7 chiffres de 24mm de haut sur l écran principal avec symboles Second afficheur avec une ligne d information et caractères alpha ...

Page 63: ...e fourni en standard Tension d entrée 100 240 VAC 50 60 Hz Tension d entrée 18 VDC 830 mA Mécanisme de pesage Pot magnétique Calibrage Suffixe i calibrage interne e calibrage externe Masse de Calibrage externe Recommandé classe OIML E2 ASTM ANSI class 2 500 g 1 kg Ecran LCD avec rétro éclairage bleu 7 chiffres de 24mm de haut sur l écran principal avec symboles Second afficheur avec une ligne d in...

Page 64: ...35ºC 40 60 RH non condensing Alimentation Adaptateur secteur externe fourni en standard Tension d entrée 100 240 VAC 50 60 Hz Tension d entrée 18 VDC 830 mA Mécanisme de pesage Jauge de contrainte Calibrage Suffixe i calibrage interne e calibrage externe Masse de Calibrage externe Recommandé classe OIML F1 ASTM ANSI class 3 500 g 1 kg 2 kg Ecran LCD avec rétro éclairage bleu 7 chiffres de 24mm de ...

Page 65: ... 60 RH non condensing Alimentation Adaptateur secteur externe fourni en standard Tension d entrée 100 240 VAC 50 60 Hz Tension d entrée 18 VDC 830 mA Mécanisme de pesage Jauge de contrainte Calibrage Calibrage externe uniquement Masse de Calibrage externe Recommandé classe OIML F2 ASTM ANSI class 4 2 kg Ecran LCD avec rétro éclairage bleu 7 chiffres de 24mm de haut sur l écran principal avec symbo...

Page 66: ...C 40 60 RH non condensing Alimentation Adaptateur secteur externe fourni en standard Tension d entrée 100 240 VAC 50 60 Hz Tension d entrée 18 VDC 830 mA Mécanisme de pesage Jauge de contrainte Calibrage Calibrage externe uniquement Masse de Calibrage externe Recommandé classe OIML F2 ASTM ANSI class 4 5 kg 10 kg Ecran LCD avec rétro éclairage bleu 7 chiffres de 24mm de haut sur l écran principal ...

Page 67: ...lein soleil ou à proximité de bouches de climatisation Evitez les surfaces instables La table ou le sol doivent être rigides et ne pas vibrer Evitez les sources d énergies instables Ne pas utiliser près de larges utilisateurs d électricité tels que les équipements de soudure ou de gros moteurs Ne pas mettre la balance près de machines vibrantes Evitez l humidité élevée qui pourraient provoquer de ...

Page 68: ...e et de la laisser en préchauffage pendant au moins 6 heures pour les systèmes à jauge de contrainte et 12 heures pour les systèmes à pot magnétique 6 1 3 Pesage Insérez le câble de l adaptateur au connecteur à l arrière de la balance Branchez le bloc alimentation sur le secteur L écran affichera le numéro de série de la balance suivi du numéro de révision du logiciel suivi de la capacité maximum ...

Page 69: ... 7 tirets réapparaitra suivi par CAL On CAL On CAL On CAL On Ensuite CALIbrA CALIbrA CALIbrA CALIbrA apparaitra de nouveau suivi du symbole d exécution et une ligne de tirets Enfin CAL OFF CAL OFF CAL OFF CAL OFF sera affiché suivi par un signal sonore et le symbole d exécution et une ligne de tirets Un signal sonore final avertira de la fin du calibrage et l écran affichera de nouveau 0 0 0 0 000...

Page 70: ...excède le temps préréglé typiquement 4 heures ou 15 minutes après la mise en marche La balance indiquera le besoin de calibrer lorsque le symbole CAL clignotera sur l écran Dès que la balance sera calibrée le symbole disparaitra La fonction d auto calibrage peut être activée désactivée ou modifiée dans les options utilisateur pour répondre aux besoins des opérateurs 6 2 5 Erreurs de calibrage Occa...

Page 71: ...dicateur de capacité en bas de l écran 7 1 SYMBOLES ET TEXTE L écran LCD possède des symboles uniques qui indiquent ce qui suit 0 Zéro Symbole du niveau de charge de la batterie si installée Execution Stable ti Custom MM tl T lb oz dwt GN dr g cc g kg ct mg Symboles des unités et modes Indicateur de capacité Indications CAL Lors du calibrage ou bien quand celui ci doit être exécuté T Temps prédéfi...

Page 72: ...re en veille 0 T 0 T Touche combinée pour le zéro et la fonction tare Pour sortir du réglage des fonctions et des modes Cal Cal Lance la fonction de calibrage Print Print Commande la balance pour envoyer les données Mode Mode Entre dans le menu de sélection des modes Unit Unit Sélectionne les unités de pesage en faisant défiler les unités actives Select Select Entre dans les paramètres de réglage ...

Page 73: ...fichée ou faire défiler des options en avant 8 1 METHODE DE SAISIE NUMERIQUE Pour régler une valeur requise utilisez les touches comme indiquées ci dessous Les touches symboles Up et Down lancent le processus d entrée provoquant le chiffre actif à clignoter Appuyez sur Up et Down pour augmenter ou diminuer le chiffre clignotant Une fois chaque chiffre réglé à la valeur requise utilisez les touches...

Page 74: ...diamètre externe X 2 1mm diamètre interne Centre positif La RS232 et I O peuvent être connectés et utilisés individuellement ou simultanément Donc une imprimante et un terminal ou PC peuvent être connectés La connexion est un format de données séries seulement et ne peut pas être utilisée pour connecter une mémoire flash ou autres systèmes similaires USB Il existe aussi un compartiment pour la bat...

Page 75: ...ns de sécurité par mot de passe qui peut restreindre certaines opérations à des utilisateurs en particulier Les modes Superviseur et Opérateur sont disponibles Si aucun mot de passe n est réglé alors l accès par défaut est de niveau Superviseur Le réglage d un mot de passe Superviseur donne la possibilité de verrouiller les paramètres clés de sorte qu ils ne soient pas modifiables par le personnel...

Page 76: ... disponibles peuvent être activées ou désactivées lors du réglage de la balance voir section 13 1 Seulement les unités de pesage qui ont été activées pourront être sélectionnées en appuyant sur Unit Unités de pesage Vous pouvez sélectionner toutes les unités de pesage en appuyant sur Unit Selon le modèle les unités de pesage disponibles sont Unité Symbole Modèles Facteur de Conversion 1g Facteur d...

Page 77: ...t d être affiché Si un multiplicateur de plus de 1 000 est saisi le nombre de décimale affiché sera réduit d une Cette valeur multiplicatrice sera enregistrée pour la prochaine utilisation jusqu à ce qu elle soit modifiée par l utilisateur La balance affiche les unités alternatives avec le plus de précision possible Par exemple les balances EBL 423 420g x 0 001g peuvent peser jusqu à Unité Maximum...

Page 78: ...Détermination de densité Liquide Solide Les fonctions sélectionnables peuvent être activées dans le mode Superviseur et sont sélectionnées en appuyant sur Mode pour entrer dans le mode sélection L écran sera vide et du texte apparaitra sur le haut de l afficheur tel que PARTS PARTS PARTS PARTS PERCENT PERCENT PERCENT PERCENT CHECK CHECK CHECK CHECK etc Utilisez les touches Up et Down pour faire dé...

Page 79: ...de l écran pour indiquer que la balance se trouve dans le mode de comptage de pièces Retirer l échantillon et l écran affichera 0 0 0 0 PCS Placez une quantité de pièces inconnue sur le plateau La balance alors calculera le nombre de pièces basée sur le poids unitaire moyen L écran affichera le résultat en nombre de pièces Le résultat sera affiché comme une valeur entière dans le format XX PCS App...

Page 80: ...é Retirer l échantillon et 0 0 0 0 00 00 00 00 sera affiché Placez maintenant un échantillon inconnu sur le plateau et l écran affichera le poids en pourcentage relatif à l échantillon initial Appuyez sur Print pour envoyer le résultat vers un système connecté si besoin Pour régler un autre poids à 100 appuyez sur Mode et répéter la procédure ou retourner au mode pesage normal appuyez sur Mode sui...

Page 81: ...eulement alors l autre limite est considérée comme étant à zéro limite basse ou bien au maximum limite haute La fonction de contrôle de pesée n est pas active lorsqu un poids mis sur le plateau est inférieur à 20 divisions de la balance Il s agit du poids minimum auquel les segments du bargraph sont actifs et que le signal sonore fonctionne si ce dernier n est pas réglé sur OFF Etapes du réglage d...

Page 82: ... de réglage du buzzer sont les suivants Appuyez sur Up ou Down pour faire défiler les options BUZZER BUZZER BUZZER BUZZER OFF OFF OFF OFF Buzzer est réglé sur Off tout le temps BUZZER BUZZER BUZZER BUZZER In In In In Buzzer retentira lorsque le poids sur le plateau est stable et entre les limites BUZZER BUZZER BUZZER BUZZER Out Out Out Out Buzzer retentira lorsque le poids sur le plateau est stabl...

Page 83: ...e sont illuminées Print met la séquence en pause La balance affichera PAvSEd PAvSEd PAvSEd PAvSEd et indiquera le poids moyen actuel calculé Pour recommencer appuyez de nouveau sur Print ou bien si vous ne souhaitez pas continuer alors appuyez sur Mode qui affichera StOPPED StOPPED StOPPED StOPPED et ensuite la valeur finale moyenne Mode arrête le fonctionnement La balance affichera StOPPED StOPPE...

Page 84: ...amique L écran affichera MODE MODE MODE MODE Appuyez de nouveau sur Select et utiliser les touches Up ou Down pour sélectionner AvtO AvtO AvtO AvtO ou mmAnvAL mAnvAL mAnvAL mAnvAL Si AvtO AvtO AvtO AvtO ou mmAnvAL mAnvAL mAnvAL mAnvAL est sélectionnée les 4 paramètres suivants sont disponibles Seuil Threshold THRESH THRESH THRESH THRESH Mode mode mode mode mode Délai DELAY DELAY DELAY DELAY Temps ...

Page 85: ...eur est en dehors de cette portée sélectionnée alors elle ne sera pas acceptée et ER LOW ER LOW ER LOW ER LOW ou ER ER ER ER HIGH HIGH HIGH HIGH sera affiché suivi du retour à l écran de saisie du temps Pour confirmer la valeur désirée appuyez sur Select ou sortir sans changer la valeur appuyez sur Mode 10 4 4 3 4 Temps de test TEST T TEST T TEST T TEST T Appuyez sur Select quand TES TES TES TESt ...

Page 86: ...lectionnées et le nombre de décimale disponible sur l écran Etapes NET TOTAL Appuyez sur Mode et ensuite sur Up ou Down pour sélectionner NEt TOT NEt TOT NEt TOT NEt TOT pour le mode Net Total Maintenant Appuyez sur Select pour entrer dans la fonction L écran affichera des zéros dans les deux écrans et sur la zone supérieure de l écran accompagné de NT NT NT NT dans la partie supérieure de l écran...

Page 87: ...ite appuyez sur 0 T pour mettre l écran à zéro La partie supérieure de l écran affichera le poids total net Placez un second objet sur le plateau L écran principal affichera le poids du second article En appuyant sur Select cela mettra à zéro l écran principal et l écran de la partie supérieure indiquera le poids total des deux objets Retirez l article et appuyez sur 0 T pour mettre à zéro l écran...

Page 88: ...quide eau affiche wAtEr wAtEr wAtEr wAtEr éthanol EtHAnOL EtHAnOL EtHAnOL EtHAnOL ou autre OtHEr OtHEr OtHEr OtHEr Pour l Eau et l Ethanol La densité sera calculée selon la température de liquide L information WATER T WATER T WATER T WATER T ou ETH TEM ETH TEM ETH TEM ETH TEM suivi par une valeur numérique par exemple 20 0 et le symbole C en haut à gauche de l écran apparaitra Mesurez et entrez la...

Page 89: ...jusqu à ce que Density Density Density Density Liquid Liquid Liquid Liquid soit affiché et ensuite appuyez sur Select pour entrer dans ce mode de densité choisi Le volume sera demandé en affichant VOLvME VOLvME VOLvME VOLvME suivi d une valeur qui est le volume du flotteur en centilitres cubes cc Entrer ou changer le volume si nécessaire en utilisant la méthode d entrée numérique par le clavier vo...

Page 90: ...l ou un PC peuvent être connecté La connexion est sous forme de données série seulement et ne peut pas être utilisée avec des mémoires flash ou autres systèmes similaires USB 11 1 HARDWARE L interface RS 232 est une simple connexion à 3 fils Un câble null modem peut être utilisé Les connexions d entrée et de sortie sont Connecteur prise D sub miniature 9 pin Pin 2 Entrée vers la balance RXD Pin 3 ...

Page 91: ...s formes personnalisables 1 et 2 seront la même que le format standard jusqu à ce que l utilisateur les modifies Line 1 Date Line 2 Heure Line 3 Saut de ligne Line 4 Numéro identification ID Line 5 Saut de ligne Line 6 Résultat Line 7 Saut de ligne Line 8 Saut de ligne Résultat d une impression NOTE Le format de la ligne de résultat changera selon le mode dans lequel la balance fonctionne par ex P...

Page 92: ...n de transmission EOT caractère ASCII 04 Ces caractères seront ignorés par une imprimante série mais permettra à un programme d ordinateur qui lit les données de distinguer entre ce bloc de format de rapport et le format de sortie ligne simple décrite ci dessus 11 3COMMANDES D ENTREES EN UTILISANT DES TOUCHES A DISTANCE La balance peut être contrôlée avec les commandes suivantes en utilisant les t...

Page 93: ...ommande invalide est reçue alors la commande est renvoyée comme suivant Commande invalide Message renvoyé Remarques NT CR EU CR Le caractère de commande n est pas K KK CR EK CR La touche du caractère n est pas T S P M C ou U KT CR EF CR Erreur format de commande CR n est pas le quatrième caractère KT CR or KT No reply Soit ou CR manque dans la trame de commande Lorsque la sortie d affichage à dist...

Page 94: ...nt Celles ci sont décrites dans la section correspondante Les messages d erreurs et les raisons sont Concernant le comptage A D ERR UL ERR UL ERR UL ERR UL Comptage A D dessous une limite ERR OL ERR OL ERR OL ERR OL Comptage A D au dessus de la limite préréglée Concernant le calibrage ERR STB ERR STB ERR STB ERR STB Calibrage n a pas pu être accompli car les résultats étaient instables ERR LO ERR ...

Page 95: ...yez sur Mode pour sortir d un sous menu ou 0 T pour revenir au mode de pesage normal 13 1 ACTIVER LES UNITES DE PESAGE Quand v v v vNITS NITS NITS NITS est affiché appuyez sur Select Sur le côté à droite de l écran sera affiché le symbole de la première unité par ex carats ct ensemble avec l état de l unité en cours OFF OFF OFF OFF ou On On On On Le Superviseur peut alors activer ou bien désactive...

Page 96: ...econdes OFF Pas de périodicité dans la transmission de données FORMAT FORMAT FORMAT FORMAT Format de sortie de données série Paramètres sélectionnables SINGLE Sortie série de données envoyées comme simple ligne STANDARD Sortie série de données envoyées dans le format standard FORM 1 Sortie série de données envoyées dans le format personnalisable FORM 1 FORM 2 ou FORM 2 Voir section 13 4 13 4 FORMA...

Page 97: ...urnera dans le sous menu SERIAL SERIAL SERIAL SERIAL Appuyez sur Mode pour avancer au réglage du prochain menu ou appuyez sur 0 T pour revenir au mode pesage normal 13 5 REGLAGE DES PARAMETRES Les paramètres utilisateur qui contrôle la balance sont indiqués dans le menu de réglage Lorsque SE SE SE SEtV tV tV tVP P P P est affiché appuyez sur Select Les options pour chaque paramètre pourront être c...

Page 98: ... nombre correspond à une zone plus grande stabilité Les valeurs disponibles 1 2 5 ou 10 divisions Valeur recommandée pour une utilisation normale 1 AV ZERO AV ZERO AV ZERO AV ZERO ON Fonction Auto zéro Valeurs sélectionnables 1 2 5 10 or 15 divisions OFF Fonction Auto zéro désactivée Valeur recommandée pour une utilisation normale ON 5 SEPARAT SEPARAT SEPARAT SEPARAT COMMA Règle l indicateur de sé...

Page 99: ...rateur PC OPER PC OPER PC OPER PC OPER ou Superviseur PC SV PC SV PC SV PC SVPE PE PE PE PC OPER PC OPER PC OPER PC OPER Appuyez sur Select 0 0 0 0 sera affiché Entrez tout d abord le mot de passe actuel OLD et appuyez sur Select Si celui ci est correctement saisi alors NEW sera affiché brièvement suivi par 0 0 0 0 Entrez le nouveau mot de passe si désiré ou appuyez sur Mode ou 0 T pour garder cel...

Page 100: ...FR Adam Equipment Company 2015 98 3016612482 Rev1 Aug15 PASSCODE Réinitialiser le mot de passe Opérateur ou Superviseur en utilisant 15 15 15 15 lorsque l ancien mot de passe vous est demandé ...

Page 101: ...trop volumineux ou difficiles à placer en toute sécurité sur le plateau d une balance alors une charge peut être soutenue par un crochet à partir de la face inférieure de la balance Cette application est communément appelé pesage sous la balance Tous les modèles de la gamme NBL sont équipés avec la possibilité de relier un crochet sous la balance et des crochets appropriés sont disponibles Aucun l...

Page 102: ...lecte de données peut être contrôlée individuellement configurée et adaptée à vos exigences Adam DU peut aussi annoncer vocalement les lectures reçues Cette fonction est idéale si vous souhaitez rester informé des progrès de la balance tout en effectuant d autres tâches ou bien pour des personnes malvoyantes Visitez http www adamdu com pour plus de détails et télécharger une copie d évaluation gra...

Page 103: ...d exposer la balance à des traitements brutaux ou des chocs pendant le transport l installation et le fonctionnement Ne surchargez pas la balance au delà de sa capacité maximale et ne laissez pas tomber de matériau sur la plate forme qui pourrait endommager la balance Ne renversez pas de liquides sur la balance car elle n est pas résistante à l eau Les liquides peuvent endommager le châssis et s i...

Page 104: ...Elles peuvent être endommagées en plaçant un poids qui est trop élevé pour la capacité de la balance ou en laissant tomber la balance au sol lors de son expédition sans en prendre soin Les parties les plus fragiles sont les lamelles La poussière la saleté les déversements de liquides et autres objets étrangers dans la balance peuvent également causer des disfonctionnements Problèmes électroniques ...

Page 105: ...stable de quelques divisions Bruit ou vibration de l environnement Friction mécanique Vérifier que la balance soit bien positionnée pour éviter les vibrations courant d air et qu elle se trouve sur une surface stable à distance de sources de chaleur ou air conditionné Contrôler la balance avec des masses si le problème apparait quand l échantillon est utilisé L électricité statique sur les échanti...

Page 106: ... autre problème Charge excentrique pauvre Un problème mécanique Inspectez les zones autour du plateau saleté ou autres obstructions Inspection du mécanisme peut être requise pour tout autre problème Un réajustement de la charge d excentricité est recommande Linéarité pauvre Habituellement un problème mécanique Problème électronique Re contrôler la reproductibilité Inspection des lamelles pour domm...

Page 107: ...ntiques à l appareil connecté Vérifier que le câble soit le bon Circuit RS 232 endommagé Pas de d affichage les touches émettent un son Pauvre contraste de l écran Câble débranché ou endommagé Vérifier les câbles vers l écran Remplacer l afficheur qui peut être endommagé Doit être entrepris par un technicien qualité et autorisé uniquement ...

Page 108: ... Fax ou autre méthode B Détails du modèle acheté Cette partie de l information doit toujours être disponible pour toute correspondance ultérieure Nous suggérons que vous remplissiez ce formulaire dès que la balance est réceptionnée et gardiez une copie dans votre dossier pour référence Modèle nom de la balance Eclipse________ Numéro de série Numéro de révision du logiciel S affiche lors de la mise...

Page 109: ...FR Adam Equipment Company 2015 107 3016612482 Rev1 Aug15 18 STRUCTURE DU MENU DE LA BALANCE Accès Niveau Opérateur ...

Page 110: ... ne sont pas disponibles ou bien certaines options peuvent être visibles selon si le modèle possède un calibrage de type interne ou externe ou si il s agit d un modèle homologué Les conditions d homologation dans certains pays nécessitent l ajout ou bien le retrait de certaines options de l interface utilisateur ...

Page 111: ...FR Adam Equipment Company 2015 109 3016612482 Rev1 Aug15 Accès Niveau Superviseur suite ...

Page 112: ... MOIS Month SERIAL SERIAL SERIE P serie Serial Setup DAY DIA TAG JOvR Day MODES MODOS MODvS modes Modes THvRSDA JvEvES DONNERS JEvDI Thursday vNITS vNIDADE EINHEIT vnites Units FRIDAY VIERNES FREITAG VENDRED Friday PASSCOD CONTRAS PASSWOR CODES Passcode STATvRDA SABADO SAMSTAG SAMEDI Staturday PC OPER OPERADO OPERATO OPERATE Operator mode SvNDAY DONINGO SONNTAG DIMANCH Sunday pc Svpe SvPERVI INSPE...

Page 113: ...es paramètres de gestion de l alimentation Une diminution de la capacité maximale de la batterie ou de durée de vie de la batterie n est pas un défaut de matériaux ou de fabrication et n est pas couvert par cette garantie limitée La réparation effectuée en vertu de la garantie n étend pas la période de garantie Les composants enlevés durant les réparations de garantie deviennent la propriété de l ...

Page 114: ...es types de balance cités ci dessous munis de la mention CE sont conformes aux directives et aux normes mentionnées ci après Wir erklären in alleiniger Verantwortung dass die untenstehenden Waagentypen gekennzeichnet mit CE mit den genannten Richtlinien und Normen übereinstimmen Nosotros declaramos bajo responsabilidad exclusiva que los modelos de balanzas indicados a continuación con el distintiv...

Page 115: ...These limits are designed to provide reasonable protection against harmful interference when the equipment is operated in a commercial environment This equipment generates uses and can radiate radio frequency energy and if not installed and used in accordance with the instruction manual may cause harmful interference to radio communications Operation of this equipment in a residential area is like...

Page 116: ...ne 49 0 4340 40300 0 Fax 49 0 4340 40300 20 e mail sales adamequipment co za Adam Equipment S A Pty Ltd 7 Megawatt Road Spartan EXT 22 Kempton Park Johannesburg Republic of South Africa Phone 27 0 11 974 9745 Fax 27 0 11 392 2587 e mail sales adamequipment co za Adam Equipment S E ASIA PTY Ltd 2 71 Tacoma Circuit CANNING VALE 6155 Perth Western Australia Phone 61 0 8 6461 6236 Fax 61 0 8 9456 4462...

Reviews: