101
GB
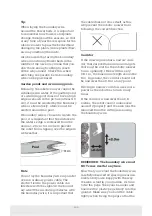
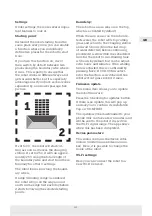
cable lies completely straight.
When you have made it back to the
charging station, pull out about 1 metre
of extra cable so that you have plenty of
wire to work with when connecting or
if corrections need to be made some-
where along the lawn.
CONNECTING THE BOUNDARY WIRE
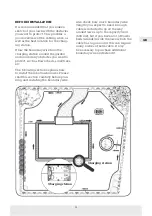
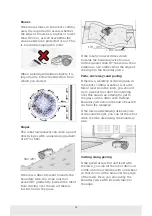
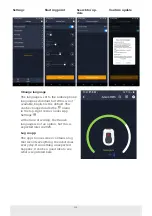
REMEMBER: There must be at least
1 metre of cable in a straight line in
front of the charging station's drive
plate.
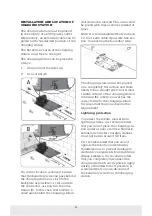
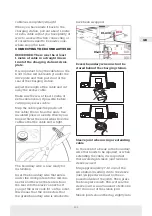
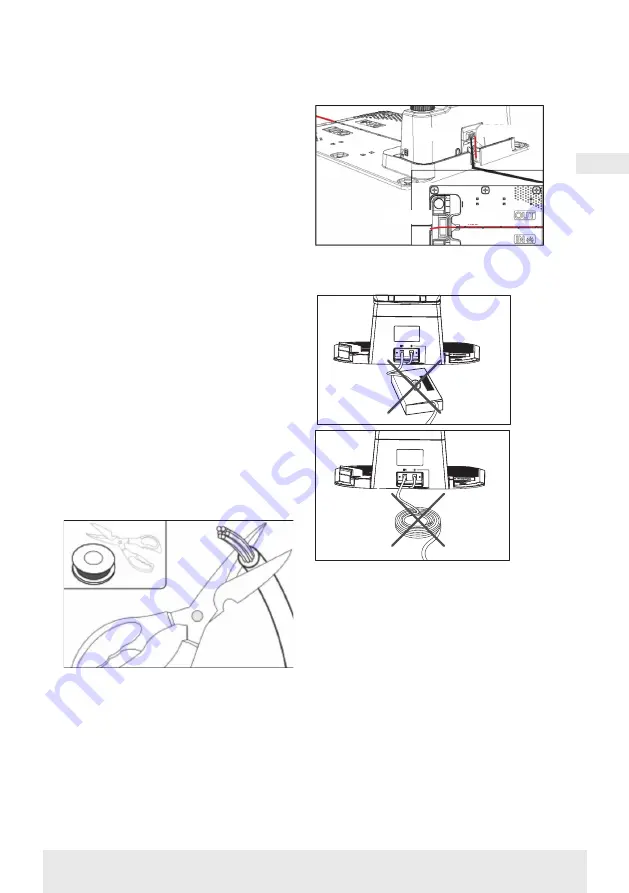
It is important to lay the cable from the
front (to the red cable entry) under the
drive plate and then pull it out at the
rear of the charging station.
Adjust the length of the cable and cut
away the excess cable.
Make sure there is at least 1 metre of
extra cable overall, if possible, before
cutting any excess cable.
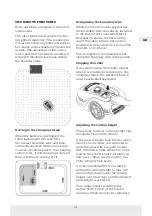
Strip the cable (peel the plastic off
the cable) 10 mm from the ends. Use
insulated pliers or a knife. Watch your
fingers! Twist the metal wires from the
cable so that the cable end is tight.
The boundary wire is now ready for
installation.
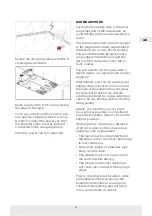
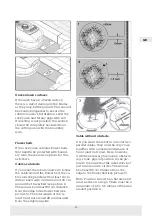
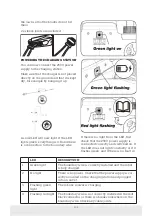
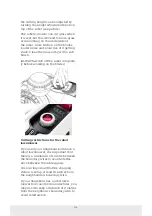
Insert the boundary wire that enters
under the drive plate into the red con-
nector and the wire that enters from
the rear into the black connector. If
you get the error code ‘E1’ on the robot,
this means that the connectors that
the green boundary wire is attached to
have been swapped.
BLACK
BLACK
RED
RED
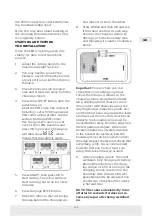
Excess boundary wire must not be
stored behind the charging station.
Sleeve joint when using or extending
cable
In the event of a break in the boundary
wire that needs to be repaired, or when
extending the cable, it is important
that a watertight sleeve joint (silicone
sleeve) is used.
Strip approximately 7-10 mm of the
wire before inserting it into the sleeve
joint (stripped wire must not be ex-
posed outside of the joint). Then press
the blue piece down. This will seal the
sleeve joint. A small amount of silicone
will come out of the sleeve joint.
Sleeve joints should be dug slightly into

