background image

2

1

10

7

6

8

9

13

5

4

11

14

12

3

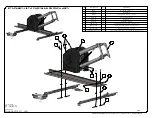
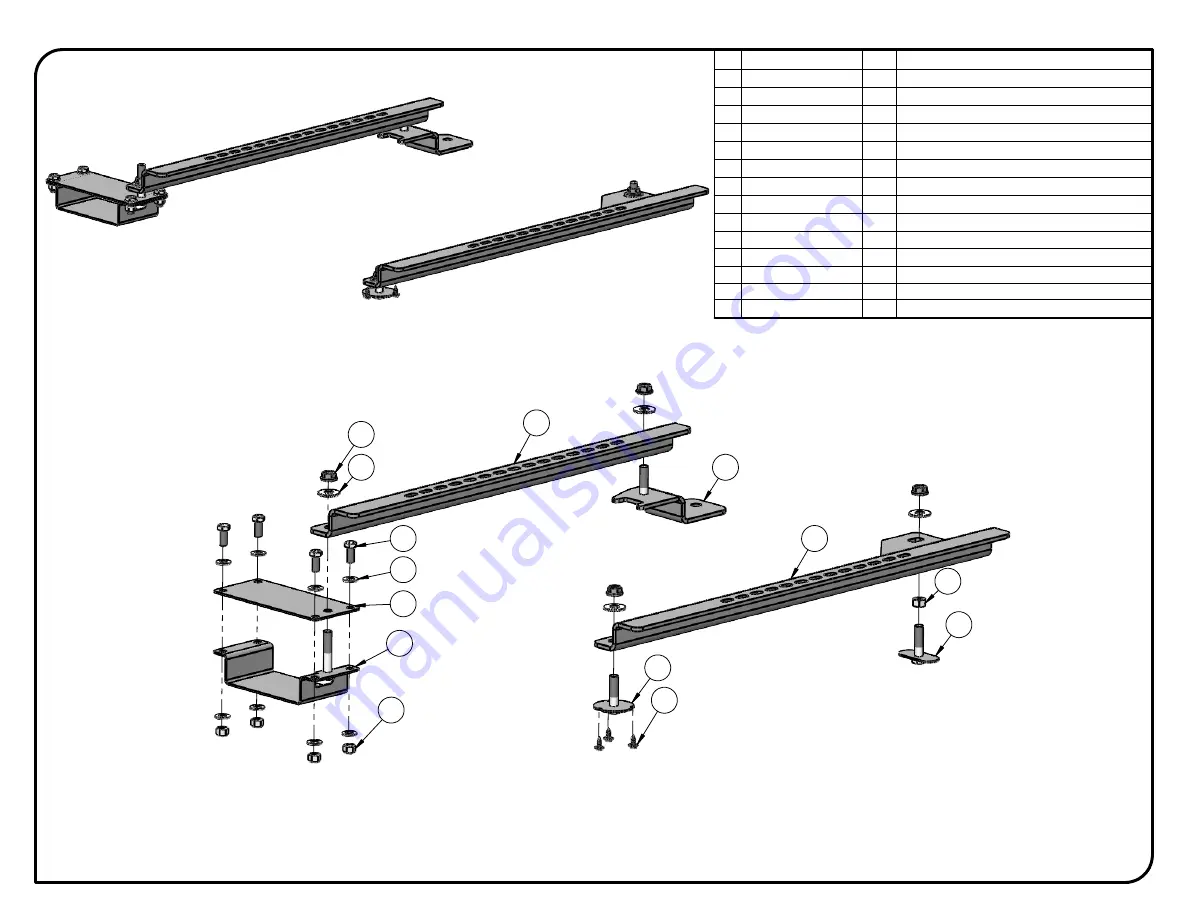
2 of 5

SCALE 1:5

SCALE 1:6

ITEM

PART NUMBER

QTY

DESCRIPTION

1

SL-CHR17L-01

1

Outside Floor Adapter   -Left-

2

SL-CHR17-02

1

Inside Floor Adapter

3

SL-CHR17L-03

1

Rear Fixing   -Left-

4

SL-CHR17-04

1

Front Fixing

5

SL-CHR17-05

1

Front Fixing

6

SL-CHR17-06

1

Front Fixing

7

SL-CHR17-07

1

Rear Fixing

8

PRD 110-104

3

Round washer head tapping screw #8 x 1/2

9

PRD 302-138P

4

Hex Cap Bolt Zinc Plated 5/16-18 x 3/4 G5

10

PRD 321-104P

1

Hex Nut Zinc Plated 3/8-16  G5

11

PRD 333-107

4

Nylon Insert Locknut 5/16-18

12

PRD 341-108P

4

Flat Washer Zinc Plated I.D. 3/8 USS

13

PRD 341-146P

8

Flat Washer Zinc Plated I.D. 11/32 SAE 5/16

14

PRD 2945

4

Flange Locknut Zinc Plated 3/8-16

SP-CHR17L

ADAPT SOLUTIONS

|tech@adaptsolutions.ca|866.641.0419|418.889.9838 fax

PART NUMBER

Speedy-Lift 2 Kit   -Left-

DESCRIPTION

KIT SPEEDY-LIFT 2 CHRYSLER PACIFICA 2017+

Summary of Contents for SPEEDY-LIFT SP-CHR17L

Page 1: ...SPEEDY LIFT INSTALLATION MANUAL SP CHR17L CHRYSLER PACIFICA DRIVER SIDE 2017 UP ...

Page 2: ...loor Adapter Left 9 SL CHR17 02 1 Inside Floor Adapter 10 PRD 110 104 4 Round washer head tapping screw 8 x 1 2 11 PRD 302 100P 1 Hex Cap Bolt Zinc Plated 1 4 20 x 1 2 G5 12 PRD 333 105M 1 Nylon Insert Locknut 1 4 20 Thin 13 PRD 337 211P 10 Button Head Socket Cap Screw Zinc Plated 5 16 18 x 1 2 14 PRD 2946 4 Flange Locknut Zinc Plated 5 16 18 SP CHR17L ADAPT SOLUTIONS tech adaptsolutions ca 866 64...

Page 3: ...10 104 3 Round washer head tapping screw 8 x 1 2 9 PRD 302 138P 4 Hex Cap Bolt Zinc Plated 5 16 18 x 3 4 G5 10 PRD 321 104P 1 Hex Nut Zinc Plated 3 8 16 G5 11 PRD 333 107 4 Nylon Insert Locknut 5 16 18 12 PRD 341 108P 4 Flat Washer Zinc Plated I D 3 8 USS 13 PRD 341 146P 8 Flat Washer Zinc Plated I D 11 32 SAE 5 16 14 PRD 2945 4 Flange Locknut Zinc Plated 3 8 16 SP CHR17L ADAPT SOLUTIONS tech adap...

Page 4: ... 6 SL UNI 09 4 Rail Spacer Washer 7 PRD 110 104 4 Round washer head tapping screw 8 x 1 2 8 PRD 302 100P 1 Hex Cap Bolt Zinc Plated 1 4 20 x 1 2 G5 9 PRD 333 105M 1 Nylon Insert Locknut 1 4 20 Thin 10 PRD BSHCS51618114P 4 Button Head Socket Cap Screw Zinc Plated 5 16 18 x 1 1 4 SP CHR17L ADAPT SOLUTIONS tech adaptsolutions ca 866 641 0419 418 889 9838 fax PART NUMBER Speedy Lift 2 Kit Left DESCRIP...

Page 5: ... SP700B 1 Hook Assembly Black 2 PRD 337 211P 6 Button Head Socket Cap Screw Zinc Plated 5 16 18 x 1 2 SP CHR17L ADAPT SOLUTIONS tech adaptsolutions ca 866 641 0419 418 889 9838 fax PART NUMBER Speedy Lift 2 Kit Left DESCRIPTION KIT SPEEDY LIFT 2 CHRYSLER PACIFICA 2017 ...

Page 6: ...ir support 2 PRD 337 211P 4 Button Head Socket Cap Screw Zinc Plated 5 16 18 x 1 2 3 PRD 2946 4 Flange Locknut Zinc Plated 5 16 18 SP CHR17L ADAPT SOLUTIONS tech adaptsolutions ca 866 641 0419 418 889 9838 fax PART NUMBER Speedy Lift 2 Kit Left DESCRIPTION KIT SPEEDY LIFT 2 CHRYSLER PACIFICA 2017 ...

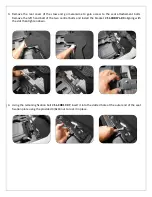
Page 7: ...vided brackets SL CHR17 04 and SL CHR17 05 using the four provided 5 16 18x3 4 bolts nuts and washers Align the protruding bolt with the hole in the stow and go cover then tighten down all the bolts 2 Install the bolt SL CHR17 06 into the hole in the front left hand corner of the stow and go cover and secure in place with the three 8x12 screws ...

Page 8: ...emove the left hand bolt of the two central bolts and install the bracket SL CHR17L 03 aligning with the slot then tighten down 4 Using the remaning fixation bolt SL CHR17 07 insert it into the slotted hole at the outer end of the seat fixation plate using the provided 3 8x16 nut to lock it in place ...

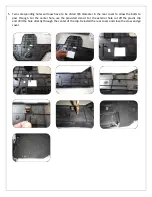
Page 9: ...er in the rear cover to allow the bolts to pass through For the center hole use the provided stencil For the exterior hole cut off the plastic clip and drill the hole directly through the center of the clip Reinstall the rear cover and close the stow and go cover ...

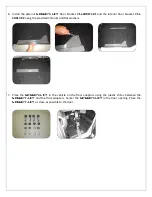
Page 10: ...ket SL CHR17 02 using the provided 3 8 nuts and flat washers 7 Place the SPEEDY LIFT in the vehicle on the floor adaptors using the plastic shims between the SPEEDY LIFT and the floor adapters Center the SPEEDY LIFT in the door opening Place the SPEEDY LIFT as close as possible to the door ...

Page 11: ...while disengaging To disengage move the handle to the right and push down This will disengage the two motors and the arm will spring up To reengage lift up the lever You may have to move the arm and the unit back and forth 9 Place the washer over the SPEEDY LIFT track and use the 5 16 X 1 1 4 button head bolts to line up the washer plate the SPEEDY LIFT track and the black plastic shim Secure the ...

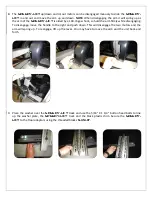
Page 12: ...h the wheelchair hook and support assembly SP700 to the head of the SPEEDY LIFT The height of the hook assembly may need to be adjusted depending on the height or style of the wheelchair Remove the plastic housing covers 12 The stop up and stop down height may be adjusted using the bolts in the slotted holes on the up down gear NOTE The stop up bolt is pre adjusted for maximum travel STOP UP STOP ...

Page 13: ...lt so that the arm stops in this position 14 To properly position the lower support arms back the wheelchair up over the upper wheelchair support bracket Press and hold the IN button until the wheelchair barely starts to lift off the ground Then adjust the lower support arms to the wheelchair Adjust the liftting angle of the wheelchair by sliding the lower supports forward or back ...

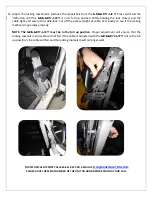
Page 14: ...y to see if the locking mechanism operates properly NOTE The SPEEDY LIFT must be in the full up position Proper adjustment will ensure that the locking mecanism and cable will not fail If the cable is adjusted with the SPEEDY LIFT not in the full up possition the cable will fail and the locking mecanism will no longer work FOR TECHNICAL SUPPORT CALL 866 641 0419 OR E MAIL US TECH ADAPTSOLUTIONS CO...

Page 15: ...the warning decals NOTE The surface must be clean dry and at ambient temperature for the sticker to stick to the surface Start by locating a position to install the decals Clean the surface with the provided alcohol swab Peel off the backing of the sticker and then stick it to the cleaned surface ...

Page 16: ... module Burnt out actuator Replace actuator Power Loss The SPEEDY LIFT motor is not getting adequate electrical power because of a loose connection Check the SPEEDY LIFT connections for tightness and corrosion especially the ground connection A partially discharged battery in the vehicle Check the car s battery by trying the car lights or checking the voltage with a voltmeter should read 13 2 volt...

Page 17: ...tach the ground wire black to the vehicle s frame under the doorstep molding using a self tapping screw NOTE It is preferable to locate it in a spot where the sheet metal is doubled up to insure a better ground 4 Thread the hand held control wire under the doorstep molding and up under the dash Secure the wire in place under the dash with a tie wrap and secure the hand held control on the dash usi...

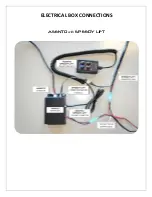
Page 18: ...ELECTRICAL BOX CONNECTIONS ASENTO with SPEEDY LIFT ...

Page 19: ...SPEEDY LIFT ALONE SPEEDY LIFT CORD BLACK GROUNDED TO THE CHASSIS RED 12 V POWER SUPPLY ...

Page 20: ...ges arise from claims based on contract warranty tort including negligence strict liability or product liability All implied warranties including any warranty of merchantability or fitness for a particular purpose are limited in their duration to the length of the warranty stated above for the affected component This warranty is to the original purchaser only and excludes product damage due to ins...

Reviews: