background image

182

Software Installation and User’s Guide

ICP RAID Navigator

loss. Some expansions take a long time, so it is advisable that there be a minimal 
amount of traffic on the system. 

11.5.15

Add Hot Fix

Click the right mouse button on the array drive icon.

Use this option to add a hot fix drive to an array drive (RAID 1/4/5/10). Add a 

private hot 

fix

 drive or a 

pool hot fix

 drive. Private hot fix drives are assigned to a specific array drive 

and are activated if a member of this array drive fails. Pool hot fix drives can be used by 
any array drive with pool hot fix access enabled. RAID 1 array drives allow only pool hot 
fix drives. After choosing the type of hot fix drive, you can select a physical drive from 
the box that shows all suitable drives. 

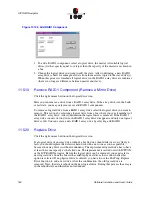
Figure 11-144. Add Hot Fix Drive

The capacity of the hot fix drive has to be larger or equal than the capacity of the 
components of the array drive. For example: The logical drives of the array drive have 
4.2GB capacity, thus the capacity of the hot fix drive has to be 4.2GB or larger.

The spindle motor of the hot fix drive is normally stopped (for example, when the hot fix 
drive is not needed). Thus, it may take a few seconds to get a response when you click on 
that drive.

Some general notes on hot fix drives.

One of the reasons RAID array drives are used, lies with the data 

r

edundancy they 

provide, that is, the data security you have in the event of a hard disk failure. For the 
purpose of the following considerations, we define the term 

time without redundancy


(

TWR) as the time it takes to replace a failed hard drive (assuming there is no hot fix drive 

installed in the system). The time without redundancy should be kept as short as possible, 
not including the time needed to set up the array drive (state 

build

). 

Let us assume that one of the hard disks of a RAID 5 array drive fails. The array drive is 
without redundancy. TWR begins. Any superfluous prolongation of the TWR (because 
you have to get a replacement hard disk or because no one checked the file server) 
increases the risk of data loss should a second hard disk fail. Therefore, new redundancy 
should be created as soon as possible and in an entirely automated manner. Integrate a hot 
fix drive as an immediately available and auto-replacing hard disk to keep the TWR as 
short as possible. Only a hot fix drive can ensure optimal array drive security and constant 

Summary of Contents for 2074700-R - ICP Vortex GDT8514RZ RAID Controller

Page 1: ...Preliminary ICP RAID Software Software Installation and User s Guide Version 1 2 7 June 2003 ...

Page 2: ...he time of writing ICP vortex and or its suppliers accept no liability for the implementation of these methods within the user s environment The user is responsible for and must satisfy itself that any use made of this information or ICP products is suitable to its needs Any named third party suppliers are provided for information only The hardware vendor remains solely responsible for the design ...

Page 3: ...27 2 3 Install the ICP RAID Controller 29 3 Quick Installation 3 1 Roadmap for Quick Installation 31 3 2 Create a Bootable Host Drive RAID 1 Mirrored Array 32 3 3 Create a Bootable Host Drive RAID 5 Disk Array with Hot Fix 36 3 4 Microsoft Windows 2000 and Windows NT Quick Installation 41 3 4 1 Minimum Requirements 41 3 4 2 OS Installation Procedures 41 3 5 Novell NetWare 4 2x 5 x and 6 x Quick In...

Page 4: ...RCD Remote Access Service 66 5 7 1 SRCD Installation Instructions from the RAID Software Suite CD ROM 66 6 Installing Novell NetWare 6 1 Pre Installation Requirements Checklist 69 6 1 1 Minimum Hardware Requirements 69 6 1 2 Minimum Software Requirements 69 6 2 New installation of NetWare 4 2x 5 xx and 6 x 70 6 2 1 New Installation of NetWare 4 20 with the SRCRX HAM Driver 70 6 2 2 New Installatio...

Page 5: ...on 86 8 4 Remote Monitoring with the SRCD Remote Access Service 86 8 4 1 SRCD Installation Instructions 87 9 Installing Berkeley UNIX FreeBSD 9 1 General Installation Notes 88 9 1 1 Minimum Hardware Requirements 88 9 1 2 Minimum Software Requirements 88 9 2 Installing an Operating System onto an Array Drive or Single Disk 89 9 3 Installing an OS onto an IDE or SCSI Disk Drive not Attached to the I...

Page 6: ...ile Menu Commands 155 11 2 4 View Menu Commands 155 11 2 5 Window Menu Commands 156 11 2 6 The Chart Menu 156 11 2 7 The Configuration Menu Commands 156 11 2 8 Help Menu Commands 158 11 3 Select Controller 158 11 4 Physical Configuration Window 159 11 4 1 Controller Configuration Settings 161 11 4 2 I O Processors 163 11 4 3 Direct Access Devices 165 11 4 4 Non Direct Access Devices Raw Devices 16...

Page 7: ... 1 3 Using ICP RAID Controllers with SCSI Interfaces 196 A 1 4 Releasing the Cluster Channels 197 A 1 5 The Microsoft Cluster Server Concept 197 A 1 6 Novell Netware Clustering 199 A 2 PCI Hot Plug Overview 204 B Advanced Features B 1 Chaining 206 B 1 1 Configuring a Chaining Set Using ICPCON 206 B 1 2 Configuring a Chaining Set Using ICP RAID Navigator 206 C Fibre Channel Features C 1 Boot BIOS M...

Page 8: ...e Creation Confirmation 39 3 26 Drive Capacity 39 3 27 Newly Created Host Drive 40 3 28 Progress Window 40 3 29 RAID Software Setup Splash Screen 45 3 30 Setup Type 46 4 31 Access Account Manager 57 4 32 Enter User Account and Password 58 4 33 Confirm User Account and Password 59 10 34 ICP RAID Splash Screen 95 10 35 Setup Type 96 10 36 Select Interface 100 10 37 Remote Machine 100 10 38 Select Co...

Page 9: ...reen with Initialized and Fragmented Disk 128 10 75 Select Physical Drive Screen with De initialized Disk 128 10 76 Enclosure Status 129 10 77 Enclosure Slots 129 10 78 Block Diagram of a SAF TE Subsystem 130 10 79 Select Logical Drive 131 10 80 Select Physical Drive 131 10 81 Create Single Drive 131 10 82 Drive Size 132 10 83 Select Array Drive 132 10 84 Array Drive Menu 133 10 85 Expand Popup Wi...

Page 10: ...roller 158 11 125 Select Controller 159 11 126 Sockets 159 11 127 Access Control 159 11 128 Physical Configuration Icon 159 11 129 Example of a Physical Configuration and the Controller Settings 160 11 130 Controller Icon 160 11 131 Controller Settings Dialogs 161 11 132 Processor Information 163 11 133 Physical Drive Information 166 11 134 Logical Configuration Icon 169 11 135 Host Drive Informat...

Page 11: ...n 188 11 154 Controller Events 189 11 155 ICP RAID Navigator Help 190 11 156 Services 191 11 157 RAID Configuration Service 192 11 158 RAID Configuration Service 193 11 159 RAIDMail 193 11 160 Log File Name 194 11 161 Workstation Names 194 11 162 RAIDMail Utility 194 ...

Page 12: ...ve Types 99 10 8 Controller Settings 113 10 9 Advanced Settings 119 10 10 Cluster Channels Settings 120 10 11 Periodic Parity Verify Settings 121 11 12 Toolbar Icons 154 11 13 Configuration Menu Refresh Settings 157 11 14 Controller Settings 161 11 15 I O Processor Icons 163 11 16 Direct Access Device Icons 165 11 17 Data Transfer Rates 167 11 18 Non Direct Access Devices 169 11 19 Host Drive Icon...

Page 13: ...P RAID controller and provides a guide to its features and specifications For a particular ICP RAID controller its hardware guide documents compatible RAID adapters supported operating systems standard features and optional features Software Installation and User s Guide The Software Installation and User s Guide or Software Guide contains Quick installation of the ICP RAID controller software on ...

Page 14: ... 1 1 1 Document Formats All documents with the exception of the quick start poster are provided on the CD ROM in both PDF and HTML format HTML To view online HTML documents Click Documentation from the autorun menu or open cdromdrive docs index htm PDF Portable Document Format PDF documents can be opened viewed and printed with Adobe Acrobat Reader not provided on the CD ROM 1 2 About This Guide T...

Page 15: ...otable host drive with the following operating systems Microsoft Windows 2000 Microsoft Windows NT 4 0 Novell NetWare 4 2x 5 x and 6 x UnixWare 7 1 1 and 8 0 Refer to Chapter 4 Chapter 6 and Chapter 7 for more complex installations on these same operating systems Refer to Chapter 5 Chapter 8 and Chapter 9 for installations with other operating systems Chapter 4 Installing Microsoft Windows NT 2000...

Page 16: ...ler ICPCON is available for all supported operating systems Chapter 11 ICP RAID Navigator ICP RAID Navigator ICP RAID Navigator is a software tool for setting up and maintaining mass storage subsystems based on ICP RAID controllers ICP RAID Navigator is a graphical user interface designed for execution under Win32 operating systems only Appendix A Optional Features Appendix A provides instructions...

Page 17: ...t Figure 1 1 RAID 0 Data Striping 1 3 2 RAID 1 Disk Mirroring Disk Duplexing All data is stored twice on two identical hard disks When one hard disk fails all data is immediately available on the other without any impact on performance and data integrity With Disk Mirroring Figure 1 2 two hard disks are mirrored on one I O channel If each hard disk is connected to a separate I O channel it is call...

Page 18: ... hard disk P1 P2 See Figure 1 4 Should one hard disk fail all data remains fully available Missing data is recalculated from existing data and parity information Unlike in RAID 1 only the capacity of one hard disk is needed for redundancy For example in a RAID 4 disk array with 5 hard disks 80 of the installed hard disk capacity is available as user capacity only 20 is used for redundancy In syste...

Page 19: ...l fully available Missing data is recalculated from the existing data and parity information RAID 4 and RAID 5 are particularly suitable for systems with medium to large capacity requirements due to their efficient ratio of installed and available capacity Figure 1 5 RAID 5 Data Striping with Striped Parity 1 3 5 RAID 10 Combination of RAID 1 and RAID 0 RAID 10 is a combination of RAID 0 Performan...

Page 20: ...e used by the firmware these hard disks must be prepared through a procedure called initialization During this initialization each hard disk receives information which allows an univocal identification even if the SCSI ID or the controller is changed For reasons of data coherency this information is extremely important for any drive construction consisting of more than one physical drive 1 3 6 2 L...

Page 21: ...SCSI On this level the user may split an existing array drive into several host drives After a capacity expansion of a given array drive the added capacity appears as a new host drive on this level It can be either used as a separate host drive or merged with the first host drive of the array drive Within RAIDCU each level of hierarchy has its own menu Level 1 Configure Physical Devices Level 2 Co...

Page 22: ...ical drive or host drive SCSI devices of this kind are either operated through the Advanced SCSI programming Interface ASPI MSDOS or Novell NetWare or are directly accessed from the operating system UNIX Note Hard disks and removable hard disks are called Direct Access Devices However there are some Non Direct Access Devices for example certain MO drives which can be operated just like removable h...

Page 23: ...Software Installation and User s Guide 23 Introduction ...

Page 24: ... drives supported for the RAID level you selected 3 In column 3 record the number of disk drives you will use for the host drive 4 In column 4 record the capacity in megabytes MB that you will need on each physical drive You will enter this value as the Used Capacity per Drive when you are creating the host drive Based on the physical drive capacity value and the number of disk drives you will use...

Page 25: ...m the CD ROM Insert the CD ROM into the system CD ROM drive and power up the system The Main appears Figure 2 7 Table 2 1 Pre installation Worksheet Creating a Host Drive for the Operating System RAID Level of disk drives supported for this RAID level minimum to maximum of disk drives1 to include in new host drive Physical drive capacity MB RAID 0 2 to 15 per Channel RAID 1 2 2 RAID 4 3 to 15 per ...

Page 26: ... Figure 2 7 Main Menu 2 From the menu select Create Diskettes then press Enter The Create Diskettes Menu appears See Figure 2 8 Figure 2 8 Create Diskettes Menu 3 With OS Diskettes selected press Enter The Select an OS to Create screen appears See Figure 2 9 ...

Page 27: ... can create the disk with the following alternative means If you have a Windows 2000 or Windows NT server you can use the RAID Software Suite CD ROM on the Windows server to generate an ICP RAID controller driver diskette for any of its supported operating systems see Section 2 2 2 1 If you do not have a Windows server you can manually create the diskette for the following operating systems SCO Op...

Page 28: ...run exe Figure 2 10 ICP RAID Splash Screen 3 Click OS Diskettes The Select an Operating System screen appears see Figure 2 11 Select the appropriate operating system of the system into which you will install the ICP RAID controller Figure 2 11 Select an Operating System Screen 4 Select the screen options that are appropriate for your specific operating system version 5 A command prompt window appe...

Page 29: ...t the RAID Software Suite CD ROM and go to the apps folder 2 Create a folder on the system hard drive and copy the rawrite exe application to that folder 3 Open the unixware folder on the CD ROM then open the dskimg folder 4 Copy unixw7 img to the folder created in step 2 5 Open the command window From the command prompt go to the folder created in step 2 and type the following command rawrite 6 E...

Page 30: ...ls 4 If the ICP RAID controller is configured with removable SDRAM be sure that the DIMM is installed in the adapter prior to use Ensure that the optional battery backup is disconnected during any installation or removal of the DIMM Not all adapters are configured with removable SDRAM or battery backup support For installation details and applicability to your ICP RAID controller refer to the Hard...

Page 31: ... the quick installation d Table 3 2 High Level Steps for Quick Installation Step Reference 1 Determine RAID configuration See Determine the RAID Configuration on page 24 2 Create RAID driver installation diskette See Create the RAID Driver Installation Diskette on page 25 3 Install the ICP RAID controller See Install the ICP RAID Controller on page 29 4 Create a bootable host drive See Create a Bo...

Page 32: ... RAID subsystem This section describes how to create a bootable host drive in a RAID 1 mirrored array configuration via the expansion ROM XROM ICPCON See Section 3 3 for an example of a RAID 5 disk array with hot fix drive configuration 1 Power on the computer 2 Press Crtl g when the ICP RAID BIOS message appears to load XROM ICPCON 3 Select the controller and press Enter See Figure 3 12 Figure 3 ...

Page 33: ...ect the menu option Configure Host Drives and press Enter See Figure 3 13 5 Select Create new Host Drive see Figure 3 14 and press Enter ICPCON displays a list of available hard disks see Figure 3 15 Figure 3 13 Configure Host Drives Figure 3 14 Create New Host Drive ...

Page 34: ...e arrow keys and the Space bar to select two hard disks these hard disks become marked with an as shown in Figure 3 15 and press Enter 7 From the Choose Type menu select RAID 1 and press Enter See Figure 3 16 Figure 3 15 Select Physical Drive Figure 3 16 Choose Type Menu ...

Page 35: ...PCON pauses to determine if you want to configure the selected disks for SAF TE Auto Hot Plug Press y or n to confirm your choice 11 ICPCON asks if you want to set the host drive type to Cluster Refer to your product s Hardware Guide to determine if clustering is supported before pressing y or n to confirm your choice 12 The new host drive is created see Figure 3 19 When the build process is compl...

Page 36: ...ID 5 Disk Array with Hot Fix ICP RAID Console ICPCON is the software tool used for creating host drives as well as administering the RAID subsystem This section describes how to create a bootable host drive in a RAID 5 mirrored array configuration via the expansion ROM XROM ICPCON See Section 3 2 for an example of a RAID 1 mirrored array 1 Power on the computer 2 Press Crtl G when the ICP RAID BIO...

Page 37: ...r s Guide 37 Quick Installation 3 Select the controller and press Enter See Figure 3 20 4 Select the menu option Configure Host Drives and press Enter See Figure 3 21 Figure 3 20 Select Controller Figure 3 21 Configure Host Drives ...

Page 38: ...se the arrow keys and the Space bar to select the number of hard disks for your RAID 5 array minimum of three disks to a maximum of 15 disks per channel In this RAID 5 Hot Fix example four disks are selected The selected hard disks become marked with an as shown in Figure 3 23 Press Enter to accept your selections Figure 3 22 Create New Host Drive Figure 3 23 Select Physical Drive ...

Page 39: ...pressing y 9 ICPCON asks for the capacity to use for each drive see Figure 3 26 Type in the physical drive capacity that you recorded in Table 2 1 for RAID 5 and press Enter 10 ICPCON asks if you want to set the host drive type to Cluster Refer to your product s Hardware Guide to determine if clustering is supported before pressing y or n to confirm your choice Figure 3 24 Choose Type Menu Figure ...

Page 40: ...e RAID 5 build process may take a considerable amount of time You may exit out of ICPCON without waiting for the build to complete When leaving ICPCON a progress window informs you about the estimated completion time for the build process see Figure 3 28 Upon successful completion of the build process the RAID 5 disk array changes to ready status for example the data is fully redundant Figure 3 27...

Page 41: ...soft Windows 2000 Professional Server or Advanced Server RAID Software Suite Driver Installation diskette see Section 2 2 for instructions to create this diskette One blank high density floppy diskette may be required to create the installation diskette Microsoft Windows NT 4 0 RAID Software Suite CD ROM 9 MB of free hard disk space for the RAID Software Suite RAID Software Suite Driver Installati...

Page 42: ...ased portion of the Windows installation procedures Reboot and continue with the GUI based portion of the installation 6 After the operating system is completely installed go to Section 3 7 to complete the installation 3 4 2 2 Installing Windows Using the Bootable Windows CD ROM 1 Insert the bootable CD ROM and power on the computer 2 Press F6 as soon as the initial blue screen appears to ensure t...

Page 43: ...lled on your target hard drive and have the appropriate DOS driver for your CD ROM 3 At the driver summary menu select modify drivers 4 Insert the driver diskette into drive A 5 Press Enter on the ICP RAID driver list 6 Press Insert in the ICP RAID controller driver menu 7 Press F3 and change the path to A DRIVERS 4XX then press Enter 8 Select the SRCRX HAM driver and complete the installation 3 5...

Page 44: ...igh density floppy diskette may be required to create the installation diskette SCO UnixWare 7 1 1 or 8 0 OS software Not supplied 3 6 2 OS Installation Procedures Note When installing SCO UnixWare create only one RAID device host drive on which the operating system is to be installed 1 Create and configure one RAID device from the BIOS of ICP RAID ICP RAID Console accessed by pressing Ctrl g 2 In...

Page 45: ...ts 2 Insert the RAID Software Suite CD ROM in the CD ROM drive When the ICP RAID splash screen see Figure 3 29 appears click on the link Install to launch the Setup program Note If the RAID Software Setup Splash Screen does not appear then run the setup exe file that resides at CD ROM root windows install setup exe 3 A welcome screen appears Click Next 4 License Agreement Click Yes after reading t...

Page 46: ...click to complete the installation Restart the computer after you install the device drivers This completes the installation procedure for Windows 3 7 2 Novell NetWare 4 2x 5 x and 6 x 3 7 2 1 Installing the ICP RAID Controller Tools Kit Package Note ICPCON NLM will not find any controllers unless SRCRX HAM is already loaded and running 1 Select Product options then Install a product not listed 2 ...

Page 47: ...ess 1 Create a group SRC_Operator in the NDS 2 Add the Admin and all other users who will use this interface 3 Load SRCIPX NLM 4 Start ICP RAID Console ICPCON exe or ICP RAID Navigator ICP RAID Navigator exe from a workstation using a user name of the group SRC_Operator and his her NetWare password 3 7 3 SCO UnixWare 7 1 1 or 8 0 No additional steps are necessary to install the RAID Software Suite...

Page 48: ...s Install the OS on either an array drive or single disk that is attached to and configured on the ICP RAID controller that you are installing see Section 4 1 2 or Install the OS on either an IDE hard disk or a SCSI hard disk that is not attached to the ICP RAID controller that you are installing see Section 4 1 3 4 1 1 Pre Installation Requirements Checklist 4 1 1 1 Minimum Hardware Requirements ...

Page 49: ...AID Software Suite Driver Installation diskette Miniport diskette for Windows XP Professional One blank high density floppy diskette may be required to create the installation diskette Not supplied 4 1 2 Installing an Operating System onto a Host Drive Ensure that you have completed the steps described in Chapter 2 Getting Started before continuing with the installation of the OS onto a host drive...

Page 50: ...ext based portion of the Windows installation procedures Reboot and follow the on screen instructions to continue with the GUI based portion of the installation 6 After the operating system is completely installed go to Section 10 2 Installing and Launching ICPCON to complete the installation Installing Windows Using the Bootable Windows CD ROM 1 Boot your computer to the CD ROM of your Windows OS...

Page 51: ...n of the RAID Software Suite Note For detailed Windows installation procedures please consult the documentation that came with your computer system or operating system Install the operating system software using one of the scenarios below that matches your installation method Installing Windows with Installation Boot Diskettes Booting from Windows installation diskettes initially to setup Windows ...

Page 52: ... Windows XP If not then exit this installation procedure Windows NT4 0 Server is not upgradeable to Windows XP Professional The procedure described in Section 4 1 4 3 will replace the existing NT 4 0 Server installation Warning Installation of Windows XP Professional using this procedure will overwrite all data on this host drive 4 1 4 2 Upgrading Windows NT 4 0 to Windows 2000 Note For hardware i...

Page 53: ... 4 3 Replacing existing Windows NT 4 0 with Windows XP Professional Note For hardware installation details consult the accompanying Hardware Guide 1 Before beginning back up any vital data Warning Installation of Windows XP Professional using this procedure will overwrite all data on this host drive 2 If you are not installing a new adapter and you are only upgrading the OS and the RAID software g...

Page 54: ... boot to the hard drive to continue the installation 16 During the GUI portion of setup you may be prompted to enter the path again to the raidsrc sys driver If so enter a winnt x86 raidsrc sys where a is your drive letter to load the driver again from the floppy disk 17 When the GUI portion of setup completes the computer will auto reboot If it does not auto reboot manually reboot the computer to...

Page 55: ...uctions below for the applicable OS Windows 2000 a Open the Device Manager and scan the PCI bus for new hardware or hardware changes b Select the ICP RAID controller in the hardware found list and then click Next c Select Search for a suitable driver for my device and then click Next d Select Floppy Drive e Click on Next and follow the instructions up to and including system reboot Windows NT a Op...

Page 56: ...n IDE drive connected to the motherboard For a list of compatible ICP RAID controllers see the Hardware Guide 4 1 6 1 If OS Is on a Host Drive Connected to the ICP RAID Controller If Windows OS is installed to a host drive connected to the ICP RAID controller then replacing an ICP RAID controller with another compatible but different model is similar to the procedure for adding a new controller Th...

Page 57: ...d replace the RAID controller 3 Boot to Windows OS and follow the procedure for installing a Raid Controller to an existing operating system See Section 4 1 5 4 2 Configuring the RAID Configuration Service The RAID Configuration Service RCS must be configured to allow for remote management of the RAID subsystem of your controller The following steps describe how to configure the RCS 1 Open the Con...

Page 58: ...ccount used to manage the RAID subsystem remotely on this computer 5 Click the full Access radio button 6 Click Add Note that the account has been added to the list on the right side of the window You can add additional accounts if desired but at this point the configuration is complete 7 Click OK to close the window and save changes See Figure 4 33 Figure 4 32 Enter User Account and Password ...

Page 59: ...Software Installation and User s Guide 59 Installing Microsoft Windows NT 2000 XP Figure 4 33 Confirm User Account and Password ...

Page 60: ...driver diskette from the CD ROM before you begin the Linux installation to a RAID drive In other cases you can use the driver provided by the Linux distributor to install the operating system and then update the driver to the latest version using the source code that is available on the CD ROM To determine which case applies to your operating system see Table 5 3 below Linux drivers and updates ar...

Page 61: ...controller One available PCI slot ICP RAID controller PCI 2 2 compliant system BIOS SCSI hard disk drives the minimum needed to meet desired RAID level requirements gdth tgz ICP RAID driver sources for Intel and alpha systems ICPCON 2 02 gz ICPCON for i386 systems version 2 02 srcd 1 10 suse tgz Remote RAID Configuration Service version 1 10 with start stop script for SuSE Linux srcd 1 10 redhat t...

Page 62: ...ted the steps described in Chapter 2 Getting Started before beginning the OS installation 2 Ensure the ICP RAID controller is installed in your machine and is connected to drives on which you intend to create a host drive 3 Boot your machine and when prompted press Ctrl G to enter ICPCON Create a single host drive from your selected disks For more information on creating host drives using the ICPC...

Page 63: ...drivers scsi c Enter the following command cp mnt cdrom linux drivers gdth tgz usr src linux drivers scsi d Unpack and unzip the tar file using the following command tar zxvf usr src linux drivers scsi gdth tgz Note Linux kernel versions are specific For example the directory usr src linux 2 4 2 is specific to Linux kernel version 2 4 2 found in Red Hat version 7 1 You should be aware of the speci...

Page 64: ... difficult Non Direct Access Devices like CD ROMs Streamers DATs etc do NOT require a reservation Important The reservation of SCSI devices is only possible with not initialized SCSI devices Use ICPCON to de initialize an already initialized device 1 From driver version 1 10 on you can add the parameters for the reservation with the LILO append command Excerpt of etc lilo conf End LILO global sect...

Page 65: ...n place the RAID Software Suite CD ROM in the CD ROM drive and mount the CD ROM mount dev cdrom mnt cdrom 2 Copy the ICPCON utility archive to usr sbin Note that x xx in these examples is the version of ICPCON that was shipped on your software CD that matches the current Firmware cp mnt cdrom linux install storcon 2 02 gz usr sbin storcon x xx disable Y deactivates the RAID driver disable N activa...

Page 66: ...console session dmesg n 1 When finished using ICPCON the console log level can be set back to the default level using the following command dmesg n 7 This behavior is not observed if the ICPCON utility is used from an X windows terminal window 5 7 Remote Monitoring with the ICP vortex SRCD Remote Access Service srcd is the remote access service for ICP RAID controllers With srcd running you can ma...

Page 67: ... will interactively set up a start script and a file etc srcd conf install sh 4 Edit etc srcd conf to send SNMP traps or execute an external program when controller events occur 5 If srcd is not running start it by executing one of the following commands For SuSE Linux sbin init d srcd start For RedHat Linux etc rc d rc2 d srcd start ...

Page 68: ...68 Software Installation and User s Guide Installing Linux ...

Page 69: ...ents specifications and installation procedures specific to your ICP RAID controller consult the Hardware Guide 6 1 1 1 Computer System Requirements Computer with CD ROM Drive not attached to the ICP RAID controller One available PCI slot ICP RAID controller PCI 2 2 compliant system BIOS SCSI hard disk drives the minimum needed to meet desired RAID level requirements Note If the ICP RAID controlle...

Page 70: ... are NOT bootable so you must have a bootable DOS partition installed on your target hard drive and have the appropriate DOS driver for your CD ROM 3 At the driver summary menu select modify drivers 4 Insert the driver diskette into drive A 5 Press Enter on the ICP RAID driver list 6 Press Insert in the ICP RAID controller driver menu 7 Press F3 and change the path to A DRIVERS 4XX then press Ente...

Page 71: ...o install a New Server you may encounter the following warning dialog box Warning A previously installed version of NetWare was detected in C NWSERVER If you choose to install a new server all data on the existing server will be lost Press ENTER to continue If the warning dialog box appears press Enter 11 Complete the installation Note The above procedure will only install the device drivers for y...

Page 72: ... the ICP RAID controller s is are already installed in your system Install all Novell patches and updates prior to installing the ICP RAID controller driver and ICP RAID Console These updates can be found at http www novell com 1 Create a driver diskette from the RAID Software Suite CD ROM See Section 2 2 Create the RAID Driver Installation Diskette for instructions 2 Power on the system and boot ...

Page 73: ...you added in the system and update the STARTUP NCF file so the driver will load for each subsequent restart of the server 12 Select Return to previous menu twice to get back to the INSTALL NWCONFIG main options 6 3 2 Installing the ICP RAID Controller Tools Kit Package Note ICPCON NLM will not find any controllers unless SRCRX HAM is already loaded and running 1 Select Product options then Install...

Page 74: ...tions from your application vendor to correctly configure ASPI 1 With the server loaded and running load INSTALL NLM NetWare 4 2x or NWCONFIG NLM NetWare 5 x 2 Select NCF Files Option from the main menu 3 Select Edit Startup ncf 4 Add the following line at the end of the CDM section of STARTUP NCF 5 LOAD NWASPI CDM 6 Reboot the server 6 5 Tips and Tricks 6 5 1 Last Status Information All ICP RAID ...

Page 75: ...additional capacity resulting from an online capacity expansion of an existing array drive is introduced to the system as a new host drive To be able to make use of the new capacity without having to down the server type scan for new devices on the server console to recognize the new capacity Use Install to build new partitions and volumes ...

Page 76: ...e Hardware Guide 7 1 1 1 Computer System Requirements Computer with CD ROM Drive not attached to the ICP RAID controller One available PCI slot ICP RAID controller PCI 2 2 compliant system BIOS SCSI hard disk drives the minimum needed to meet desired RAID level requirements Note If the ICP RAID controller is configured with removable SDRAM be sure that the DIMM is installed in the adapter prior to...

Page 77: ...equested insert the UnixWare HBA Disk 3 Follow the installation as described in the SCO documentation Note The assignment of an IRQ to an INT is made by the PCI System BIOS UnixWare versions 2 x and higher automatically recognize the IRQ of a PCI expansion card 7 3 Installing the ICP RAID Controller as an Additional Controller Two cases are discussed below 7 3 1 No ICP RAID Controller Has Yet Been...

Page 78: ... detects the new device at startup reboots the system and links the driver 7 4 Installing an Operating System onto an Array Drive or Single Disk Note When installing UnixWare create only one RAID device host drive on which the operating system is to be installed 1 Create and configure one RAID device from the BIOS of ICP RAID Console accessed by pressing Ctrl G 2 Insert UnixWare installation diske...

Page 79: ...e PCI 0 3 4 MB RAM detected The number before the designates the order on the PCI bus and the number after the is the slot number of the controller This will help determine the order of the ICP RAID controllers and which host adapter number is assigned to them by UnixWare The bus number counts first and then the slot number For example if one controller has 0 3 and the other 1 3 then 0 3 gets HA n...

Page 80: ...to be mounted For example to mount Host Drive 00 the command would be etc diskadd c0b2t0d0 When using Direct Access Devices with exchangeable media for example removable hard disks that are not reserved for the raw service media has to be inserted either when the system is booted or with ICPCON mount unmount Otherwise the device will not be available under UnixWare The ICP RAID UnixWare driver sup...

Page 81: ...trm this will remove any existing ghost names using sbin sdighost r and fix mount points for the remaining host drives by editing etc vfstab 6 Reboot the system again 7 8 Remote Monitoring with the SRCD Remote Access Service srcd is the remote access service for IIR controllers With srcd running you can manage disk arrays from a remote workstation using storage management software for example Stor...

Page 82: ...to your ICP RAID controller consult the Hardware Guide 8 1 1 1 Computer System Requirements Computer with CD ROM Drive not attached to the ICP RAID controller One available PCI slot ICP RAID controller PCI 2 2 compliant system BIOS SCSI hard disk drives the minimum needed to meet desired RAID level requirements Note If the ICP RAID controller is configured with removable SDRAM be sure that the DIM...

Page 83: ... must have SCSI ID 5 and be connected with channel A of the ICP RAID controller When using OpenServer you have the option to link the driver to the kernel before starting the kernel btld ADM This will allow you to use the ICP RAID controller as the only controller in the system Use the ICP RAID HBA Disk During the installation whenever the N1 floppy disk is inserted and the message Boot is display...

Page 84: ...ve not attached to the RAID Card 1 Install the package by using installpkg The system will display the packages available on the floppy disk Select iir to begin the installation 2 Execute the command etc conf bin idbuild to start the kernel rebuild Select Y for all options 3 Restart the system when prompted 4 When in the graphical mode of the OS execute the following commands before running ICP RA...

Page 85: ... with the lower PCI slot number is assigned host adapter number 0 and the ICP RAID controller with the higher PCI slot number is assigned host adapter 1 Note After a cold boot the ICP RAID BIOS displays a couple of messages each beginning with the controller s PCI slot number for example PCI 0 3 4 MB RAM detected The number after the is the slot number of the controller This will help determine th...

Page 86: ...till present in ICP RAID controller s cache to be written to the logical drives It is advisable to use this tool before shutting down the system When using Direct Access Devices with exchangeable media for example removable hard disks a media has to be inserted when the system is booted otherwise the device is not available under UNIX Non Direct Access Devices streamer tapes CD ROMs etc can be swi...

Page 87: ...ler event occurs See comments in etc srcd conf for detailed comments and explanations on performing these configurations 3 A script named S99srcd is automatically placed in the etc rc2 d directory which will start srcd during the boot process provided that etc srcd conf has been configured as described in step 2 The srcd daemon can also be started manually by executing the command etc srcd 4 Remot...

Page 88: ...pecifications and installation procedures specific to your ICP RAID controller consult the Hardware Guide 9 1 1 1 Computer System Requirements Computer with CD ROM Drive not attached to the ICP RAID controller One available PCI slot ICP RAID controller PCI 2 2 compliant system BIOS SCSI hard disk drives the minimum needed to meet desired RAID level requirements Note If the ICP RAID controller is c...

Page 89: ...RAID driver from floppy disk disk0 is the CD ROM floppy emulation disk1 the first Floppy DOS Format Type boot to boot the kernel 4 Remove the CD ROM and floppy from the drives and reboot When you boot from the host drive you must interrupt the boot process as in step 3 above Re insert the FreeBSD driver floppy and load the driver The command is load disk0 iir 5 0 CURRENT load disk0 iir2 since ther...

Page 90: ...nd unload the ICP RAID Kernel Module using utilities like kldload and kldunload after the system has booted 2 Modify system configuration files like etc fstab To do so you will need to know explicit device filenames associated with all the disks in the system The exact procedure used will depend on your particular system configuration Please refer to your FreeBSD documentation before changing any ...

Page 91: ... mount t msdos dev fd0 mnt b cp mnt iir 1 1 tgz tmp iir 1 1 tgz c umount mnt 2 Install the package with the command pkg_add iir 1 1 tgz This process will install the IIR driver IIR driver source code and modify the system configuration files STORCON IIRCFG and SRCD utilities appropriately For detailed information about on these utilities refer to their man pages 3 Reboot server to put changes in e...

Page 92: ...92 Software Installation and User s Guide Installing Berkeley UNIX FreeBSD ...

Page 93: ...ns However ICP RAID Navigator runs on Microsoft Windows based systems only More information on ICP RAID Navigator can be found in Chapter 11 ICP RAID Navigator 10 1 ICPCON Features ICPCON features include diagnosis and configuration functions online capacity expansion of disk arrays host drives which can be setup and configured under normal operation monitoring functions which indicate the perform...

Page 94: ...ave been previously loaded on the server Use the following command to load ICPCON LOAD ICPCON Enter Installing ICPCON on a Workstation Note The NetWare driver for the ICP RAID controller the auto loading module CTRLTRAN and module CTRLIPX NLM must have been previously loaded on the server console This module searches for a file named CTRLIPX CFG This file must be located in the same directory as C...

Page 95: ...ear then run the setup exe file that resides at CD ROM root windows install setup exe Figure 10 34 ICP RAID Splash Screen 5 A welcome screen appears Click Next 6 License Agreement Click Yes after reading to agree 7 Setup Type Select one of the following for Local or Remote administration of the ICP RAID controller see Figure 10 35 and click Next Server Utilities Services and Drivers This option al...

Page 96: ...ticipated in the very near future As a result a window may appear notifying you about the Windows Logo testing compatibility You can simply click on Yes when prompted to continue your installation This completes the installation procedure for Windows 10 2 3 Installing and Launching ICPCON Under Linux The RAID Software Suite CD ROM for Linux includes the following archive This archive includes all ...

Page 97: ...h login The ICPCON program itself is copied during the OpenServer installation into the etc directory ICPCON is launched by entering ICPCON Enter 10 2 5 Launching ICPCON Under UnixWare Launch ICPCON by typing the following at the prompt ICPCON Enter 10 2 6 Launching ICPCON Under FreeBSD Launch ICPCON by typing the following at the prompt ICPCON Enter 10 2 7 Un installing the RAID Software Suite Wa...

Page 98: ...ove the check from the check box in front of each component that you wish to remove Do not remove the check from the check box in front of the RAID Device Drivers component unless you intend to remove the device drivers Note If you remove the device drivers and you are booting to a host drive you will be unable to reboot back into Windows The operating system will be inaccessible Click Next c A Qu...

Page 99: ...p arrow and down arrow keys or type a highlighted character when applicable to select an item Press the Enter key to accept a selection Press the Esc key to return to a previous menu or exit ICPCON After launching the OS version of ICPCON the screen in Figure 10 36 appears After launching the XROM version of ICPCON the Select Controller screen Figure 10 38 appears Refer to Section 10 3 2 for more ...

Page 100: ...e service must be loaded on the server Users must be assigned access rights Name password See Figure 10 37 After selecting Sockets and TCP IP you may enter the IP address of the server if you choose SPX IPX ICPCON will scan the network for suitable servers which have SPX IPX protocol Enter user name and password as appropriate Figure 10 37 Remote Machine In the Select Interface screen you can pres...

Page 101: ...itch to the Advanced Setup and Monitor menus see Figure 10 40 You can toggle between the Express Setup and Advanced Setup menus by pressing F4 Figure 10 39 Express Setup and Monitor Menus Figure 10 40 Advanced Setup and Monitor Menus Menu options can be selected either with the cursor up down keys or by pressing the key matching the highlighted character 10 4 Express Setup Express Setup has the fo...

Page 102: ...w drive which could have conceivably been used on another SCSI host bus adapter could have valid data To prevent this from occurring run a surface check on each disk before creating hosts Note The XROM version of ICPCON may report an error incorrectly after configuring more than 30 host drives This false error is indicated by one of the following messages No more handles Memory allocation failed A...

Page 103: ...sks show an in the first column After selecting the hard disks press Enter and the Choose Type window becomes active see Figure 10 42 The Choose Type window displays all host drive types and enables the appropriate types depending on the number of selected hard disks and the firmware level of the ICP RAID controller Select the appropriate RAID level type and press Enter to confirm your selection F...

Page 104: ... determine if you want to configure the selected disks for SAF TE Auto Hot Plug use this option only with hot swap disks and equipment See Figure 10 45 Press Y or N to confirm your choice Note This options shown in Figure 10 45 are available only if your hard disk enclosure supports SAF TE Figure 10 45 SAF TE Auto Hot Plug If your controller supports clustering ICPCON then asks if you want to set ...

Page 105: ... 2 build types the Destructive Build and the Non destructive Build Only available if ICPCON is loaded with Ctrl G the Destructive Build deletes any data by writing a 0 pattern across all hard disks This initialization process is very fast since no read IOs or parity calculation is involved However the initialization build must be successfully finished before leaving ICPCON otherwise the build mode...

Page 106: ...s in the build state the array returns to idle The exception is that if during build mode the dedicated drive of RAID 4 fails the mode changes to fail Build State After the disk array has been configured for the first time it assumes the build state While the array is in the build state redundancy information is calculated and stored to the hard disks of the array Ready State The disk array is ful...

Page 107: ...e displayed If the problem is resolved you can choose y to patch the array to fail state y n Entering y results in a patch to fail The default behavior is performing the patch If the patch was successful the array status is set to Fail Patch and the following message is displayed Patching the array drive was successful If the patch failed the following message is displayed Patching the array drive...

Page 108: ...person in which case a printout of the Save Information file is extremely helpful see Section 10 6 4 for details 10 4 1 3 Host Drive Screen From the Express Setup menu select Configure Host Drives and press Enter to display a list of any existing host drives in the Select Host Drive screen To configure an existing host drive highlight the drive in the Select Host Drive screen Figure 10 47 and pres...

Page 109: ...A private hot fix drive is dedicated to one RAID 4 RAID 5 or RAID 10 array drive Remove Hot Fix Drive Remove Hot Fix Drive allows you to remove a previously assigned hot fix drive Overwrite Master Boot Code This option creates a valid and consistent master boot record on the selected host drive and should be carried out on any new host drive on which Windows NT is installed Never use this function...

Page 110: ...er be maintained Select the array drive and ICPCON displays the drive that failed For example the hard disk that forms logical drive 5 has a failed state in Figure 10 51 Figure 10 51 Failed Hard Drive After confirmation the failed drive must be removed from the system and the new one configured on the same ID and installed in the system See Figure 10 52 and Figure 10 53 Figure 10 52 Replace Hard D...

Page 111: ...Setup and Monitor menus see Figure 10 39 Press F4 to switch to the Advanced Setup and Monitor menus see Figure 10 40 You can toggle between the Express Setup and Advanced Setup menus by pressing F4 Advanced Setup has the following menu options Configure Controller to setup the ICP RAID controller Here you can change the cache settings termination memory test etc Configure Physical Devices to initi...

Page 112: ...d Setup menu select the Configure Controller option and press Enter to display the Configure Controller menu then select the Controller Settings option and press Enter to display the Controller Settings dialog Figure 10 58 Use the up arrow and down arrow keys to switch between options and toggle a setting by pressing Enter to choose a parameter Use the Controller Settings dialog to view and change...

Page 113: ... possible Enabled Ctrl G allowed Display Off Ctrl G not displayed at system boot level On Ctrl G displayed at system boot level Supported BIOS Drives 2 The ICP RAID BIOS supports 2 drives 7 The ICP RAID BIOS supports 7 drives CD ROM Boot Disabled Boot from CD ROM disabled Enabled Boot from CD ROM enabled Memory Test No test No test at all Standard Standard test Double scan Double scan test Intensi...

Page 114: ...CD ROM To get the latest firmware for the ICP RAID controller visit our web site at http www icp vortex com or http www vortex de Note The Firmware Update option is not available when ICPCON is accessing the ICP RAID controller remotely Follow the procedure below to update the firmware via XROM ICPCON or the OS version of ICPCON 1 Format a 3 5 HD disk 1 44MB and copy the SRC_RXFW file onto the dis...

Page 115: ...irmware update does ICPCON program the flash eprom Warning Do not interrupt the update process to avoid damaging the firmware image in the Flash If the firmware is interrupted you will need to follow the Firmware Recovery process described in the accompanying Hardware Guide of your ICP RAID controller After ICPCON indicates that the update is complete press any key 8 The focus returns to the Confi...

Page 116: ... subsystem backplane and the ICP RAID controller Through this channel the subsystem can report its temperature and the power supply status to the ICP RAID controller The major objective of SAF TE is auto hot plug In contrast to hot plug auto hot plug allows a defective drive to be simply removed from the subsystem and the replacement unit installed in its place Both the ICP RAID controller and the...

Page 117: ...re 10 61 Select Enclosure The example in Figure 10 62 shows the slots of the enclosure which have been assigned with hard disks To fill an empty slot press Enter and select the desired hard disk See Figure 10 63 Figure 10 62 Enclosure Slots Figure 10 63 Select Disk ...

Page 118: ...ller menu then select the Advanced Settings option and press Enter Within Advanced Settings there are three settings which control the configuration and address behavior of the ICP RAID controller s BIOS and DPMEM ICPCON displays a warning message see Figure 10 64 before allowing you to change these settings Figure 10 64 Advanced Settings Warning Press any key to continue and the Advanced Settings...

Page 119: ...ial care must be taken that the IO processors of a shared channel have different IDs otherwise there will be conflicts A description of each of the cluster settings is provided in Table 10 10 Use the up arrow and down arrow keys to switch between screen options and toggle a setting by pressing Enter to choose a parameter Figure 10 66 Cluster Channels Screen Table 10 9 Advanced Settings Parameter O...

Page 120: ...d time when the parity is verified for example once a day at 9 a m The user may also set the scheduled verification to stop if it encounters a problem or to continue and automatically repair the parity on the RAID A description of each of the Periodic Parity Verify settings is provided in Table 10 11 Use the up arrow and down arrow keys to switch between screen options and toggle a setting by pres...

Page 121: ...ration 10 5 1 9 Remove Enclosure Config To access this menu option from the Advanced Setup menu select the Configure Controller option and press Enter to display the Configure Controller menu then select the Remove Enclosure Config option and press Enter to display the Remove Configuration screen Figure 10 68 Table 10 11 Periodic Parity Verify Settings Parameter Options Description Start Parity Ve...

Page 122: ... to enable you to verify your choice Press Y to remove the configuration or press N to cancel the operation To remove non intelligent enclosure configurations in the Remove Configuration screen select the option Non ICP vortex Enclosure Configuration ICPCON displays a warning message to enable you to verify your choice Press Y to remove the configuration or press N to cancel the operation Figure 1...

Page 123: ...d Cap MB The capacity of the given hard disk in MB 1MB 1024KB 1GB 1024MB Drive Drive number assignment of the given physical device to a logical array host drive Within the Select Physical Drive screen you can scroll the list of devices with the cursor up down keys Press F4 to display any extended information about the selected device Press F5 to switch any available LED s of the corresponding dri...

Page 124: ...ues If you create new host drives via the Express Setup menu ICPCON and the ICP RAID controller will automatically adjust all parameters to their respective best values The transfer rate per drive depends on circumstances like cables terminators etc For example if a certain configuration does not allow 160 MB sec the drive is automatically throttled down to the next trouble free transfer rate see ...

Page 125: ... in MB s Ultra160 SCSI allows up to 160 MB s If a SCSI cable does not permit a certain transfer rate the transfer rate can be reduced to a value that permits trouble free data transfer Lowering the transfer rate may also become necessary when using a configuration which does not allow full speed See Figure 10 71 Disconnect You can connect several components to a SCSI bus It is particularly importa...

Page 126: ...formatting may take a considerable amount of time Note Before formatting ICPCON asks the user whether to delete the Grown Defect table of the hard disk Some users incorrectly believe that a table deletion makes a newly formatted hard disk with grown defects reusable However a re assign occurs when the system accesses the disk s bad sectors resulting in a new grown defect Press Y to delete the grow...

Page 127: ... selected physical drive See Figure 10 73 and table below Figure 10 73 View Defects Status 10 5 2 5 Deinitialize Disk To access this function from the Advanced Setup menu Select the Configure Physical Devices option and press Enter to display the Select Physical Drive screen To enable the Deinitialize Disk option select a disk that is initialized This disk must not belong to a logical drive Press ...

Page 128: ...iously the de initialization cannot restore data that was lost during initialization After you select the Deinitialize Disk option ICPCON displays a message to confirm de initializing the selected disk Press Y to de initialize the selected disk or press N to cancel the function If you press Y ICPCON completes the function and displays the selected disk as no longer initialized no i or fragmented n...

Page 129: ... screen Select an enclosure and press Enter to display the Configure Disk screen Select the Enclosure Status or Enclosure Slot Configuration option and press Enter Before you can use the auto hot plug with a SAF TE subsystem you must configure the subsystem more precisely its intelligence the so called SEP SAF TE Enclosure Processor After you select the Enclosure Status option ICPCON displays the ...

Page 130: ... a SAF TE Subsystem 10 5 3 Configure Logical Drives Configure Logical Drives allows for the setup and maintenance of logical drives hierarchy level 2 From the Advanced Setup menu select the Configure Logical Drives option and press Enter to display the Select Logical Drive menu Figure 10 79 ...

Page 131: ...ogical Drive screen 10 5 3 1 Create New Logical Drive Create new Logical Drive allows you to configure and setup a new logical drive To access this function from the Advanced Setup menu select the Configure Logical Drives option and press Enter to display the Select Logical Drive screen then select the Create new Logical Drive option and press Enter ICPCON displays a list of free physical drives w...

Page 132: ...compared to a chain If for example the logical drive consists of 4 hard disks with 2000MB each the logical drive will have a capacity of 8000MB When data is written to this logical drive the first hard disk is filled first then the second and so on Although it is not advisable logical drives of the type Chain can also be components of array drives 10 5 4 Configure Array Drives The Configure Array ...

Page 133: ...rom the Advanced Setup menu Select the Configure Array Drives option and press Enter to display the Select Array Drive screen Select an array drive and press Enter to display the Array Drive window Select the Change Drive Name option press Enter and type in the new array drive name The Change Drive Name command allows you to change the name of an array drive The name serves to identify an array dr...

Page 134: ...ption allows you to add to a logical drive which is member of an array drive another logical drive as a mirror drive RAID 1 To access this function from the Advanced Setup menu Select the Configure Array Drives option and press Enter to display the Select Array Drive screen Select an array drive and press Enter to display the Array Drive window Select the Add RAID 1 Component option and press Ente...

Page 135: ...he replacement logical drive has to have at least the same capacity as the failed one After you replace the hard disk ICPCON offers a list of existing physical drives which can be used as replacement units The array drive s state changes into rebuild and the missing data is automatically reconstructed on the new drive Remove RAID 1 Component This option corresponds to the Add RAID 1 Component opti...

Page 136: ...e and press Enter to display the Array Drive window Select the Add Hot Fix Drive option and press Enter This submenu option allows you to add a hot fix drive to an existing RAID 1 RAID 4 RAID 5 or RAID 10 array drive There are two different types of hot fix drives Private and Pool hot fix drives A pool hot fix drive is a spare drive within the so called hot fix pool A drive in a hot fix pool is av...

Page 137: ...he array drive is now in the rebuild mode No other hard disk may fail until all data has entirely been reconstructed on the hot fix drive because the system is operating without redundancy without the array drive going into error mode Note In some literature hot fix drives are also referred to as hot spare drives You can also add or remove hot spare drives using ICP RAID Navigator Remove Hot Fix D...

Page 138: ...tion may take quite a long time but you can terminate it by pressing Esc Note If you press the escape key Esc the progress indicator Figure 10 87 will close However parity verify continues to run unless you press the A key to abort the parity verify Note Parity verify has the capability to repair bad parity sectors automatically Figure 10 87 Progress Information Periodic Parity Verify To access th...

Page 139: ...ch are free see Figure 10 88 The selection bar is moved with the arrow up down keys and a logical drive is selected deselected with the space bar Figure 10 88 Create New Array Drive For a striping array RAID 0 4 5 10 the master drive indicated by M is the first logical drive in the array see Figure 10 88 For a RAID 1 array mirroring the master drive is the first logical drive in the array that con...

Page 140: ... redundancy information from the contents of the data stripes It takes longer but can run in the background for example during the installation of the operating system See Figure 10 91 Figure 10 91 Choose Build Type A warning displays that all data will be destroyed after confirmation Figure 10 92 Confirm your choice by pressing Y The array drive is created Figure 10 92 Create Array Drive Confirma...

Page 141: ...rver increases the risk of data loss should a second hard disk fail Therefore new redundancy should be created as soon as possible and in an entirely automated manner Integrate a hot fix drive as an immediately available and auto replacing hard disk to keep the TWR as short as possible Only a hot fix drive can ensure optimal array drive security and constant data availability Of course a hot fix d...

Page 142: ...hich may assist in getting an overview of a specific host drive Press F5 to switch the hard disk LEDs of the selected host drive on and off Press F10 to refresh the window You can create new host drives from the Select Host Drive screen by selecting the Create new Host Drive menu option Figure 10 95 and pressing Enter Before creating a new host drive the ICP RAID controller scans all channels for ...

Page 143: ...0 97 Create Host Drive Confirmation After you press Y ICPCON displays the Strip Size popup window see Figure 10 98 ICPCON defaults to 128 KB stripe size but you may also select 16KB 32KB or 64 KB Figure 10 98 Strip Size After you select the stripe size ICPCON displays the Used Capacity per Drive popup window see Figure 10 99 You may limit the capacity of each selected hard disk for the new host dr...

Page 144: ...uses to determine if you want to configure the selected disks for SAF TE Auto Hot Plug use this option only with hot swap disks and equipment See Figure 10 100 Press Y or N to confirm your choice Figure 10 100 SAF TE Auto Hot Plug ICPCON then asks if you want to set the host drive type to Cluster see Figure 10 101 Refer to your product s Hardware Guide to determine if clustering is supported befor...

Page 145: ... 2 build types the Destructive Build and the Non destructive Build Only available if ICPCON is loaded with Ctrl G the Destructive Build deletes any data by writing a 0 pattern across all hard disks This initialization process is very fast since no read IOs or parity calculation is involved However the initialization build must be successfully finished before leaving ICPCON otherwise the build mode...

Page 146: ... 10 4 1 2 for descriptions of the host drive statuses 10 5 5 3 Host Drive Screen From the Advanced Setup menu select Configure Host Drives and press Enter to display a list of any existing host drives in the Select Host Drive screen To configure an existing host drive highlight the drive in the Select Host Drive screen Figure 10 102 and press Enter The Host Drive screen opens Figure 10 104 The var...

Page 147: ...drive to which several host drives belong after capacity expansion or after splitting the data on ALL other host drives will be lost Split Host Drive Warning This command results in all data being lost For some purposes it might be necessary to split an existing host drive into two or several host drives using the Split Host Drive option To the operating system each new host drive looks like a sin...

Page 148: ...uster Transaction Tracking In a cluster configuration Transaction Tracking logs all changes written to the disks in a specific area on the hard disk transaction container This allows recovery from situations where a hardware problem has occurred Write Through When the Write Through function is enabled the controller uses no write caching on the host drive 10 5 6 Repair Array Drives The Repair Arra...

Page 149: ...CON displays a list of all drives within the selected drive level hierarchy See Figure 10 107 for an example of the Physical Drives statistics In addition to the performance report on the drives the menu monitor displays the hard disk I O channel hard disk ID hard disk name and hard disk gross capacity where 1MB 1024KB The figures shown at TOTAL represent the performance of all drives of the corre...

Page 150: ...orded and saved into a log file This menu option gives the administrator the ability to analyze and supervise array drives See Figure 10 109 Figure 10 109 Controller Events 10 6 3 View Hard Disk Info View Hard Disk Info menu shows information for hard disk drives see Figure 10 110 Figure 10 110 Hard Disk Information The hard disk information includes Channel SCSI ID Vendor Product Type Retries Rea...

Page 151: ...ever a defective block is being accessed the read write actuator has to move to an alternate position and this requires extra time The Grown Defects counter records the number of media defects that have occurred since the hard disk was delivered by the manufacturer A hard disk is in good condition when it has 0 grown defects Any value greater than 0 indicates a grown defect condition For more info...

Page 152: ...s and other events stored in the Flash RAM of the ICP RAID controller The log is a good source of information for analyzing complex events and problems If the buffer is full the oldest events are deleted first Figure 10 113 Screen Service Messages and Async Events Note In the Advanced Setup mode the Configure Controller menu has a Clear Log Buffer option to clear the saved information ...

Page 153: ...e the device parameters Check or recalculate the parity data of RAID 4 and RAID 5 array drives Online capacity expansion of array drives Split and merge host drives Hot Plug Replace a failed member of an array drive Hot Fix Configure a spare disk for an array drive Configure SAF TE compliant enclosures Monitoring of the Whole Subsystem Watch the performance and throughput of virtually every part o...

Page 154: ... Navigator window and shown in a small window To place the toolbar back under the menu bar you can double click on the top window bar of the toolbar or drag and drop the toolbar back under the menu bar You can also place the toolbar on the bottom of the ICP RAID Navigator window Table 11 12 Toolbar Icons Icon Opens Closes Description Select Controller Select a local or remote ICP RAID controller f...

Page 155: ...s Bar 11 2 3 File Menu Commands Use the File Exit command to end your ICP RAID Navigator session Shortcut Press Alt F4 Figure 11 116 File Menu 11 2 4 View Menu Commands Use the items in this menu to open or close the windows of the main components of ICP RAID Navigator or change the appearance of the main window Events Show the ICP RAID controller events Help Shows help information on ICP RAID Nav...

Page 156: ... activate an open window Figure 11 118 Window Menu 11 2 6 The Chart Menu The chart menu appears when you open the Statistics window Here you can add and remove data sources and configure the chart Figure 11 119 Chart Menu 11 2 7 The Configuration Menu Commands The Configuration menu appears when you select the Physical Configuration window see Figure 11 120 or the Logical Configuration window see ...

Page 157: ... Configuration and Logical Configuration windows See Figure 11 122 Figure 11 122 Refresh Rate Settings Dialog These menu options are also available if you click the right mouse button on the corresponding icon in the Physical Configuration or the Logical Configuration windows See Table 11 13 Table 11 13 Configuration Menu Refresh Settings Option Description Refresh on Activates and deactivates the...

Page 158: ...ator and the system equipped with the ICP RAID controller by double clicking on the protocol icon on the very left side of the window see Figure 11 125 If you want to select an ICP RAID controller via TCP IP sockets type in the corresponding TCP IP address or the server system s name see Figure 11 126 Enter a user name and password see Figure 11 127 This information is transmitted with encryption ...

Page 159: ...onfiguration Window The Physical Configuration window shows the physical configuration of the I O channel busses of the selected ICP RAID controller and the devices connected with these busses Click on the Physical Configuration icon to open the window See Figure 11 129 for an example of a Physical Configuration window Figure 11 128 Physical Configuration Icon ...

Page 160: ...left most Controller Settings dialog in Figure 11 131 Right click on the icon to see a submenu with the following options Change Settings Save Information or configure Non Intelligent Enclosures you can also get to this submenu by selecting the controller icon and choosing the Configuration menu Controller submenu at the top of the Physical Configuration window These configuration setting selectio...

Page 161: ...ngs See Figure 11 131 The controller settings are described in Table 11 14 Table 11 14 Controller Settings Setting Description Cache Enables or disables the ICP RAID cache For optimum performance the cache should be always On Delayed Write Enables or disables the write cache function of the ICP RAID cache For optimum performance the write cache should be always On BIOS The BIOS of the ICP RAID con...

Page 162: ...nformation file can also be very helpful for a remote diagnosis of a system If a trained support person has a copy of this file by fax or by e mail it can be used to bring the system back to full operation 11 4 1 3 Non Intelligent Enclosures Right click the controller icon and select Non Intelligent Enclosures See Figure 11 131 For more information about non intelligent enclosures see Section 10 5...

Page 163: ... on a processor see the channel info dialog in Figure 11 132 Right click on the icon to Change Settings Rescan ID s or do a Hot Plug Add Disk See Figure 11 132 you can also get to this submenu by selecting the processor icon and choosing the Configuration menu Processor submenu at the top of the Physical Configuration window These selections are described below Figure 11 132 Processor Information ...

Page 164: ...leted when creating new logical drives All data will be lost 11 4 2 3 Hot Plug Add Disk With the hot plug function you can add a new hard disk while the system is running Before starting the hot plug procedure you should prepare the new hard disk and set the jumpers according to the free SCSI IDs and SCSI bus termination Ensure the correct termination of the SCSI bus and set the ID of the hard dis...

Page 165: ...igator Also these devices have to be reserved for the raw service Thus the removable disk is handled like a non direct access device Double click on the processor icons shown in Table 11 16 to get the Physical Drive window see Figure 11 133 Right click on the icon to open the submenu with the following options see Figure 11 133 SCSI Parameter Initialize Format Disk Check Surface Deinitialize Disk ...

Page 166: ...he Domain Validation only if ICP RAID controller has Ultra160 SCSI channels Set the Synchronous Transfer Rate Enable or Disable the Disconnect Feature Enable or Disable the Tagged Queues Change the Settings of the Hard Disk Read and Write Cache Warning By changing these parameters on a new hard disk or a hard disk which has been connected to a non compatible RAID controller the hard disk will be i...

Page 167: ...tocol must be set to SCSI III Higher frequencies single ended SCSI require better cabling shorter cables and a professional termination of the SCSI bus Domain Validation Domain Validation is a cyclical check of the correct data transfer at a given rate for ICP RAID controllers with Ultra160 SCSI channels Normally this parameter is Off Disconnect This SCSI feature enables a SCSI device to disconnec...

Page 168: ...ces of the selected hard disk media The ICP RAID controller writes and reads certain data patterns and checks them for correctness After you choose the Check Surface option ICP RAID Navigator displays a warning that performing this command will destroy all data Press Y to do a surface check or press N to cancel If you choose to do the surface check ICPCON displays a progress information bar with t...

Page 169: ... Configuration Window The Logical Configuration window shows the logical configuration of host drives array drives and logical drives controlled by the selected ICP RAID controller The complete configuration is shown as a tree starting from the left with the host drives followed by the array drives the logical drives and the physical drives See the Logical Configuration window in Figure 11 143 Cli...

Page 170: ...companying Hardware Guide to determine if clustering is supported on this ICP RAID controller product Clustering means that two or more servers share resources If one server fails its resources move to another valid server The hard disks used for clustering are physically connected not with just one ICP RAID controller but with several ICP RAID controllers in different servers shared I O channels ...

Page 171: ...troller This is a host drive on a clustering I O channel This host drive is configured as a private host drive and does not belong to the selected ICP RAID controller A private host drive cannot be used for clustering Note Refer to the accompanying Hardware Guide to determine if clustering is supported on this ICP RAID controller product Clustering means that two or more servers share resources If...

Page 172: ...drives consist of logical drives They can be fault tolerant depending on the RAID level The RAID level is displayed under the array drive icon Double click on an icon to get more information on the state of an array See Figure 11 135 Right click the desired drive to select an array drive option ...

Page 173: ...Software Installation and User s Guide 173 ICP RAID Navigator Table 11 20 Array Drive Icons Icon Description RAID 4 5 10 Right click to select a drive option RAID 1 RAID 0 ...

Page 174: ...nt to change the settings you must do so in the Physical Configuration window 11 5 5 The Host Drive Information Window Double click on the icon for an existing host drive This window contains information on the selected host drive See Figure 11 135 Table 11 21 Logical Drive Icons Icon Description Right click to select a drive option Table 11 22 Physical Disk Icon Physical Disk Use the Physical Con...

Page 175: ...he system the system will boot from the host drive with the lowest number Name The name of the host drive A host drive is automatically given a name during the configuration It can be renamed by selecting the menu Drive Name of the menu list you get after clicking with the right mouse button on the host drive icon Capacity The host drive capacity reported to the operating system The size of a host...

Page 176: ...onent of a disk array is missing during startup and the operator decides not to activate fail mode the array is set to the read only attribute RO When the missing drive becomes available the array drive shows the ready status for example attribute RW Striping Size RAID 0 5 10 Data written on RAID 0 4 5 or RAID 10 drives is distributed over all drives striping The striping size can only be changed ...

Page 177: ... drives or host drives Attributes The attribute of a logical drive is usually read write RW If a component of a disk array is missing during startup and the operator decides not to activate fail mode the array is set to the read only attribute RO When the missing drive becomes available the array drive shows the ready status for example attribute RW Last Status The last status information of a log...

Page 178: ...nd its related host drives if it is split into several host drives must be deleted before the host drive can be removed 11 5 11 Create New Host Drive Double click on the new host drive icon Only host drives are visible to the operating system The underlying structure of the host drives is not known to the operating system The operating system does not recognize that a given host drive consists of ...

Page 179: ...ves or press the Ctrl key and then click on all the physical drives you want to combine to a new array When you have finished the selection of the physical drives choose the type of host drive you want to create and click on OK If the selected host drive uses data striping RAID 0 4 5 or 10 you can change the default striping size If you have selected a configuration with hot fix drives you can cho...

Page 180: ...tion or hardware error from a defective drive or an overheated drive After removing the reason of the data corruption you can carry out parity recalculate to ensure that the parity information of this disk array becomes valid Figure 11 141 Parity Verify 11 5 13 Progress Information Click the right mouse button on the array drive or physical drive icons The progress information window shows the pro...

Page 181: ... Tool Install allow the online integration of new disk capacity Depending on the RAID level the current array drive has selecting a different one will cause the Migration of the RAID level of the array drive If you select the same RAID level the following procedure will expand the capacity of the array drive only Figure 11 143 Logical Configuration If you want to add additional drives to the array...

Page 182: ...stopped for example when the hot fix drive is not needed Thus it may take a few seconds to get a response when you click on that drive Some general notes on hot fix drives One of the reasons RAID array drives are used lies with the data redundancy they provide that is the data security you have in the event of a hard disk failure For the purpose of the following considerations we define the term t...

Page 183: ...ay drive To be able to activate this feature there must be suitable logical drives in the hot fix pool You can add drives to the hot fix pool using the function Add Hot Fix Drive By doing so the hot fix pool access for this specific array drive is activated automatically For all other arrays drive you must activate the access manually 11 5 18 Add RAID 1 Component Mirror a Drive Click the right mou...

Page 184: ...ox where you see all members of the RAID 1 array drive After confirmation the logical drive is removed If the RAID 1 array drive consists of two drives the RAID 1 array drive disappears and only one logical drive is left You can create a new RAID 1 array drive by selecting add RAID 1 11 5 20 Replace Drive Click the right mouse button on the logical drive icon If a logical drive of an array drive w...

Page 185: ...ined support person a printout of the Save Information file is extremely helpful 11 5 21 1 The Ready State The array drive is fully operational when in the ready state All redundant information is present that is a hard disk can fail without impairing the functionality of the array drive This is the normal state of an array drive The ready expand state indicates that the RAID level and or capacity...

Page 186: ...rive that is already connected with the controller but not yet used for a logical drive with the replace drive function or by using the Hot Plug Replace Drive function If a hot fix drive has previously been assigned to an array drive the ICP RAID controller will automatically replace the defective drive and start the reconstruction of the data and the redundant information Therefore under these ci...

Page 187: ...1 Statistics Window Icon The statistics window displays the throughput of physical logical and host drives The vertical axis show throughput the horizontal axis time You can add drives by dragging and dropping them from the physical and logical configuration windows into the statistics window To change the layout of the lines adjust the scales of the axis or remove drives from the statistics windo...

Page 188: ...188 Software Installation and User s Guide ICP RAID Navigator Figure 11 152 Statistics Window 11 7 The Events Window Figure 11 153 Events Window Icon ...

Page 189: ... the polling interval and enable the auto save function Logs that are not saved on the hard disk are lost when the system is reset The auto save function saves the current log in the time intervals selected The Save As button allows you to write the contents of the event log of file extension evt to a specific file on the hard disk The Load button loads an older event log and displays it The last ...

Page 190: ...line help function You can choose the Help menu or the pointer with the question mark to obtain online help for an icon or function There is also an index which allows you to search for certain keywords and or topics The Help menu also allows you to view the version of ICP RAID Navigator Figure 11 155 ICP RAID Navigator Help ...

Page 191: ...s control panel applet See Figure 11 156 Figure 11 156 Services To configure the RAID Configuration Service double click on the RAID Configuration Service icon See Figure 11 157 The Poll Interval determines the time between two message acquisitions of the RAID Configuration Service Under Workstation you can add workstations which receive broadcast messages from the ICP RAID controller In the devic...

Page 192: ...Guide ICP RAID Navigator Figure 11 157 RAID Configuration Service In the IOCTLSrv property sheet you can add remove users which have remote access to the ICP RAID controller via ICP RAID Navigator Passwords are encrypted See Figure 11 158 ...

Page 193: ...fined workstations See Figure 11 159 Figure 11 159 RAIDMail After loading RAIDMAIL EXE and selecting Settings configure the mail tool If you select Local System all messages are displayed on the server itself If you select Log file you are asked for a log file path name See Figure 11 159 All messages are recorded into this file Figure 11 160 Remote System allows you to add workstations to which me...

Page 194: ...r Figure 11 160 Log File Name Figure 11 161 Workstation Names Figure 11 162 illustrates a typical message generated by RAIDMail The Mail option allows the interfacing to a standard mailing system like Microsoft Outlook or Exchange Figure 11 162 RAIDMail Utility ...

Page 195: ...I O bus Host based RAID controllers are ideally suited for cluster systems designed to avoid single points of failure the components that cause a system failure when they fail The choice of host based RAID controllers for the nodes of a cluster system implements the appropriate redundancy and security in the mass storage part of the system In contrast external RAID controllers carry the risk of be...

Page 196: ...d Isolators or Converters are all important A 1 2 Hardware Installation SCSI channels which are used as a shared I O bus require 2 SCSI Bus separators per shared channel to ensure that the shared channel will work even if a server is switched off or if the bus is separated from the ICP RAID controller in one of the servers A 1 3 Using ICP RAID Controllers with SCSI Interfaces Both ICP RAID control...

Page 197: ... This can be a drive a partition or a subdirectory This resource is a kind of information exchange area which are used by both Nodes An MSCS can not be configured or started without this kind of Quorum Resource In addition to this resource other or more disk arrays are normally configured as shared user data hard disks These disks must be NTFS formatted If one of the Nodes fails the remaining serv...

Page 198: ...an SQL database server on Node 2 Both Nodes can communicate with each other via the normal network User LAN It is possible to link the Nodes with an additional network Private Network Microsoft urges the user to use two Interconnects 1 Public Network as User LAN and a Private Network for the Nodes for OEMs with original MSCS equipment The diagram on the previous page shows this kind of configurati...

Page 199: ...t you install cluster array drives To setup a cluster array drive which will contain NCS Cluster volumes follow these rules With the exception of one server unit all other server units of the Cluster should be switched off On this server unit the Cluster array drive receives its initial setup At system boot level of this one server unit press Ctrl G to enter the ROM resident ICPCON program Choose ...

Page 200: ...server which is designed for that scenario Thus a standard application for example a simple copy job will fail and terminate with an error message in an active active failover situation Note Install on the Client ConsoleOne a Java Tool current version to be able to manage the Netware Cluster Note ConsoleOne running on the server does not support the Netware Cluster Services With ConsoleOne you can...

Page 201: ...er with all its individual servers and switch them off 2 Switch on only one of the servers and enter ICPCON with Ctrl G 3 Change the drive type of the Cluster Array into Private 4 Expand and or migrate the array and wait until this process is completed 5 Change the drive type of the Cluster Array back into Cluster 6 Restart the Cluster A 1 6 7 Notes on the ICP RAID Navigator ICP RAID Navigator A d...

Page 202: ...tion and User s Guide Optional Features In Figure A 4 two disk drives within the RAID 1 disk array have been moved to the currently displayed ICP RAID controller Figure A 4 Channel Settings Figure A 5 Cluster Administration ...

Page 203: ...ed procedure moving two disk drives back to the other ICP RAID controller is displayed Figure A 7 The shared host drive still belongs to this ICP RAID controller Now it is moved within the cluster administrator to the other node with the other ICP RAID controller See the drop down menu in Figure A 7 Figure A 7 Cluster Administration ...

Page 204: ...1 host drive would be displayed with all its components allowing configuration changes to these components Figure A 9 Logical Configuration A 2 PCI Hot Plug Overview The PCI Hot Plug PCI HP specification defines the requirements for adapter cards system platforms and system software to enable the insertion and removal of PCI adapter cards without turning off the platform or rebooting the operating...

Page 205: ...I slot Surprise Removal the removal of the card while the slot still powered is not supported PCI Hot Plug enables the features of replacement repair Hot Replacement addition Hot Addition adapter update and deletion Hot Deletion of PCI adapters Hot Replacement consists of replacing an unusable adapter in a system utilizing in sequence the Hot Removal followed by the Hot Insertion functions of PCI ...

Page 206: ...ay drives is not recommended Warning Disk Chaining does not offer any form of data protection B 1 1 Configuring a Chaining Set Using ICPCON 1 Select Create New Host Drive 2 Select 2 or more drives 3 Press Enter and select Chaining B 1 2 Configuring a Chaining Set Using ICP RAID Navigator 1 Click on the New host drive icon 2 Select the Configuration menu then Host Drive Create New A new host drive ...

Page 207: ...ow information about your Fibre Channel is presented This section covers these differences C 1 Boot BIOS Message During system POST the ICP RAID Controller BIOS check informs the user of the state of the Fibre Channel loops In Figure C 1 the screen shows that Loop A has been initiated and Loop B has not been initiated Note Color was added to screen only to highlight This would be expected for a si...

Page 208: ...ical Device Configuration Screen In addition to the standard information provided in the Configure Physical Device menu option see Section 10 5 2 information also displays about FC I O channels and available FC devices See Figure C 2 for details Note In a dual channel configuration shared FC devices are denoted by in the channel information column Figure C 2 Physical Device Configuration Screen ...

Page 209: ...el Information In the Configure Physical Devices screen Figure C 2 note an FC I O processor for each FC channel Select one of these processors and press F4 to display the screen in Figure C 3 about Fibre Channel information for that channel Figure C 3 Fibre Channel Information Screen ...

Page 210: ...about FC I O channels and available FC devices The first noticeable difference is in the Physical Configuration window Note that the icons for the SCSI I O processor as explained in Section 11 4 2 and the FC AL are different See the Physical Configuration window in Figure C 4 for details Figure C 4 ICP RAID Navigator Physical Configuration Window ...

Page 211: ...our RAID controller Ensure that your FC AL loops are initialized See the section of your FC enabled ICP RAID Controller s Hardware Guide entitled Configuring Single and Dual Loops to ensure that your loop is configured correctly Also see Section C 1 Boot BIOS Message to ensure that your loops are initialized Ensure that your controller is running at a 2G Link Speed To check use one of these method...

Page 212: ...r menu select Controller Settings 5 From the Controller Settings menu select SES Support 6 Press ENTER 7 Select Disabled or Enabled C 3 2 SES Verification You can use ICPCON or ICP RAID Navigator to verify SES status C 3 2 1 Verifying SES Status in ICPCON 1 From ICPCON X ROM select the contoller The Express Setup menu opens 2 Press F4 The Advanced Setup menu opens 3 From the Advanced Setup menu se...

Page 213: ...on and User s Guide 213 Fibre Channel Features Copyright 2003 ICP vortex Computersysteme GmbH ICP Intelligent Computer Peripherals is a registered trademark Other names and brands may be claimend as the property of others ...

Page 214: ...214 Software Installation and User s Guide Fibre Channel Features ...

Reviews: