background image

EN - 13

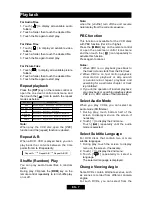
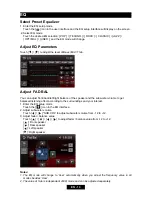
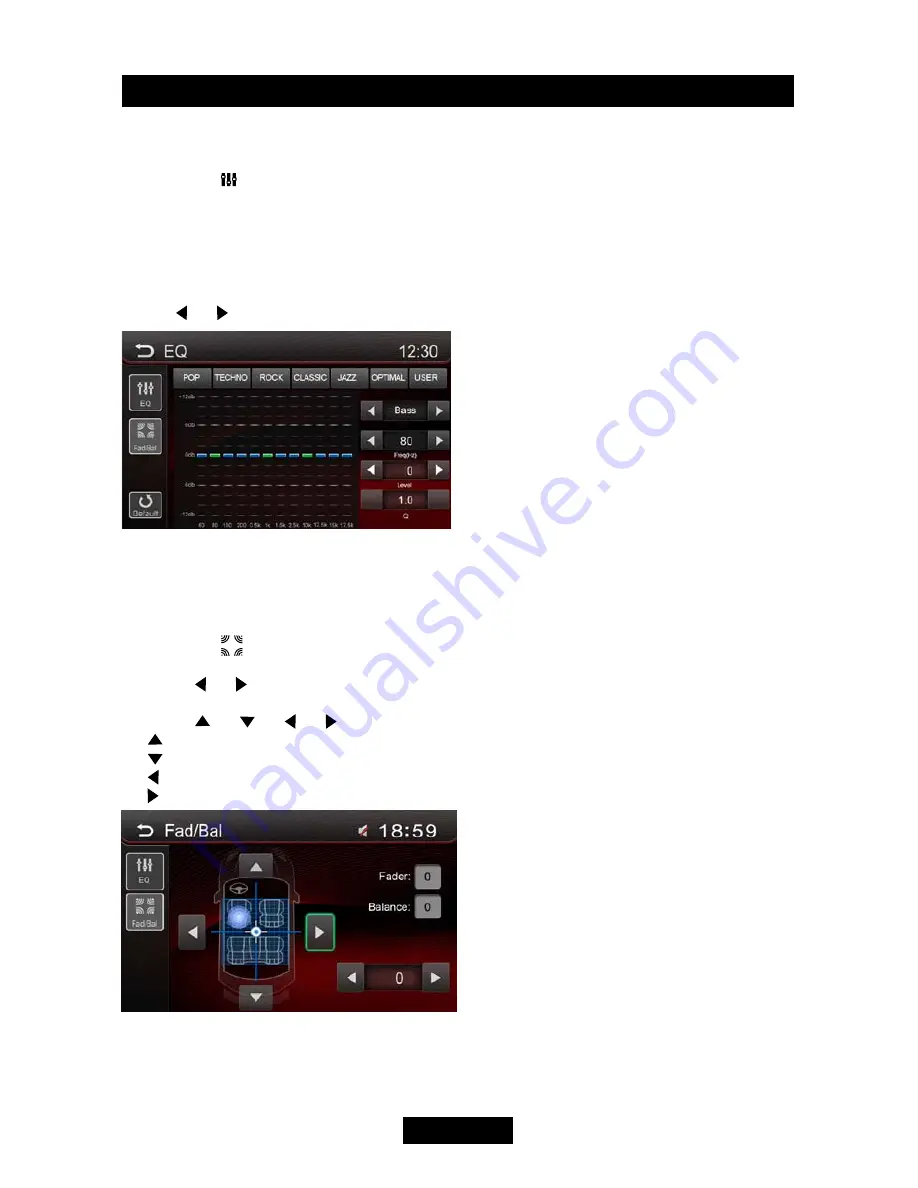
Select Preset Equalizer

1. Enter the EQ setup mode

  Touch the [   ] icon in the user interface and the EQ setup interface will display on the screen.

 2. Select EQ mode

  Touch the desired EQ selection: [ POP ] / [ TECHNO ] / [ ROCK ] / [ CLASSIC ] / [ JAZZ ] /               

[ OPTIMAL ] / [ USER ], and the EQ mode will change.

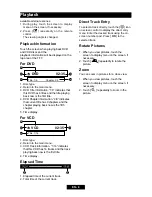
Adjust EQ Parameters

Touch 

[   ] / [   ]

 to adjust the level of Bass / Mid / Treb.


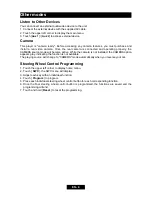
Adjust  FAD BAL

You can adjust front/back/left/right balance of the speaker and the subwoofer volume to get 

balanced listening effect according to the surroundings and your interest. 

1. Enter the EQ setup mode
    Touch the [ 

 ] icon in the EQ interface.

2. Adjust subwoofer volume

    Touch [   ] / [   ] “SUB VOL” to adjust subwoofer volume from -12 to +12.

3. Adjust fader / balance value

    Touch [   ] / [   ] / [   ] / [   ] to adjust fader / balance value from -12 to +12.

    [   ]: Front speaker

    [   ]: Rear speaker

    [   ]: Left speaker

    [   ]: Right speaker

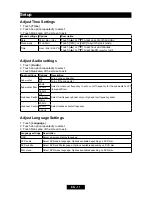
Notes:

1. The EQ mode will change to ‘User’ automatically when you adjust the frequency value in all 

modes besides ‘User’.

2. The value of Sub is independent of EQ mode and can be adjusted separately.

EQ

Summary of Contents for DV7B01

Page 1: ...DVD CD VCD MP3 WMA USB PLAYER BLUETOOTH WITH FM AM TUNER DV7B01 Operation Instructions ...

Page 2: ...e or water to prevent electronic sparks or fires Warnings 5 Please don t change the fuse in the power cord without professional guidance improper fuse may cause damage to this using unit or even cause fire 6 Please power off this unit at once and send it back to the after sales service center or the dealer distributor you purchased from if one of the following symptoms is found a No audio output b...

Page 3: ... the screen avoid touching it with sharp objects 8 The monitor employs auto motorizing mechanism please don t push pull or swivel the monitor manually to prevent damage to the core mechanism 9 To provide a clear demonstration and an alternative for easy understanding to the operation of this unit graphic illustrations areused However these illustrations are some different from the actual images di...

Page 4: ...guage 7 Change Viewing Angle 7 Playback Information 8 For DVD 8 For VCD 8 Elapsed Time 8 Direct Track Entry 8 Rotate Pictures 8 Zoom 8 Other modes Listen to Other Devices 9 Camera 9 Steering Wheel Control Programming 9 Setup Display System 10 Adjust General Settings 10 Adjust Video Settings 10 Adjust Time Settings 11 Adjust Audio settings 11 Adjust Language Settings 11 Adjust DVD Rating 12 Adjust ...

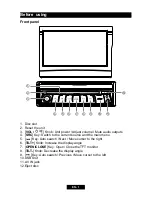
Page 5: ...itch to the current source and the main menu 5 Key Auto search Next Move cursor to the right 6 TILT Knob Increase the display angle 7 OPEN CLOSE Key Open Close the TFT monitor 8 TILT Knob Decrease the display angle 9 Key Auto search Previous Move cursor to the left 10 USB Slot 11 AV IN jack 12 Eject disc ཱ ི ཱི ུ ཱུ ྲྀ ཷ ླྀ ཹ ེ ཻ ...

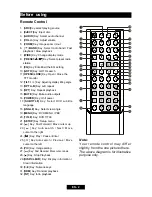
Page 6: ... Open Close the TFT monitor 12 TILT Key Adjusting display tilting angle 13 RPT A B Key A B repeat 14 RPT Key Repeat playback 15 MUTE Key Mute audio outputs 16 POWER Key Unit power 17 SUBTITLE Key Select DVD subtitle language 18 ANGLE Key Select view angle 19 MENU Key DVD MENU PBC 20 TITLE Key DVD TITLE 21 SETUP Key Setup menu 22 Key Fast Forward Move cursor up 23 Key Auto search Next Move cursor t...

Page 7: ...rmal condition If the remote control can t work please change the battery 5 Use button shaped lithium battery CR2025 3V only 6 DO NOT recharge disassemble heat or expose the battery in fire 7 Insert the battery in proper direction according to the and poles 8 Store the battery in a place where children cannot reach to avoid the risk of accident Uninstall Battery Slide out the battery compartment t...

Page 8: ...r to adjust the volume to the desired turn on volume Push and hold the rotary encoder while the blue speaker icon and level indication is displayed on the screen The unit will beep to confirm your turn on volume setting Using the TFT Monitor Open Close monitor Press the OPEN CLOSE key on the front panel or remote control topush the display panel out or in Change the monitor tilt angle Due to the i...

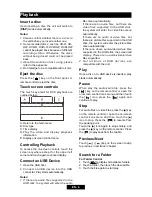
Page 9: ... step 3 Touch OK to enter Preset station The unit has 5 bands such as FM1 FM2 FM3 AM1 AM2 and each band can store 6 stations hence the unit can store 30 stations in total Manual store 1 Tune to a station 2 Touch and hold one of the channels 1 to 6 to save the selected band Search Stations Automatically Touch to search station and store the 6 strongest stations in the current band automatically Rec...

Page 10: ...nter the audio files menu automatically If there are no audio files but there are video files supported in the USB stick the system will enter the video files menu automatically If there are no audio or video files but there are picture files supported in the USB stick the system will enter the picture files menu automatically If there no above audio video picture files supported in the USB stick ...

Page 11: ...ly to activate this function Press again to cancel Notes 1 When PBC is on playback goes back to the track list and starts from the first track 2 When PBC is on fast motion playback slow motion playback or skip search is available but repeat playback and searching for a particular chapter or track is prohibited 3 If you do the operation of random playback scan playback or searching playback when PB...

Page 12: ...splay For VCD 1 Disc type 2 Return to the main menu 3 VCD Track information 1 16 indicates that this VCD has 16 tracks and the track playing back now is the first title 4 Time display Elapsed Time 1 Elapsed time of the current track 2 Total time of the current track Title 1 6 Chapter 2 9 DVD 02 35 Title 1 16 VCD 02 35 Direct Track Entry To select a track directly touch the icon on screen control t...

Page 13: ...me active While the camera is not installed the CAMERA option appears gray indicating the function is not available The playing source will change to CAMERA mode automatically when you reverse your car Steering Wheel Control Programming 1 Touch the upper left corner to display home menu 2 Touch SWC the SWC menu will display 3 Adjust each key with an individual function 4 Touch Program to program 5...

Page 14: ...alid you should calibrate the touch screen using the calibration setting function Adjust the response positions of the touch panel as followings 1 Press the Calibration option on the setup menu to enter 2 Touch Yes to enter 3 Press and hold the center of for 5 seconds the will move automatically 4 Aim at center of follow the path as shown in the figure Once steps 1 4 are complete the system will a...

Page 15: ... Turn off the subwoofer Sub woofer filter 80Hz Select a crossover frequency to set a cut off frequency for the subwoofer s LPF low pass filter 120Hz 160Hz Loudness Switch Off Select low frequency boost only or high and low frequency boost Lo Boost HiGLo Loudness Center 400Hz Select loudness center frequency 800Hz 2 4KHz Adjust Language Settings 1 Touch Language 2 Touch an option repeatedly to sele...

Page 16: ...ental guidance is advised for children under the age of 17 NC 17 Unsuitable for children under age 17 Adult Acceptable for adults only Load factory Restore to default settings Version Info The Version Sub menu is used to identify the model and resident operation system as well as the hardware and software versions Adjust Volume Settings You can set different volumes for different modes 1 Touch Vol...

Page 17: ...of the speaker and the subwoofer volume to get balanced listening effect according to the surroundings and your interest 1 Enter the EQ setup mode Touch the icon in the EQ interface 2 Adjust subwoofer volume Touch SUB VOL to adjust subwoofer volume from 12 to 12 3 Adjust fader balance value Touch to adjust fader balance value from 12 to 12 Front speaker Rear speaker Left speaker Right speaker Note...

Page 18: ...l l s p e a k e r w i r i n g connections Poor sound quality or distortion Piratic disc is in use Use original disc Speaker power rating does not match unit Replace speakers Wrong connections Check wiring and correct Speaker is shorted Check wiring and correct Tel Mute malfunction MUTE wire is grounded Check the MUTE wiring and correct Unit resets itself when engine is off Incorrect connection bet...

Page 19: ...with proper region code PBC cannot be used during VCD playback PBC is not available on the disc Use disc with PBC available Repeat or search function is invalid during VCD playback PBC is on Turn PBC off Error messages No disc Disc is dirty Clean disc with soft cloth Disc is upside down Insert disc with label side up No disc inside Insert disc Bad disc Disc is dirty Clean disc with soft cloth Disc...

Page 20: ...t P CONT lead to the power lead of the external power amplifier otherwise electric spark or other damage may be resulted Never ground the speaker output to prevent the damage to the built in power amplifier The minimum rating of the speakers connected to this unit is 50W with 4 to 8Ω impedance Control Cables Auto Brightness Control To avoid the display being too bright at night time if the headlig...

Page 21: ...EN 17 Device connections Parking Brake Cable Connections Reverse Driving Cable Connections ...

Page 22: ...ve any other audio system from the car 2 Insert the mounting sleeve into the dashboard Fix it firmly in place by folding down the metal tabs 3 Perform the required electrical connections 4 Then check that everything works before installing the main unit 5 Remove the two screws on the top of the unit otherwise the unit will not work 6 Install the car radio in the dashboard using the supplied screw ...

Page 23: ...rtion 0 5 Frequency Response 3dB 20Hz 20KHz Audio Input Level 0 4Vrms Audio Audio Output Impedance 200Ω Audio Output Level 2Vrms Max Audio Input Level 0 4Vrms Under normal audio input level and maximum volume Video Normal Video Input Level CVBS 1 0 0 2V Video Input Impedance 75Ω Video Output Impedance 75Ω Video Output Level 1 0 0 2V Under normal video input level TFT monitor Screen Diagonal 7 inch...

Page 24: ...rent from that to which the receiver is connected Consult the dealer or an experienced radio TV technician for help FCC Radiation Exposure Statement This equipment complies with FCC radiation exposure limits set forth for an uncontrolled environment This equipment should be installed and operated with minimum distance of 20 centimeters between the radiator and your body This item incorporates copy...

Page 25: ...EN 21 Wiring Diagram ...

Page 26: ...CLASS 1 LASER PRODUCT P N 127075005684 ...

Reviews: