General Instructions
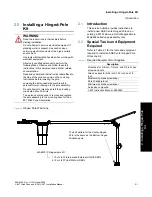
Installing a Hinged-Pole Kit
96A0345, Rev. H 13 October 2009
2-4
L-807 Wind Cone and ICAO L-807, Installation Manual
2 - Installing a Hinged-
Pole Kit
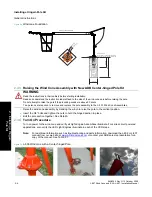
Figure 2.4.
Windcone Foundation
2.3.3
Raising the Wind Cone Assembly with New ADB Center-hinged Pole Kit
1.
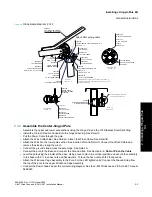
Raise the wind cone assembly by cranking the winch to raise the pole to the vertical position.
2.
Insert the 3/8” bolts and tighten the nuts to hold the hinged section in place.
3.
Bolt the pole section together. See Detail A.
2.3.4
Turn On Procedure
Turn on power to the wind cone and verify all Light Engine Assemblies illuminate. For series circuit powered
applications, also verify the LED Light Engines illuminate in each of the CCR steps.
Note:
For additional information such as troubleshooting and parts information, download the L-806 or L-807
manual from our web site at
or contact your ADB sales representative for a
copy of the manual. See Table 2.1.
Figure 2.5.
L-806 Windcone with a Center-hinged Pole.
WARNING
Read the instructions in their entirety before starting installation.
Read and understand the instruction label affixed to the side of the wind cone pole before raising the pole.
Do not attempt to raise the pole if the prevailing winds are above 20 knots.
Two persons are required to remove and replace the pole assembly to the L- 807 Wind Cone Assemblies.
WC807-22400 SHOWN
8-inch bolt circle
Leave at least 1-in below bolt for leveling
4-in
Torque the hex nuts to 40/42 foot-pounds
18-inch
60-inch
1-inch Conduit
8-inch Bolt-circle
30-inch
Summary of Contents for L-807
Page 7: ......


