Cabling the Chassis
LTPH-SM-1052-04
8
July 14, 2002
HMS-358 List 5 and List 6
C
ABLING
THE
C
HASSIS
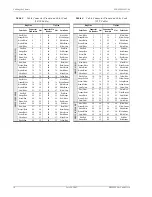
The HMS-358 allows for several network interface configurations:
•
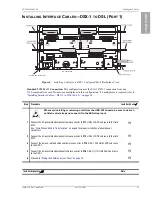
DS3 (see
“Installing Interface Cables—DS3 or STS-1 to DSL” on page 12
•
STS-1 (see
“Installing Interface Cables—DS3 or STS-1 to DSL” on page 12
•
DSX-1 (see
“Installing Interface Cables—DSX-1 to DSL (Port 2)” on page 14
)
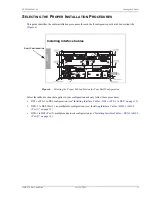
Depending on which of these shelf configurations you ordered, locate the proper cable installation procedures as
detailed in
“Selecting the Proper Installation Procedures” on page 32
D
RAIN
W
IRE
AND
C
ABLE
T
IE
I
NSTALLATION
To satisfy Network Equipment-Building System (NEBS) requirements, it is necessary to connect a drain wire
from a female amphenol cable connector to a male amphenol backplane connector. Cable ties are included in each
kit to secure the cables to the backplane. The following procedure should be repeated for each amphenol
connector.
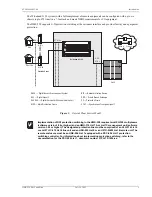
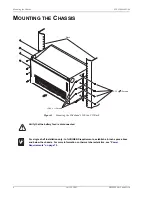
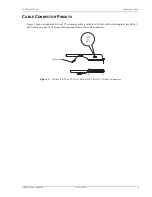
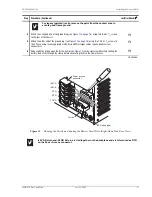
Figure 4.
Installing the Drain Wire and Cable Tie for all Amphenol Connectors
The grounding of shielded cables should always conform to local codes. To avoid ground
loops, confirm that all shielded cables are grounded at only one end.
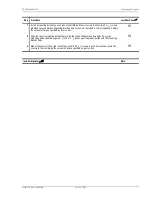
Step
Procedure
1
Place the 4-40 x 1
3
/
8
-inch screw through the drain wire, the screw hole on the female amphenol cable connector, and the
screw hole on the male amphenol backplane connector. (See
.) Tighten the screw until the connector is securely
attached.
2
Lace a cable tie through the tie base on the male backplane connector, thread the tip of the tie through the eye of the tie,
and then pull the tip until the cable tie is completely snug.
Amphenol connector
Drain wire
Cable tie
Backplane connector
4-40 1 / inch PH screw
3
8


