Installing Multiplexers
LTPH-SM-1052-04
56
July 14, 2002
HMS-358 List 5 and List 6
S
ETTING
U
P
C
IRCUIT
ID
S
4
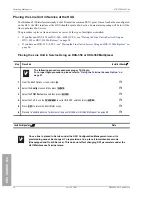
Slide the remote unit into the card guides for the desired slot, then push the unit into the enclosure
until it is seated in the card-edge connector. The unit should snap into place, indicating that the unit
is properly seated. The HRU should power up within 30 seconds.
H
5
Proceed to
on this page.
H
Installer Signature
?
Date
The craft port on an HRU can be accessed for configuration whether or not it is managed by
an HMU. Refer to
“Configuring the Management Unit” on page 29
and the HRU user manual for
more information about provisioning the HRU.
Step
Procedure
Installer Check
ü
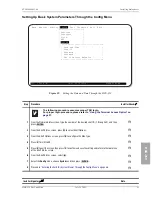
The following procedure assumes proper TAO login.
For proper login procedure, please refer to
“Using the Terminal Access Option” on
.
1
From the Shelf Status screen, type the number of the line unit, and then press
.
H
2
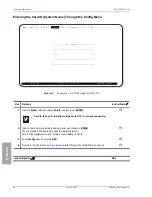
From the Maintenance Terminal Main menu, select
from the Main menu to display the line unit
System Inventory screen.
H
3
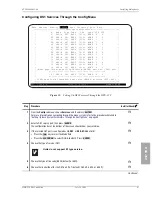
Press the corresponding letter of the unit of which you want to change the circuit ID.
H
4
Type a text string of 32 alphanumeric characters or less to identify the unit and then press
.
H
5
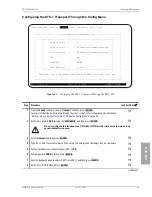
Press
to exit the System Inventory screen, and then choose
to confirm.
If more than 24 characters are typed, a warning beep is emitted and only the first 24 characters are
accepted.
H
6
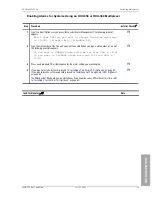
If you would like to perform a loopback test of the line at this time, follow the instructions provided
in the HRU user manual.
Loopback testing allows verification of the integrity of the HDSL channel to the HLU as well as the
DS1 channel to the customer and the HLU DSX-1 interface. A loopback testing diagram is found on
the inside front panel on the chassis as well as in
“Installing a Test Card (HTC) (Optional)” on
H
7
Repeat
through
for each line that you plan to activate.
H
8
Press
to exit the Network Status screen
.
H
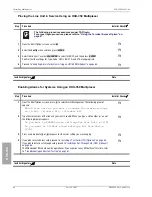
9
“Placing the Line in Service” on page 57
.
H
Installer Signature
?
Date
Step
Procedure (Continued)
Installer Check
ü
ENTER
H
ENTER
E
C
ESC


