background image


15 


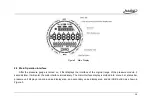
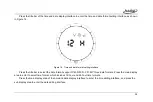
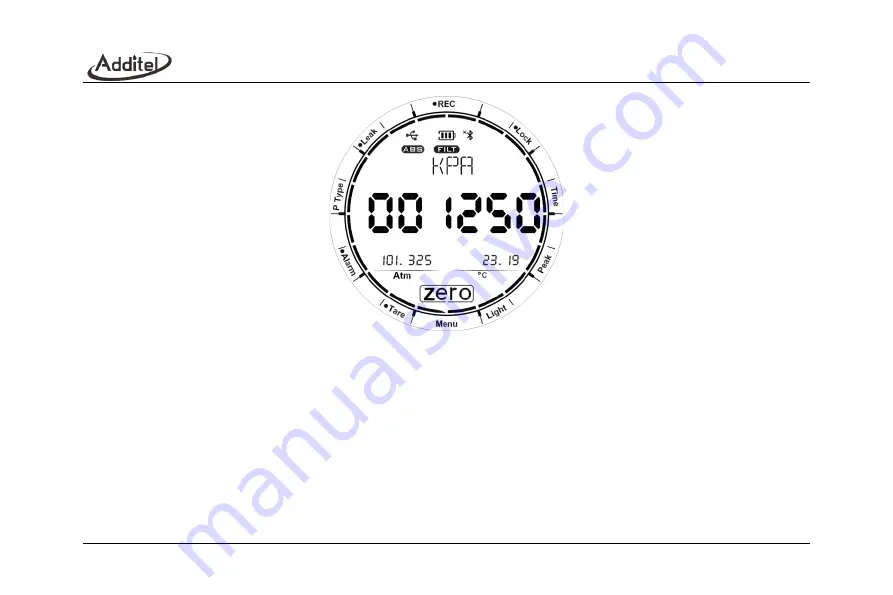
Figure 3    Main Operation Interface 

1. Menu Bar

The main interface displays the following menus, click the menu to enter or enable different functions: 

(1) Menu

Click to enter the system setting function interface, in other interfaces, the Menu button is used to return to 

the previous interface. 

(2) Tare

Enable or disable the tare function, after this function is enabled, the set Tare value will be displayed on the 

right side of the secondary value display area, press it to enter the editing interface to edit this value.   

(3) Alarm

Enable or disable the alarm function. After this function is enabled, the left and right sides of the 

secondary value display area will display the lower limit and upper limit of the alarm respectively. Press it to edit 

separately. 

Summary of Contents for ADT685

Page 1: ...685 685Ex Advanced Digital Pressure Gauge Manometry cyfrowe do pomiaru ciśnienia ADT685 i ADT685Ex Additel http acse pl ...

Page 2: ...ADT685 685EX Advanced Digital Pressure Gauges User Manual Version 2103V01 Additel Corporation ...

Page 3: ...ons for the ADT685 685EX Advanced Digital Pressure Gauges To ensure correct operation and safety please follow the instructions in this manual Additel Corporation reserves the right to change the contents and other information contained in this manual without notice ...

Page 4: ......

Page 5: ...11 2 OPERATION 13 2 1 Main Display 13 2 2 Main Operation Interface 14 2 3 Buttons 16 2 4 Pressure Measurement 17 2 4 1 Pressure Percentage Indication 17 2 4 1 Pressure Zeroing 18 2 4 2 Pressure Unit Switching 19 2 4 3 PressureType Switching 19 2 4 4 Pressure Tare 19 2 4 5 Alarm 19 2 5 Pressure Peak Recording 19 2 6 Pressure Leak Test 21 2 7 Data Logging 24 ...

Page 6: ...nications 32 3 1 1 Bluetooth 32 3 1 2 RS232 RS485 34 3 1 3 4 20mA 35 3 1 4 SWITCH Settings 36 3 2 Auto Power Off Settings 37 3 3 Filter Settings 37 3 4 Pressure Reading Display Rate 38 3 5 Calibration 39 3 5 1 Calibration Interface 39 3 5 2 Pressure Calibration 40 3 5 3 Barometric Calibration 42 3 5 4 4 20 mA Calibration only available when using 4 20 mA module 43 3 6 Restore to Factory Settings 4...

Page 7: ... 3 7 6 Touch Sound Settings 45 3 8 Malfunction Information 45 3 9 Operation Error Codes 47 4 COPYRIGHT 48 APPENDIX A RS232 MODULE DB9 PINS DESCRIPTION 48 APPENDIX B RS485 MODULE DB9 PINS DESCRIPTION 49 APPENDIX C SWITCH MODULE PINS DESCRIPTION 51 APPENDIX D DUAL CABLE 4 20 MA MODULE PINS DESCRIPTION 52 APPENDIX E SPECIAL NOTICE FOR ADT685EX CABLE 53 APPENDIX F ADT685EX EX PROOF DESCRIPTION 54 ...

Page 8: ......

Page 9: ...ollowing instructions Please read the user manual before using the product Before using the product please check the appearance of the product to ensure there is no damage Please refer to the operation steps in the manual when using the product Please be sure to store transport and use this product in the correct direction If the product is damaged or malfunctions please do not use it and contact ...

Page 10: ...njury please obey the instruction manual for use To prevent possible damage please do as follows Do not use the instrument in a high vibration environment If the gauge is abnormal please stop using it and contact with Additel ...

Page 11: ... can also be widely used for precision pressure measurement The power consumption of ADT685 ADT685EX is very low which is suitable for long term continuous work Up to 20 000 hours under ultra low power consumption mode The ADT685 ADT685EX also has excellent electromagnetic compatibility characteristics it has obtained the CE certification of the most authoritative organization and can be used in v...

Page 12: ...5 N A 3X GP5 5 0 35 G L 0 05 0 1 3X GP10 10 0 7 G L 3 0 02 0 05 0 1 3X GP15 15 1 0 G L 3 0 02 0 05 0 1 3X GP30 30 2 0 G L 3 0 02 0 05 0 1 3X GP50 50 3 5 G L 0 02 0 05 0 1 3X GP100 100 7 0 G L 0 02 0 05 0 1 3X GP150 150 10 G L 0 02 0 05 0 1 3X GP300 300 20 G L 0 02 0 05 0 1 3X GP500 500 35 G L 0 02 0 05 0 1 3X GP600 600 40 G L 0 02 0 05 0 1 3X GP1K 1 000 70 G L 0 02 0 05 0 1 3X GP1 5K 1 500 100 G L...

Page 13: ... 1 1 5X GP20K 20 000 1 400 G L 0 05 0 1 N A 1 5X GP25K 25 000 1 600 G L 0 05 0 1 N A 1 5X GP30K 30 000 2 000 G L 0 05 0 1 N A 1 5X GP36K 36 000 2 500 G L 0 05 0 1 N A 1 5X GP40K 40 000 2 800 G L 0 05 0 1 N A 1 35X GP50K 50 000 3 500 G L 0 1 0 2 N A 1 2X GP60K 60 000 4 200 G L 0 1 0 2 N A 11X 1 Sealed gauge pressure for above 1 000 psi 2 G Gas L Liquid 3 0 02 FS for gas media only ...

Page 14: ...G 0 05 2 20X 10 psi DP20 20 50 G 0 05 20X 10 psi DP30 30 75 G 0 05 20X 10 psi DP50 50 125 G 0 05 3X 10 psi DP100 100 250 G 0 02 3X 15 psi DP150 150 350 G 0 02 3X 50 psi DP300 300 700 G 0 02 3X 50 psi 1 FS specification applies to the span of the range Accuracy includes one year stability 2 0 05 FS accuracy incl 6 months stability One year accuracy is 0 05 FS calibration accuracy combined with 0 05...

Page 15: ... 05 0 1 3X CP15 15 1 G 0 02 0 05 0 1 3X CP30 15 to 30 1 to 2 G 0 02 0 05 0 1 3X CP100 15 to 100 1 to 7 G L 0 02 0 05 0 1 3X CP300 15 to 300 1 to 20 G L 0 02 0 05 0 1 3X CP500 15 to 500 1 to 35 G L 0 02 0 05 0 1 3X CP600 15 to 600 1 to 40 G L 0 02 0 05 0 1 3X CP1K 15 to 1000 1 to 70 G L 0 02 0 05 0 1 3X 1 G Gas L Liquid 2 FS specification applies to the span of the range ...

Page 16: ... 3X AP50 50 3 5 G L 0 1 3X AP100 100 7 0 G L 0 05 0 1 3X AP300 300 20 G L 0 05 0 1 3X AP500 500 35 G L 0 05 0 1 3X AP1K 1000 70 G L 0 05 0 1 3X AP3K 3000 200 G L 0 05 0 1 3X AP5K 5000 350 G L 0 05 0 1 3X 1 G Gas L Liquid Note Temperature Compensation 10 50 1year accuracy Abs pressure 0 05 accuracy the time to guarantee this accuracy is 180days The medium requires non corrosive ...

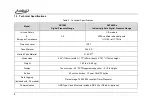
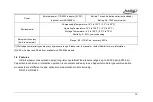
Page 17: ... IIC T4 Ga Protection Level IP67 Case Material 304 SS Wetted Parts Material 316 SS 1 Dimensions 4 65 118mm width X 1 77 42mm depth X 7 01 178mm height Weight 1 50 lbs 0 68 kg Display Touch screen 3 4 FSTN segment capacitive 5 1 2 full digits Button 4 Function buttons 1 Power ON OFF button Data Logging Included with DL models Data storage 10 000 000 records Time Pressure Communication USB Type C an...

Page 18: ...racy Built in barometer Range 60 110 kPa a accuracy 50Pa 1 Wetted parts material types may vary by pressure range Please refer to manual or contact Additel for more information 2 4 20 mA output and RS 485 not available in ADT685Ex models 1 4 Features Ultra low power consumption design long term operationWide pressure ranges up to 60 000 psi 4 200 bar Capacitive touch screen interactive operation i...

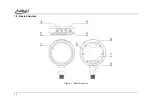
Page 19: ...11 1 5 Basic Structure Figure 1 Basic Structure ...

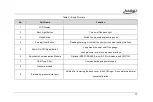
Page 20: ...r in number editing interface 5 Power On Off Reset Button Long press to power on off the gauge short pressure to return to previous interface 6 Switchable Communication Module Optional RS232 RS485 2 wire 4 20 mA module and SWITCH 7 USB Type C Port Communication and power supply 8 Pressure module 9 Barometric pressure inlet port Visible after removing the back cover with ATM logo it is used for bar...

Page 21: ...a Display engineering units or function items and other information Main display area Display pressure values and other information Sub display area Display a multi digit value or it can be divided into two left and right values for display and supports the display of Min Max Atm sec and icons at the same time Zero Ok Button Pressure zeroing value reset and confirmation operations icon means the t...

Page 22: ...ys the interface of the original range of the pressure module 3 seconds later it will enter the main interface immediately The main interface display is divided into menu bar status bar pressure unit display area main value display area and secondary value display area and Zero OK button as shown in Figure 3 ...

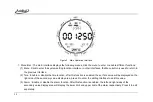
Page 23: ...vious interface 2 Tare Enable or disable the tare function after this function is enabled the set Tare value will be displayed on the right side of the secondary value display area press it to enter the editing interface to edit this value 3 Alarm Enable or disable the alarm function After this function is enabled the left and right sides of the secondary value display area will display the lower ...

Page 24: ...he Bluetooth icon can be clicked to turn on or off Bluetooth function 3 Units and prompt information display area Display engineering units click this area to switch the pressure unit 4 Main display area Display pressure values long press to enter the pressure resolution editing interface 5 Sub display area Display atmospheric pressure temperature tare value or Alarm upper and lower limits When al...

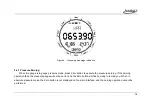
Page 25: ... Note After the pressure gauge enters the lock screen state a dot is displayed in front of the Lock icon in menu bar only the Power on off button can be operated and a lock screen reminder will be triggered when the other three buttons are operated 2 4 Pressure Measurement When the gauge is in the main interface it will display the current pressure unit and real time pressure value and display the...

Page 26: ...de press Zero button to execute the pressure zeroing If the zeroing operation fails the pressure gauge will emit an error and the Zero button will flash quickly to remind you When in absolute pressure mode the Zero button is not displayed on the main interface and the zeroing operation cannot be performed ...

Page 27: ... tare value will be displayed on the right side of the sub display area Press it to edit this value 2 4 5 Alarm Click the Alarm icon in the menu bar to enable or disable the alarm function After this function is enabled a small black dot will appear in front of the Alarm icon and the left and right sides of the sub display area will display the lower and upper limits of the alarm Press them to edi...

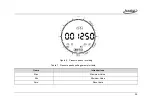
Page 28: ...20 Figure 5 Pressure peaks recording Table 7 Pressure peaks setting parameter table Items Introductions Max Maximum Value Min Minimum Value Zero Reset data ...

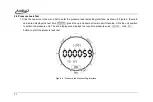
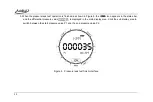
Page 29: ... as shown in Figure 6 the main value area displays the test time press the up and down arrows to edit this value Click the unit position to switch the pressure unit The sub display area displays the real time pressure value click button to start the pressure leak test Figure 6 Pressure leak test setting interface ...

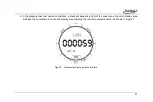
Page 30: ...ation interface a black dot appears in front of the Leak menu the main display area displays the countdown and the sub display area displays the real time pressure value as shown in Figure 7 Figure7 Pressure leak test operation interface ...

Page 31: ...n Figure 8 the icon appears in the status bar and the differential pressure value is displayed in the main display area Click the sub display area to switch between the start pressure value P1 and the end pressure value P2 Figure 8 Pressure leak test finish interface ...

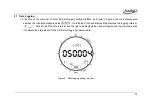
Page 32: ...ay area displays the real time pressure value the left side of the sub display area displays the logging interval click it to edit the time interval and the right side displays the used storage space in percentage click it to delete the stored data Click OK to start logging pressure data Figure 9 Data logging setting interface ...

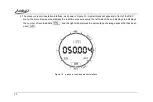
Page 33: ...ears in front of the REC menu the main display area displays the real time pressure value the left side of the sub display area displays the number of recorded data and the right side displays the percentage of storage space that has been used Figure 10 pressure record operation interface ...

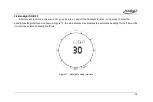
Page 34: ...n turn on and off the backlight function Long press to enter the backlight setting interface as shown in Figure 11 the main display area displays the automatic backlight turn off time click it to edit the automatic backlight off time Figure 11 Backlight setting interface ...

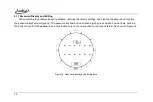
Page 35: ...tons the Lock menu bar will flash to remind the pressure gauge has entered the lock screen state Note If the password protection is turned on you will be prompted to enter the password when the unlock operation is performed and only the correct password will unlock the display 2 10 Date and Time Click Time icon in the menu bar to enter the date and time display interface as shown in Figure 12 and ...

Page 36: ...nterface Press the title bar to select the date format support Y M D M D Y D M Y three date formats Press the main display area to enter to select time format which includes 12 hour and 24 hour time formats Press the main display area of the time and date display interface to enter the time editing interface and press the sub display area to enter the date editing interface ...

Page 37: ... and clearing the data record function the password keyboard will pop up The password keyboard can edit each digit by press up and down arrows click the OK button to confirm the password and click the Menu icon or power button to cancel and return As shown in Figure 15 Figure15 Password display and edit interface ...

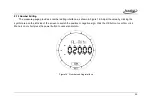
Page 38: ...ace as shown in Figure 16 Adjust the value by clicking the symbol area on the left side of the screen to switch the positive or negative sign Click the OK button to confirm click Menu icon or short press the power button to cancel and return Figure16 Numbers editing interface ...

Page 39: ...main value area will flash to indicate that this area can be edited and the main value area display can be switched by clicking the upper and lower edges of the main value area to cycle through the selections Click the Menu icon or short press the power button to cancel the setting and return Figure17 Cycle selection keyboard editing interface ...

Page 40: ...est of the operating list menus including version display resolution setting backlight time setting whether the main interface displays atmospheric pressure overpressure record display and touch sound on off settings Check Display the error code of the equipment failure COMM Press to enter the communication setting interface Auto Off Press to enter the automatic power off setting interface Filter ...

Page 41: ...alue Explanation Bluetooth ON OFF The main display area displays the Bluetooth on off status click to set the Bluetooth switch status MAC Address Read Only The sub display area displays the Bluetooth MAC address displayed from the second digit of the MAC address ...

Page 42: ...ttings as shown in Figure 18 The main display area displays the address click to edit it The left side of the sub display area displays the baud rate click to enter to select the baud rate The right side of the sub display area displays the number of data digits and stop bits click to enter editing Figure18 RS232 RS485 setting interface ...

Page 43: ... the upper and lower limits of the range and the unit is same as the main display unit of the gauge Figure19 4 20mA ranges setting interface 2 When the 4 20mA module is enabled the loop current test interface is shown in Figure 20 Click the main display area and set a value that within the current output range to enter the loop current test state ...

Page 44: ...TCH Settings When the SWITCH module is enabled the setting interface is shown in Figure 21 SWITCH is associated with the pressure alarm in section 2 4 6 the main display area shows ALARM and the output state is ON or OFF click the main display area to switch ...

Page 45: ...splay area to edit the auto power off time 3 3 Filter Settings Press the Filter icon in the menu bar to enter the filter setting interface and click the title bar to cycle through the filter modes off first order filtering and average filtering 1 First order filtering the main display area displays the filter coefficient click to edit 2 Average filtering the main display area displays the number o...

Page 46: ...ng 3 4 Pressure Reading Display Rate Click Rate in the menu bar to enter the pressure readings display rate setting the main display area displays the pressure readings display rate 3 1 means that the gauge displays 3 readings per second Click to edit The pressure gauge provides the following reading display rates 10 1 10 readings 1 sec 3 1 3 readings 1 sec 2 1 L 2 readings 1 sec 1 1 L 1 readings ...

Page 47: ...des pressure calibration atmospheric pressure calibration 4 20 mA calibration If the 4 20 mA module is enabled the 4 20 mA calibration interface will appear input the default calibration password 123456 to enter the system calibration settings as shown in Figure 22 1 Click the title bar IPM you can switch between the calibration types it includes pressure calibration atmospheric pressure calibrati...

Page 48: ...Click the title bar to switch the pressure unit The main area displays the original pressure value the left side of the sub display area represents the first point of calibration and the right side represents the standard value Click to edit Click OK to go to the next point 2 Carry out calibration to each point in order and finally submit the calibration data to complete this calibration 3 Three p...

Page 49: ...ion setting interface 4 Cancel calibration In the pressure calibration setting interface click the main display area to the cancel calibration interface and click OK to cancel the calibration data 5 Cancel zero In the pressure calibration setting interface click the main display area to the cancel zero interface click OK to cancel the zero Figure23 Pressure calibration interface ...

Page 50: ...ration connection The barometric calibration interface is shown in Figure 25 Click the main value display area to switch the selection of barometric pressure calibration Display 1 means barometric pressure single point calibration 2 means barometric pressure two points calibration and CANCEL means cancel calibration Click OK to enter the barometric pressure calibration interface the main display a...

Page 51: ...25 Barometric calibration selection interface 3 5 4 4 20 mA Calibration only available when using 4 20 mA module When the 4 20 mA module is enabled the module can be calibrated Two point calibration and cancel calibration are provided The main display area displays the output value the left side of the sub display area displays the calibration point and the right area displays the entered standard...

Page 52: ...e is not a 4 20 mA module 3 7 1 Version Information The title bar displays VERSION Press the main display area to switch version information including system software version hardware version and pressure module version 3 7 2 Resolution Settings The title bar displays RESOLUT press the main display area shortly to edit the resolution It supports 4 digits 5 digits and 5 and a half digits resolution...

Page 53: ...d off 3 8 Malfunction Information Press the Check icon in the menu bar to enter the equipment malfunction interface When there is nothing wrong it will display NORMAL When there is malfunction the corresponding fault code will be displayed Click the main display area to switch to display different fault codes Table10 Malfunction information list Error codes Description Solution 101 Ferroelectric s...

Page 54: ...2 Pressure module internal baseline failed 1003 Pressure module AVDD failed 1011 Pressure module VCC power voltage failed 1021 Pressure module MCU failed 1031 Pressure module AD7124 CRC failed 1041 Pressure module AD ALDO failed 1051 Pressure module AD DLDO failed 1061 Pressure module AD failed 1071 Pressure module AD internal baseline failed 1081 Pressure module TMP failed 1091 Pressure module pr...

Page 55: ...When performing function operations or information editing operations on the screen since the screen cannot display detailed text the pressure gauge will prompt in the form of an error codes Table11 Operation Error codes list Error codes Description Measure 001 Password wrong Check the password 002 Parameter beyond the range The entered value is beyond the gauge s range enter a new value 003 Opera...

Page 56: ...em and reserves all rights Please respect the rights of our company Appendix A RS232 module DB9 Pins Description Figure 26 RS232 module DB9 female pins description Table12 RS232 module DB9 pins description Pins Description 1 Reserved 2 TXD 3 RXD 4 Reserved ...

Page 57: ...49 5 GND 6 Reserved 7 Reserved 8 Reserved 9 Reserved Appendix B RS485 module DB9 Pins Description Figure27 RS485 module DB9 female pins description ...

Page 58: ...50 Table13 RS485 module DB9 pins description Pins Description 1 Reserved 2 Reserved 3 Reserved 4 Reserved 5 GND 6 D 7 Reserved 8 Reserved 9 D ...

Page 59: ...51 Appendix C SWITCH Module Pins Description Figure28 SWITCH module pins description Table14 SWITCH module pins description Pins Description 1 SW1 2 Reserved 3 Reserved 4 Reserved 5 GND 6 Reserved ...

Page 60: ...acteristics open drain output internal resistance of 100Ω when turned on and maximum external voltage of 30V 2 Ex gauges do not support SWITCH module Appendix D Dual Cable 4 20 mA Module Pins Description Figure26 Dual cable 4 20 mA module female pins description ...

Page 61: ...upported Appendix E Special Notice For ADT685Ex Cable Any data download devices connected to the Digital Pressure Gauge shall be approved SELV or Class 2 equipment against IEC 60950 or an equivalent IEC standard The maximum voltage Um from the device shall not exceed 6 Vdc for USB port and 16 Vdc for RS232 port Table15 ADT685Ex cable list No Ex cable name 1 Ex cable name 2 EX USB Cable Note Ex pro...

Page 62: ...CSA UKCA and IECEx certification 1 ATEx certificate II 1 G Ex ia IIC T4 Ga Ta 20 to 50 IECEx SIR 21 0018X CSANe 21ATEx2078X 2 CSA certificate Class I Division 1 Groups A B C and D T4 Class I Zone 0 AEx ia IIC T4 Ga CSA 21CA 80045682X Ta 20 to 50 Ex ia IIc T4 Ga ...

Page 63: ...55 ...
Reviews: