background image

www.addonics.com

Technical Support (M-F 8:30am - 6:00pm PST)   

Phone: 408-453-6212 

Email: www.addonics.com/support/query/

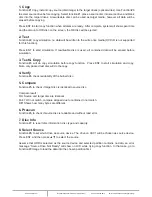
9. Image

Function#9 Image is valid only when a hard disk is installed. Disc is loaded to hard disk as an
image file.

9.1 Load
Load function loads whole disc data from any writers into the current partition of the hard disk.
“P:A” means current partition is A.

9.2 Delete Image
If you want to delete an image file stored in a particular partition, you can use this function to

delete image. Press ENT , the system will confirm with you for the action, use ▲ ▼ to select Yes or 

No, then press ENT for confirmation.

9.3 Image Info

To check selected image information. First, enter into the function and press ▼ for more

information.

9.4 Compare Image
This function is used to check if created image is identical to source disc.

When result shows on LCD, press ENT for more detail information.
Compare result :
OK: Source and target disc are identical
Fail: TOC not match, compare skipped due to contains not match.
Diff: shows how many bytes are different.

9.5 Select Image

This function is to select a partition as source image from the hard disk.  Pressing ▲ ▼ to select a 

partition, LCD will show image name and capacity.

9.6 Image Src Drive
This function is used to set the image source drive for loading disc data into a particular partition.

Enter into the function and use ▲ ▼ to select image source drive.

9.7 ImageFormat Info
This function shows which format is used for current hard disk. It is related to function#12.4 Format
HDD.  

9.8 Edit
This function is to edit selected image's title, sub1 title and sub2 title. Only valid when the current
partition contains an image file can title.  A title should be composed of 1 to 13 characters. The 

character can be alphabet, number or the combination of both. Use ▲ ▼ to select the number or 

alphabet. After selecting a desired one, press ENT for next character, the end of key in, press and 
hold ENT for 2 sec and release for next title.

Summary of Contents for DDU7SAS

Page 1: ...assistance to get your unit functioning properly please have your product information ready and contact Addonics Technical Support at Hours 8 30 am 6 00 pm PST Phone 408 453 6212 Email http www addon...

Page 2: ...e 408 453 6212 Email www addonics com support query Diagram ENT ESC Duplicator Panel LCD Scroll Up Scroll Down Executes Function Cancels Function ENT ESC 7 Destination SATAPorts Source SATAPort top po...

Page 3: ...proper ports When the duplicator is on it will go through the steps below Step 1 Duplicator LED will light up and the device will beep Step 2 LCD will display initial steps 1 Duplicator Ver Displays...

Page 4: ...mageFormat Info 9 8 Edit 9 9 Format HDD 9 10 LoadImage Method 10 1 CD to CD Edit 10 2 CD to HDD Edit 10 3 Close Session 11 1 Print 11 2 Load LSI to HDD 11 3 Select LSI File 11 4 Delete LSI File 11 5 L...

Page 5: ...before simulation 3 Test Copy Function 3 will do copy simulation before copy function Press ENT to start simulation and copy Note only passed test disc will do the copy 4 Verify Function 4 check reada...

Page 6: ...rmation Compare result OK Source and target disc are identical Fail TOC not match compare skipped due to contains not match Diff shows how many bytes are different 9 5 Select Image This function is to...

Page 7: ...up press ENT again will cancel the selection After selection use move to the End which is between 1st track and last track Press ENT to end of selection and use to confirm Yes or No Press ENT after bu...

Page 8: ...is function is to select source drive in order to load LSI File into a particular partition 11 6 Coypright Info This function is to see the LightScribe copyright information 12 Setup To change the def...

Page 9: ...Fly Burn On The Fly means data will be copied directly from the source disc to the target disc When the setting is Off the data will be loaded into temporary partition of HDD first then copy from HDD...

Page 10: ...n By default this is set to No Use to choose Yes then press ENT to scan the chosen connected tower 12 22 Tray In Out Lets you control the drive tray ejecting The default is All Once and there have Div...

Reviews: