background image

www.adeept.com

5

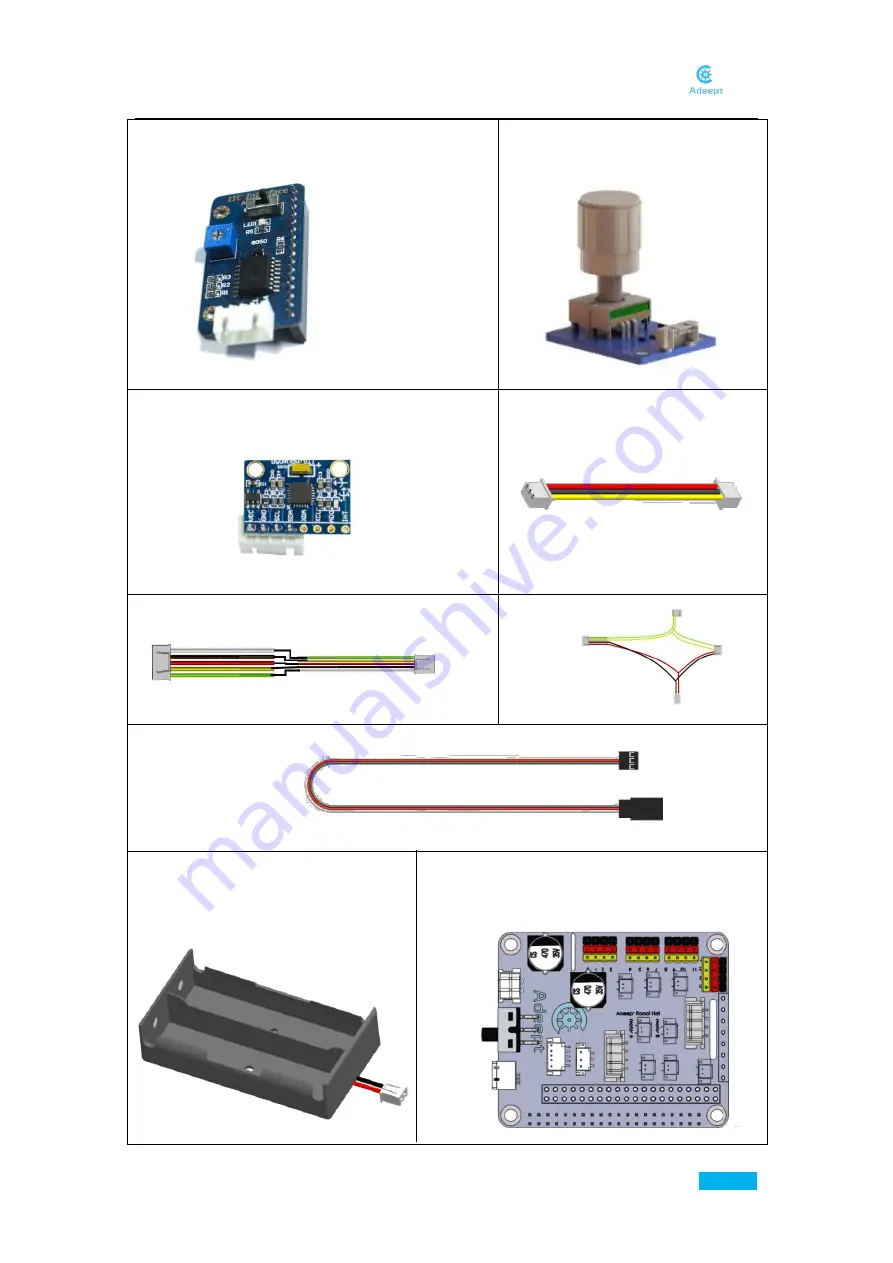
IIC Interface Module X1

Rotary Button X1

MPU-6050 X1

3pin Wire X2

5 Pin Wire

X1

IIC Cable

18650 Battery Holder Set X1

Servo Extension Cable X1

Adeept Robot HAT X1

Summary of Contents for RaspArm

Page 1: ...www adeept com 1...

Page 2: ...some part which is just normal But misoperation may cause overheat Misoperation may cause damage to the product Please take care Do not connect the positive and negative poles of the power inversely o...

Page 3: ...DIY refitting etc except for commercial purpose The Adeept Company owns all rights of contents in the manual including but not limited to texts images data etc Any distribution or printing should be...

Page 4: ...7 2 2 Download Program 13 2 3 Set Up a Raspberry Pi 13 3 Assemble the Robotic Arm 19 3 1 Preparations before Assembly 19 3 2 Install Raspberry Pi and Adeept RobotHAT 21 3 3 Install and Remove Batterie...

Page 5: ...plates are fragile so please be careful when assembling them in case of breaking The acrylic plate is covered with a layer of protective film You need to remove it first Some holes in the acrylic may...

Page 6: ...m www adeept com www adeept com www adeept com www adeept com www adeept com www adeept com www adeept com www adeept com www adeept com www adeept com www adeept com www adeept com www adeept com www...

Page 7: ...www adeept com 4 MG 946R X2 SG 5010 X4 WS2812 LED Module X2 X2 www adeept com M3 22 Nylon Standoff Sucking disc component Cap Nut X4 51108 Bearing X1 Sucking Disc X4 1 4 Electronic Parts LCD 1602 X1...

Page 8: ...www adeept com 5 IIC Interface Module X1 Rotary Button X1 MPU 6050 X1 3pin Wire X2 5 Pin Wire X1 IIC Cable 18650 Battery Holder Set X1 Servo Extension Cable X1 Adeept Robot HAT X1...

Page 9: ...6 1 5 Tools 1 6 Self prepared Parts Cross Socket wrench X1 Cable Tie X3 Cross Screwdriver X1 Large Cross head Screwdriver X1 18650 Battery X2 Winding Pipe X1 300mm 2 Ribbon X1 Flathead screwdriver X1...

Page 10: ...nd the system works well you may skip this step You need to download the Win32 Disk Imager and burn the operating system to the SD card Download the Win32 Disk Imager at https sourceforge net projects...

Page 11: ...open the img file extracted previously and click Write Display the Filename Extension For some operations you may need to change the filename extension suffix In some Windows systems they are hidden b...

Page 12: ...work Save the file and change the name of the file wpa_supplicant txt into wpa_supplicant conf Make sure MAC filtering has been turned off for the router The WPA PSK behind key_mgmt is the common encr...

Page 13: ...work Scanner App to check the address The address of the Raspberry Pi is the one with Raspberry The name of the router that the computer or mobile connects should be consistent with the one of the WiF...

Page 14: ...www adeept com 11 If a warning window prompts click Yes...

Page 15: ...default account is pi The password for login is raspberry by default When you typing in the password nothing will appear on the screen but it does not mean no input Type in the password carefully and...

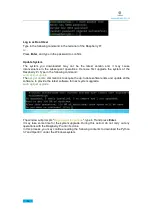
Page 16: ...adeept rasparm git Then setup sudo python3 rasparm setup py It may take some time to finish Now you can skip the next chapter and Install Python3 7 in the PC directly 2 3 Set Up a Raspberry Pi NOTE Y...

Page 17: ...e following command sudo apt get update The apt get update command is to acquire the up to date software lists and update all the software to provide the latest software for next system upgrade sudo a...

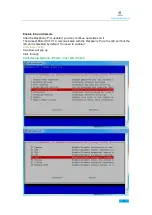
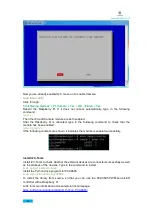
Page 18: ...d you may continue operations on it The Adeept Motor HAT V1 0 communicates with the Raspberry Pi via the I2C port but the I2C port is disabled by default You need to enable it sudo raspi config A wind...

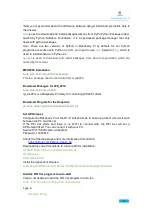
Page 19: ...abled lsmod grep i2c If the following contents are shown it indicates the module is enabled successfully Install I2C Tools Install I2C Tools to check whether the external devices are connected success...

Page 20: ...l rpi_ws281x rpi_ws281x is a Raspberry Pi library for controlling WS281X LEDs Download Program for the RaspArm git clone https github com adeept rasparm git Set AP Hotspot Configure the Raspberry Pi a...

Page 21: ...Exec sudo python3 home rasparm server server py Icon false Terminal false MutipleArgs false Type Application Catagories Application Development StartupNotify true Then press Ctrl X to exit editing Inp...

Page 22: ...ule Please note that the end marked with white strip is the signal input and the end without white strip is the signal output Connect Rotary Encoder Connect the encoder with the larger end of 5 Pin wi...

Page 23: ...t com 20 Connect MPU 6050 Pay attention to the interfaces at the two adjacent ends and select the interface with the longest connecting wire to connect to the MPU 6050 Connect IIC interface Module and...

Page 24: ...www adeept com 21 3 2 Install Raspberry Pi andAdeept Robot HAT Assemble the following components Effect diagram after assembling M2 5 6 6 Copper Standoff X4 M2 5 4 Screw X4 M2 5 14 copper standoff X4...

Page 25: ...www adeept com 22 2 Connect the battery holder and Raspberry Pi Note that the switch is OFF...

Page 26: ...he batteries just pull the ribbon and take them out Install the batteries into the holder based on the pole Insert the batteries into the rings ribbon closer to the anode Roll one end of the ribbon to...

Page 27: ...to Adeept Robot HAT In the subsequent assembly tutorial connect the servo to 0 1 2 3 PWM port in the following way Raspberry Pi will automatically check the servo position The color of the servo wire...

Page 28: ...ion manually In the next installation the servos need to be connected to the robot HAT And the Raspberry Pi will automatically adjust the servo to the correct angle After debugging remove the servo an...

Page 29: ...www adeept com 26 3 4Install Remote Control 1 Install Rotary Button Assemble the following components Effect diagram after assembling Rotary Button X1 M2 5 8 Screw X2 M2 5 Nut X2...

Page 30: ...www adeept com 27 2 Install MPU 6050 Assemble the following components Effect diagram after assembling M3 8 Screw X2 MPU 6050 X1 M3 Nut X2...

Page 31: ...www adeept com 28 Assemble the following components Effect diagram after assembling M3 8 Screw X6 M3 25 Nylon Standoff X3...

Page 32: ...www adeept com 29 3 5 Assemble RoboticArm 1 Install servo Assemble the following components Effect diagram after assembling Acrylic A0 13 X4 M3 Nut X2 M3 25 Screw X2...

Page 33: ...for backup Effect diagram after assembling Assemble the following components Effect diagram after assembling Servo rocker arm from servo 7 12 0 3 spacer X1 Self tapping screw with servo X1 Servo rock...

Page 34: ...www adeept com 31 Assemble the following components Effect diagram after assembling M3 Lock Nut X4 M3 16 Screw X4 Acrylic A1 7 X4...

Page 35: ...www adeept com 32 Install the servo SG 5010 pay attention to the nameplate on the servo Asemble the following components Effect diagram after assembling M3 12 Screw X4 M3 Nut X4 SG 5010 M3 Nut X4...

Page 36: ...w adeept com 33 Assemble the following components Effect diagram after assembling The connection part of the lock nut needs to be rotated please do not tighten the lock nut M3 16 Screw X3 M3 Lock Nut...

Page 37: ...www adeept com 34 Assemble the following components Effect diagram after assembling M3 15 Nylon standoff X1 M3 8 Screw X2 install the servo in the state of debugging M2 5 14 Screw X1...

Page 38: ...www adeept com 35 Assemble the following components Effect diagram after assembling M3 25 Screw X3 M3 Nut X3...

Page 39: ...www adeept com 36 Assemble the following components Effect diagram after assembling M3 15 Nylon standoff X2 M3 8 Screw X4...

Page 40: ...www adeept com 37 Assemble the following components Effect diagram after assembling M3 25 Screw X2 M3 Nut X2...

Page 41: ...adeept com 38 Assemble the following components Effect diagram after assembling M3 14 Screw X1 The connection part of the lock nu t needs to be rotated please do n ot tighten the lock nut M3 lock Nut...

Page 42: ...lowing components Effect diagram after assembling Acrylic A0 3 X2 M3 lock nut X3 The connection part of the lock nut needs to be rotated please do not tighten the lock nut Acrylic A1 22 X2 Acrylic A0...

Page 43: ...com 40 Assemble the following components Effect diagram after assembling M3 Lock Nut X1 M3 25 Screw X1 The connection part of the lock nut needs to be rotated please do not tighten the lock nut Acryli...

Page 44: ...com 41 Assemble the following components Effect diagram after assembling M3 Lock Nut X1 The connection part of the lock nut needs to be rotated please do not tighten the lock nut Acrylic A1 22 X1 M3 3...

Page 45: ...www adeept com 42 Install the servo SG 5010 Assemble the following components pay attention to the nameplate on the servo Effect diagram after assembling M3 Nut X8 M3 12 Screw X8...

Page 46: ...www adeept com 43 Assemble the following components Effect diagram after assembling M2 5 10 Screw X1 install the servo rocker arm in the state of debugging...

Page 47: ...www adeept com 44 Effect diagram after assembling Acrylic A0 7 X4 M3 Nut X4 M3 16 Screw X4 Assemble the following components...

Page 48: ...ponents Please install the servo in the state of debugging and install it at the angle shown in the figure Pay attention to the meshing angle of the gear Effect diagram after assembling M3 12 Screw X2...

Page 49: ...www adeept com 46 Assemble the following components Effect diagram after assembling M3 35 Screw X6 M3 Nut X6...

Page 50: ...www adeept com 47 Assemble the following components Effect diagram after assembling Self tapping screw with servo X4 Servo rocker arm from servo...

Page 51: ...www adeept com 48 Assemble the following components Effect diagram after assembling M3 Nut X4 M3 16 Screw X4...

Page 52: ...the installation direction For convience of the subsequent installation battery holder and Raspberry Pi can be disconnected after the servo is debugged Effect diagram after assembli M3 4 Screw from Se...

Page 53: ...www adeept com 50 Assemble the following components Effect diagram after assembling M3 6 Nylon satndoff X4 M3 8 SCREW X4...

Page 54: ...www adeept com 51 Assemble the following components Please follow the installation direction Effect diagram after assembling B B M3 Nut X4 B...

Page 55: ...www adeept com 52 Assemble the following components Effect diagram after assembling M3 8 Screw X4...

Page 56: ...www adeept com 53 3 6 Install the Pedestal Assemble the following components Effect diagram after assembling IIC Interface Module M3 Nut X4 M3 12 Screw X4 Acrylic A0 13 X4...

Page 57: ...www adeept com 54 Assemble the following components Effect diagram after assembling M3 Nut X2 M3 10 Countersunk Head Screw X2...

Page 58: ...www adeept com 55 Assemble the following components Effect diagram after assembling M2 5 8 Screw X4...

Page 59: ...www adeept com 56 Assemble the following components Effect diagram after assembling WS2812 X2 M2 Nut X4 M2 10 Screw X4...

Page 60: ...www adeept com 57 Assemble the following components Effect diagram after assembling...

Page 61: ...www adeept com 58 Assemble the following components Effect diagram after assembling M3 8 Screw X4 M3 40 Nylon Standoff X4...

Page 62: ...www adeept com 59 Assemble the following components Effect diagram after assembling M3 8 Screw X6 M3 30 Nylon Standoff X6...

Page 63: ...www adeept com 60 Assemble the following components Effect diagram after assembling M3 8 Screw X2 M3 14 Screw X4...

Page 64: ...www adeept com 61 Assemble the following components Effect diagram after assembling Cap Nut X4 Sucking Disc X4...

Page 65: ...below LED 1 LED 2 18650 Battery Holder Set X1 Rotray Batton Led 2 Servo MPU 6050 PWM 3 PWM 2 PWM 1 Led 1 ICD 1602 IIC interface module PWM 0 Pay attention to the interfaces at the two adjacent ends an...

Page 66: ...www adeept com 63 Assemble the following components Effect diagram after assembling M3 8 Screw X4...

Page 67: ...loading Python choose the corresponding Python version based on your own system 4 2 Run the RaspArm Start Switch on the RaspArm Note The moment the power is turned on the arm will swing randomly at a...

Page 68: ...r on the gamepad Rotate to adjust the PWM of the corresponding servo port short press to switch the servo port long press II to exit the mode and enter the menu interface of the selection mode Movemen...

Page 69: ...m through the GUI program on the PC You can download it from https github com adeept rasparm If RaspArm is not connected to Wi Fi after booting it will automatically create a Wi Fi hotspot which you c...

Page 70: ...www adeept com 67...

Reviews: