background image


- 10 - 

2.Press Marinate button to start working. The indicator LED will be light 

and the screen will be show the progress. It will release air automatically 

after finished vacuum, this is for 1 working cycle, this machine will total 

working for 5 cycles. It takes about 6 minutes to finish the process. 

3.When the indicator light crush out, then the screen show the 
“complete”, the marinate process is completed. Pull off the hose 
accessory from canister port and canister cover.   

Note:


At the beginning of the vacuum packaging in a canister, slightly 

press down the canister cover or on the hose adaptor to ensure no 

loose of the hose and to avoid air leaking through the gap between 

the cover and the canister top rim for a few seconds. 


To test vacuum, simply tug on the cover. It shall not move; 


Do not press any button to interfere with the whole process 


.Cord storage box


1.

Put the power cord into the storage fixer when not use the machine 

which is in the back of the machine. Do not wrap the cord around the 

appliance.   


CLEANING AND MAINTENANCE


Vacuum sealer   

1.  Always unplug the unit before cleaning. 

2.  Do not immerse in water or any other liquid. 

3.  Avoid using abrasive products or material to clean the unit, for 

they will scratch the surface. 

4.  Use a mild dishwashing soap and a warm, damp cloth to wipe 

away food residue or around components. 

5.  Dry thoroughly before using again. 

Note: 

The foam gaskets around the vacuum chamber should be 

dried thoroughly before re-assembling, when re-assembling, 

Summary of Contents for VS5490

Page 1: ...VS5490 VACUUM SEALER INSTRUCTIONS...

Page 2: ...attachments not recommended or appointed and don t use this appliance for other purpose except its intended use 5 Stop using the machine immediately if the cord is damaged and have it replaced by a p...

Page 3: ...is appliance power cord or plug in water or any other liquid 18 Do not use this appliance outdoors or on a wet surface it s recommended for household indoor use only 19 This appliance is not intended...

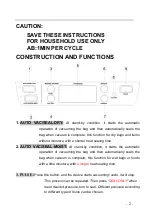
Page 4: ...th a shorter heat sealing time 2 AUTO VAC SEAL MOIST At stand by condition it starts the automatic operation of vacuuming the bag and then automatically seals the bag when vacuum is complete this func...

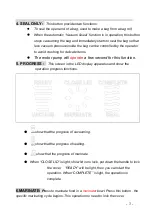
Page 5: ...will operate a few second for this function 5 PROGRESS This screen is the LED display apparatus and show the operation progress functions show that the progress of vacuuming show that the progress of...

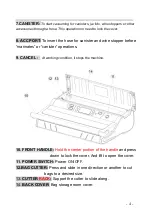
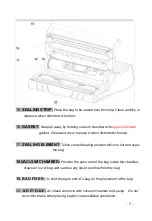
Page 6: ...before marinates or canister operations 9 CANCEL At working condition it stops the machine 10 FRONT HANDLE Hold the center portion of the handle and press down to lock the cover And lift to open the c...

Page 7: ...ted or broken 17 SEALING ELEMENT Teflon coated heating element which is hot and seals the bag 18 VACUUM CHAMBER Position the open end of the bag inside the chamber draws air out of bag and catches any...

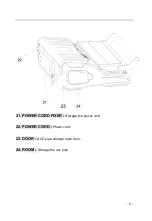
Page 8: ...6 21 POWER CORD FIXER Storage the power cord 22 POWER CORD Power cord 23 DOOR ACC pipe storage room door 24 ROOM Storage the acc pipe...

Page 9: ...the bags LED screen will show the sealing progress 8 When you hear a bee tone and LCD screen display complete then lift the handle to open the cover and take the bag out of the machine The bag is then...

Page 10: ...attempt to use other bags not intended for vacuum packaging Cut the bag straight across with scissors to open a sealed bag Vacuum packaging with a bag using Pulse Vacuum 1 This function is preferred f...

Page 11: ...immediately first after the job is completed Note When moist food are under vacuuming moisture will be stored in adaptor Remember to clean up the adaptor if there is water before vacuuming Open Canist...

Page 12: ...eaking through the gap between the cover and the canister top rim for a few seconds To test vacuum simply tug on the cover It shall not move Do not press any button to interfere with the whole process...

Page 13: ...t have been microwaved or boiled Accessories Washing all vacuum accessories in warm water with a mild dishwashing soap But do not immerse cover in water 1 Canister bases not lids are top rack dishwash...

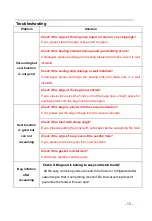
Page 14: ...ve enough space for sealing and smooth the bag mouth and try again Seal function is good but can not vacuuming Check if the bags is placed into the vacuum chamber If not please put the edge of bags in...

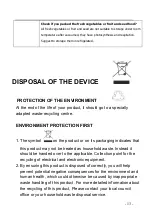
Page 15: ...CTION FIRST 1 The symbol on the product or on its packaging indicates that this product may not be treated as household waste Instead it should be handed over to the applicable Collection point for th...

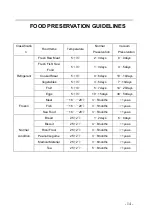
Page 16: ...at 5 3 4 6days 10 14days Vegetables 5 3 3 5days 7 10days Fruit 5 3 5 7days 14 20days Eggs 5 3 10 15days 30 50days Frozen Meat 16 20 3 5months 1yeas Fish 16 20 3 5months 1yeas Sea Food 16 20 3 5months...

Reviews: