GB
GB
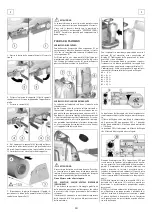
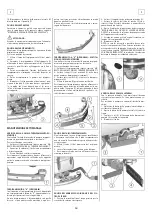
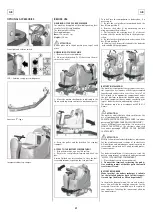
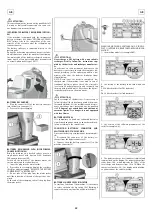
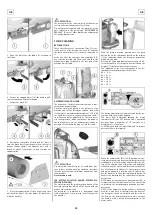
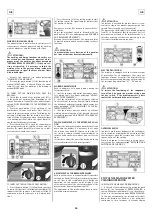
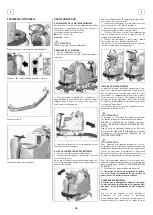
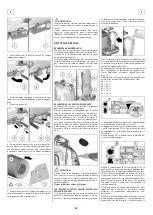
3. Open the bar of the side rubber (2) as shown in
the figure.
4. Extract the support plate (3) of the brushes pull-
ing it outwards by holding its handle.
5. Extract the brush (4).
6. During the reassembly of the brush (4), insert it
into the brush base from the part where the seat is
deeper (about 40mm). The opposite part with a
depth of about 13,5mm has to look towards the
support plate.
7. Place the support plate (3) into its position, then
put back the bar of the side rubber (2) blocking it
with the knob (1).
ATTENTION:
The brushes must be inserted easily without using
tools in order not to damage or force them.
Use only brushes supplied with the machine or the
ones indicated in the paragraph “RECOMMENDED
BRUSHES”. The use of other brushes can compromise
the good washing result.
FLOOR CLEANING
RECOVERY TANK
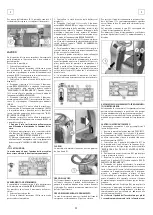
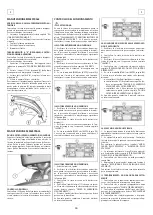
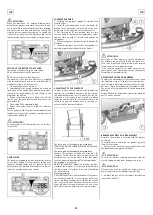
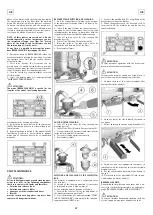
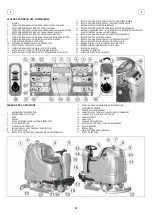
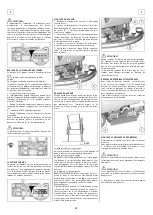
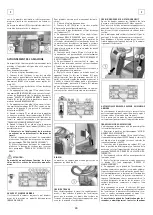
Check that the cover of the suction filter (1) is cor-
rectly secured, after rotating the levers (2) and that
the suction motor hose (3) is correctly connected to
it.
Verify also that the squeegee hose couplings (4/5)
are correctly inserted into their seats and that the
exhaust hose plug (6) placed in the rear part of the
machine is well closed.
DETERGENT SOLUTION TANK
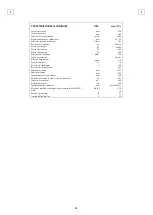
The capacity of the detergent solution tank is indi-
cated in the technical data.
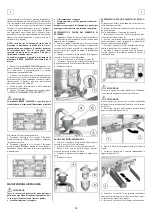
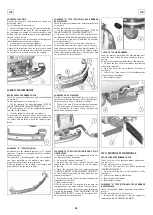
Open the screw plug placed in the left part of the
machine and fill the detergent solution tank with
clean water at a maximum temperature of 50°C. Add
the liquid detergent in the percentage and condi-
tions foreseen by the manufacturer. To avoid exces-
sive foam presence, which could cause problems to
the suction motor, use the minimum percentage of
detergent. Screw down the plug to close the tank.
ATTENTION:
Use always low foam detergent. To avoid foam pres-
ence, before starting working operation, introduce
into the recovery tank a minimum quantity of anti-
foam product.
Never use pure acid.
3SD SYSTEM SOLUTION SAVING SYSTEM DIS-
PENSER (OPTIONAL)
The system permits the predetermined dosing of the
detergent percentage which will be mixed with the
water of the solution tank.
The detergent is contained in a transparent tank
with a capacity of 8 litres, placed in the front part of
the machine.
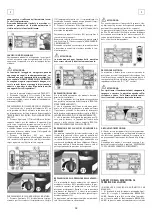
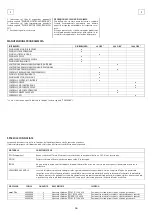
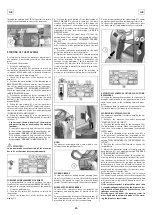
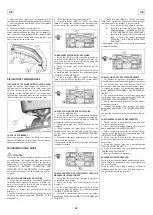
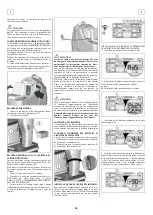
With the brushes moving, pressing once the push
button (A) on the instrument board, on the display
(1) the indication shows the detergent percentage
which is being used.
Pressing the same push button in succession, six dif-
ferent possibilities of setting can be selected and the
display (1) visualizes always the percentage.
The indication of the level corresponds to the fol-
lowing detergent percentages in the water:
d0 = 0 %
d1 = 0,3 %
d2 = 0,6 %
d3 = 1,2 %
d4 = 2,4 %
d5 = 4,5 %
The dosing adjustment set remains stored by the sys-
tem also with the machine stopped.
The water flow is adjusted through the 8-way
commutator (B): one OFF position and 7 operating
positions from a minimum of 1,2 litres/min to a
maximum of 3,7 litres/min.
In OFF position both the water flow and its relative
detergent flow is interrupted.
When the commutator (B) is in OFF position, an aux-
iliary water system can be activated, that permits the
traditional use of the machine and therefore the fill-
ing of the solution tank with water and detergent
without using the system and therefore without the
use of the pumps. In this case it is necessary to open
and adjust manually a solution valve (C) placed un-
der the machine. In this situation the push button (A)
handles the command of the solenoid valve in man-
ual function.
NOTE: when restarting with the work in mode 3SD, it
is important that the solution valve (C) is closed, this
to maintain the predetermined proportions water-
detergent.
NOTE: if the automatic dosing system is not being
used for a long time, it is possible that the hoses of
the detergent circuit are emptied and therefore at
the first use, the detergent begins to come out onto
the brushes with a certain delay compared to the
water outlet.
24
Summary of Contents for coral 70s
Page 2: ......

