


14
WORKING ADJUSTMENTS
Both in automatic as in manual mode, during the first metres check:
1.
that the adjustment of the detergent solution flow is sufficient to
wet the floor uniformly avoiding the leakage of detergent from
the splash guards (see under paragraph “FLOW ADJUSTMENT OF
THE DETERGENT SOLUTION”).
2.
that the squeegee adjustment guarantees a perfect drying result
(see under paragraph “ADJUSTMENT OF THE SQUEEGEE”).
3.
that the brushes pressure permits an efficient washing action in
function of the dirt and the speed (see under paragraph
“ADJUSTMENT OF THE BRUSHES PRESSURE”).
FLOW ADJUSTMENT OF THE DETERGENT SOLUTION
To adjust the detergent solution quantity that flows down onto the
brushes it is necessary to act upon the solution valve knob (10) placed
on the upper part of the side instrument board, rotating
counterclockwise to increase it and clockwise to reduce it up to closure
of the flow.
BRUSHES PRESSURE ADJUSTMENT
Using the knob (4) it is possible to adjust the brushes pressure on the
floor on three preset levels. On the display (1) the pressure previously
set can be seen, by pressing the button (3).
The adjustment is made this way on both manual and automatic mode.
To avoid overloading the brushes motors it is bette to decrease the
brushes pressure when switching from smooth to rough floors (i.e.
concrete floors).
ELECTRIC PROTECTION
The machine is equipped with an electronic system of amperemetric
protection for the principal working functions. This control device
disconnects the function of the interested component that shows the
problem and indicates on the display (1) the corresponding alarm, for
example ”AL01”, “AL03”.
The last two figures indicate the code number of the alarm.
To restore the functioning of the component, turn off and on again the
machine acting upon the key switch. If the alarm persists, please
contact the authorized technical assistance.
OVERFLOW DEVICE
In order to avoid serious damages to the suction motors, the machine is
equipped with a float that intervenes when the recovery tank is full,
closing the suction, the switching on of the signal lamp (20) for the
signaling of the full recovery tank and consequently to the drying stop.
When this happens, it is necessary to empty the recovery tank (see
under paragraph “RECOVERY TANK EMPTYING AND CLEANING”).
SELECTING AND WORKING ON 3S “SOLUTION SAVING SYSTEM”
MODE
To work with the 3S “Solution
Saving System” select a water
carriage using the knob (1).
On manual mode the detergent solution flow is constant and related to
the water carriage selected using the knob.
On automatic mode the carriage of the detergent solution flow changes
accordingly to the speed, up to the maxim set, in order to have a
constant water carriage per square meter.
If the machine is steady then the speed will be zero and no water will
come out.
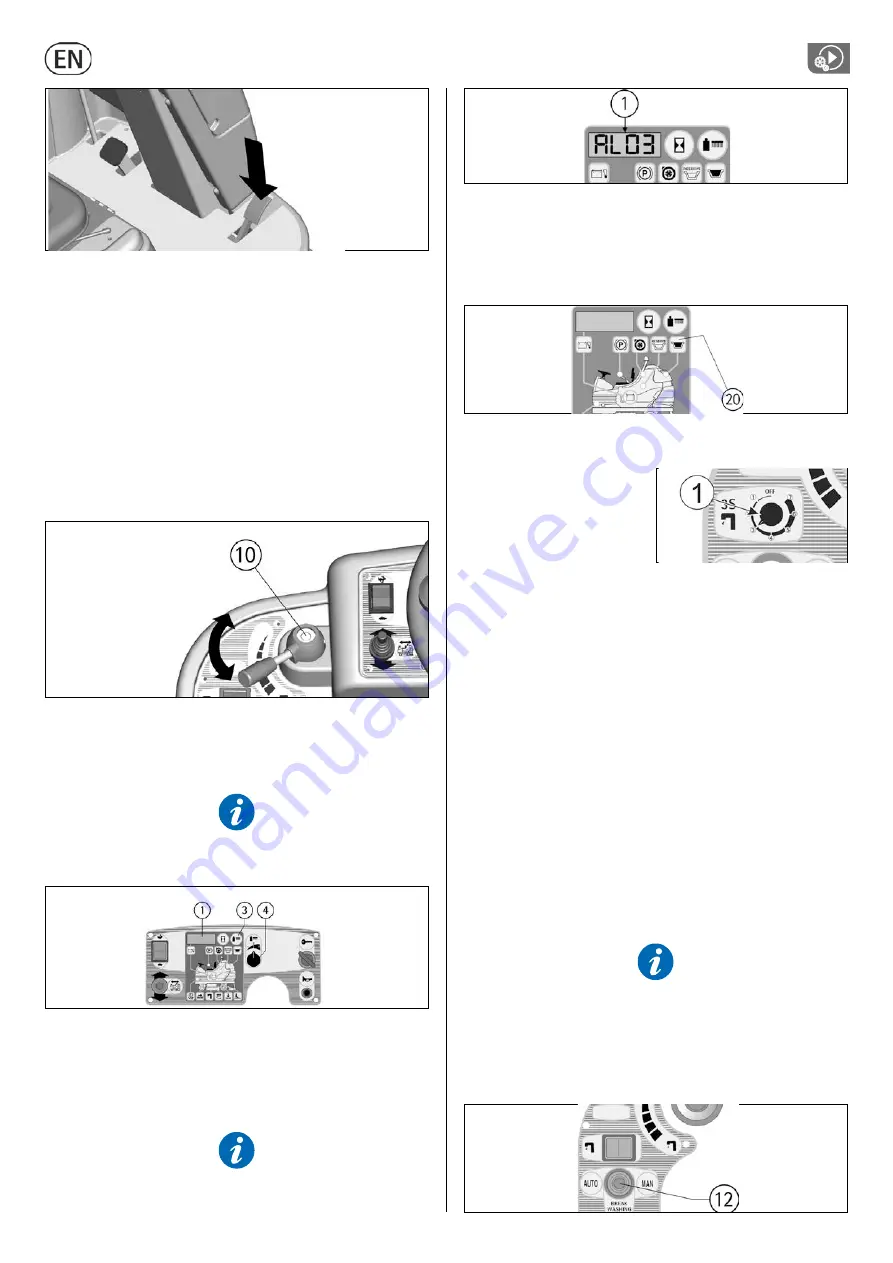
STOP OF THE MACHINE AFTER CLEANING OPERATION
IN AUTOMATIC OR MANUAL WORKING MODE:
1.
At the end of the washing cycle put the selector (12) into the
central position (BREAK WASHING). In this way automatically the
brushes lift, the solenoid valve shuts down and it is possible to
finish the drying operation.
2.
When the accelerator pedal is released for more than 3 seconds,
the squeegee raises itself and the suction switches off
automatically.
3.
After three seconds, the accelerator can be pressed again, if a
machine's transfer has to be made (the transfer can be carried out
also if the pedal is never lifted, in this case the squeegee gets lifted
and the suction stop automatically after 15 seconds).
4.
Turn the switch key counterclockwise to switch off the machine.
5.
Insert the parking brake (see under paragraph “EMERGENCY-
PARKING BRAKE”).
The mode (BREAK WASHING) is specific for the transfer at the end of
the cleaning operation.
Starting again the cleaning operation:
A.
by positioning to the left the selector (12) into position (AUTO) one
can start again to work in an automatic mode.
B.
by positioning to the right the selector (12) into position (MAN)
the machine re-establishes the functions pre-set manually.


