background image

User manual MKA 120 

 Conforms to


Issue 07.07.2021_01                                                                                                                                                     Page 6  

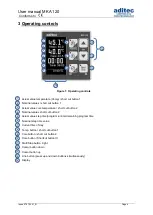
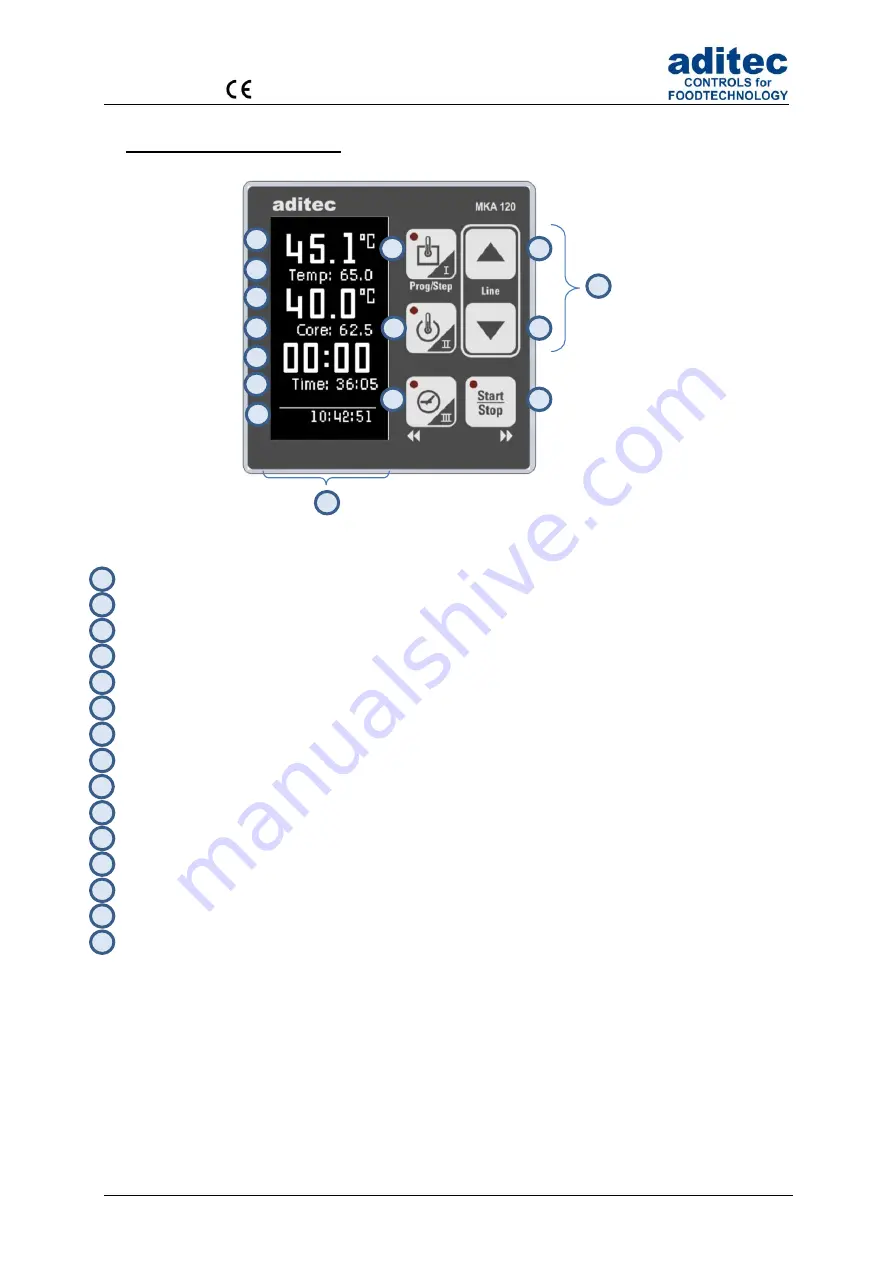
Operating controls 


Actual value temperature 

(Temp)

 / short cut button 1 

Nominal values / short cut button 1 

Actual value core temperature / short cut button 2 

Nominal values short cut button 2 

Actual value step time/program runtime/remaining program time 

Nominal step time value  

Current time of day 

Temp. button / short cut button 1  

Core button / short cut button 2 

Time button / Shortcut button III 

Start/Stop button /right 

Cursor button down 

Cursor button up 

Line button (press up and down buttons simultaneously) 

Display 


10 

11 

12 

13 

14 

15 

10 

11 

12 

13 

14 

15 

Figure 1: Operating controls 

Summary of Contents for MKA 120

Page 1: ...ng and kettle units User Manual Measurement and Control technology Hardware development Software development Specialised electronics Food technology Process visualisation aditec gmbh Talweg 17 D 74254 Offenau Tel 49 0 7136 96122 0 Fax 49 0 7136 96122 20 www aditec net eMail info aditec net ...

Page 2: ...les direct relay actuation 14 5 6 4 Optionale control loops 16 5 7 Shut down condition 16 5 8 Negative core shut down Shower Cooling 16 5 9 Pre heating function 16 5 10 Working with single step control 17 5 11 Key lock 17 6 Standby 18 7 Program setup 19 7 1 Program setup Standby 19 7 1 1 Entering a temperature 19 7 1 2 Entering a core temperature 19 7 1 3 Entering an operating time 19 7 1 4 Option...

Page 3: ...y 29 9 2 Status bar display status bar 30 9 3 Enabling a batch number 31 9 4 Enalbing the VisuNet Program 31 9 5 Version number display 32 9 6 Sensor information 32 9 7 Screen saver 33 10 Power failure 33 11 List of errors possible problems 34 12 Connecting the controller to a PC 35 12 1 Connection cables different types of connection 35 12 1 1 Connection via an Ethernet interface 35 12 1 2 Connec...

Page 4: ...e press button Press several buttons simultaneously This symbol indicates a useful hint or gives a tip Factory setting Display is flashing Be aware This symbol points out measures you should take in order to avoid potential problems Code is supported by the service program Press a button for 3 seconds or wait 3 seconds Indicates a sequence of actions that should be executed one after the other SP ...

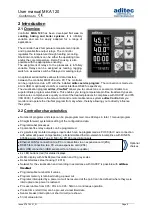
Page 5: ...l and remote maintenance system aditec Control lets you monitor and operate the VisuNet program from anywhere thereby allowing you to directly influence the system 2 2 Controller characteristics Number of programs and steps can be pre programmed max 99 steps in total 1 manual program Straight forward systematic setting of the configuration data Programmabel processes 3 potential free relay outputs...

Page 6: ... cut button 2 Actual value step time program runtime remaining program time Nominal step time value Current time of day Temp button short cut button 1 Core button short cut button 2 Time button Shortcut button III Start Stop button right Cursor button down Cursor button up Line button press up and down buttons simultaneously Display 1 2 3 4 5 6 7 8 9 10 11 12 13 14 15 1 2 3 4 5 6 7 8 9 10 11 12 13...

Page 7: ...wing nominal value step time Moving the cursor in the input field to the left Start Stop Starting and stopping programs Moving the cursor in the input field to the right Cursor buttons Moving the cursor within the display selecting specific settings Line Confirming an entry and focussing the next item by briefly pressing both cursor buttons simultaneously Leave the mask code by pressing and holdin...

Page 8: ...or is flashing in the position far right 00 When you are making an entry the cursor is at first in the position far right 00 Use the button to increase the value and the button to reduce the value The numbers will automatically shift to the left 10 The value of the entry is limited by the limit value range When you press the arrow button left you can change the individual digits Entering negative ...

Page 9: ... A B C D E F G H I J K L M N O P Q R S T U V W X Y Z a b c d e f g h i j k l m n o p q r s t u v w x y z Special characters _ Table 3 Table of characters 4 2 2 Deleting a character If you want to overwrite a character use the arrow buttons left and right to take the cursor to the required position and entert he new character in this position If you want to delete a character take the cursor to the...

Page 10: ...ar gives you only an overview The scroll bar is automatically moved when the last item of the visible segment is focussed with the arrow buttons 4 6 Drop box A drop box is used to select one item from a shown list of items Initially the previously selected item is shown Use the arrow buttons up or down respectively to focus the following or previous item When you press the Start button a list of a...

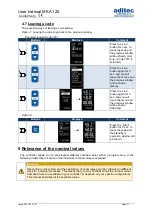
Page 11: ... menu and the previous window will be shown Standby Option 2 Buttons Displays Comment Press the Start button for 3 sec to leave the code and the standby or operation window will be shown 5 Relevance of the nominal values The controller allows you to pre program different nominal values within a program step In the following chapter the relevance of the individual nominal values is explained Be awa...

Page 12: ...l the heating process will use nominal value Chamber min and the cooling process will use Chamber max 5 4 Nominal core temperature Be aware Shut down condition If you have enabled the nominal core temperature value in a step and the actual temperature of the core sensor reaches this nominal value the step will be terminated The controller works with two types of core shut down Positive core shut d...

Page 13: ...n of the cooking process and the heating process is gentler a higher nominal Delta value will speed up the cooking process Hint Apart from a nominal temperature value and a nominal Delta value you can also enter a nominal core value which will be used as core shut down condition for the step 5 6 2 FC value Hint Bacteria have to be killed through pasteurisation FC70 sterilisation FC121 How thorough...

Page 14: ...ogrammed FC value has been reached the controller will automatically switch into the next step or terminate the program respectively 5 6 3 Aggregate modules direct relay actuation Up to 3 aggregate modules can be pre programmed thereby influencing the switching behaviour of specific relays and the connected hardware aggregates The configuration determines which nominal values may be entered and th...

Page 15: ... functions Button can only be operated with the activated or deactivated buttons as there is always a nominal value nominal time on this key If the button is configured as TIP mode and programmes are enabled the state can only be changed with the button Be aware If a nominal value is changed during operation via VisuNet the display will be updated reset Name Status Button status inactive active of...

Page 16: ...termination There is a temperature sensor fault which always leads to a program termination There is a core sensor fault program termination only when a nominal value has been pre programmed Be aware An empty not valid program step will be immediately terminated or not even started A program step is considered valid when a process has been pre programmed 5 8 Negative core shut down Shower Cooling ...

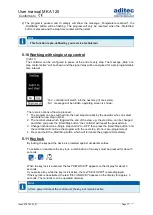
Page 17: ...ct and enter a new step number 2 The nominal value which triggered the end of the step e g the step time can be changed and when you press the Start Stop button the controller will repeat the paused step 3 Change nominal value Single step control to OFF then press the Start Stop button and the controller will continue the program with the next step if one is pre programmed 4 Press and hold the Sta...

Page 18: ...m and step numbers Program and step are displayed in standby and operation e g Operating mode program number program name step number process name Standby P01 P1 S01 Operation Operation P02 P2 S03 Operation Hint Use the Line button to skip between the program and step display Hint During a data transfer between the PC and the controller the standby mask is hidden and an information page is shown F...

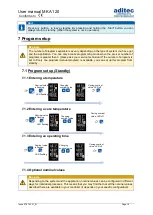
Page 19: ...can set up this program from standby 7 1 Program setup Standby 7 1 1 Entering a temperature 7 1 2 Entering a core temperature 7 1 3 Entering an operating time 7 1 4 Optional nominal values Be aware Depending on the system and the application nominal values can be configured in different ways for individual processes This means that you may find that not all the nominal values described here are av...

Page 20: ...the program cannot be started The batch description can consist of up to 10 characters By pressing the Line button for about 3 seconds you can terminate the starting process Changing optional nominal values LED flashing Nominal value is flashing 8 Saving nominal value LED off LED flashing LED is lit up Temperature is regulated wird geregelt Relay states are shown He Heating on Co Cooling off Si Si...

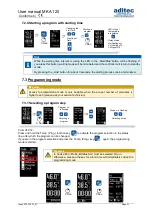
Page 21: ...vice technician 7 3 1 Selecting a program step From V20 12 Press and hold the Temp Prog function key to activate the program selection in the status line after which the program can be changed If you are in the program selection and press the Temp Prog key again the programming mode is started Be aware In Code 2803 Profile Status bar must be selected Prg no Otherwise pressing the key for a long ti...

Page 22: ...as been configured and step 1 of the following program has also been configured both programs will automatically be linked If the last step of a program is not configured the controller will end the program after the last pre programmed step has finished Hint The number programs steps and program linking can be pre programmed by the service technician to suit your requirements Service Program Numb...

Page 23: ...m your entry by pressing Enter box or cancel by pressing Cancel box Step number box Copying a step The step to be copied is shown in box Select the program number you want to copy box Select the step number you want to copy Feld Confirm your entry by pressing Enter box or cancel by pressing Cancel box Deleting a step Deleting a previously selected step Confirm your entry by pressing Enter box or c...

Page 24: ...the states of the relays are shown 1 8 1 Nominal values A service technician can make nominal values available by changing the configuration of the controller The relevance of these nominal values can vary this is why your service technician should explain them to you 1 Depends on whether the setting has been enabled under Item 9 2 Status Be aware When you press the Enter button the step will be a...

Page 25: ...urer Please ask your service technician for further information Be aware These changes are only valid in the current step They are not permanently saved and only apply until the end of the step 8 1 3 Optional control loops The nominal values of the optional control loops if configured by a service technician can be pre set individually in the program steps If additional control loops or additional...

Page 26: ...utton to make changes to the status bar display Hint The buttons are used to skip between the different lines on the status bar You can only skip between lines when nominal values are not focussed 8 3 1 Messages system status messages Here all the messages that have been configured for this process or program are shown together with their current status Hint Messages are for information only and a...

Page 27: ...h on the signal relay during this time interval In addition you can pre program whether you want to be asked about enabling the signal at the start of every program Factory setting Signal enable Yes Time from 00 00 to 00 00 means Signal can always be activated Signal can be programmed before the start of a program Prg sig start No Be aware If you select No for Signal enable the controller will not...

Page 28: ... pressing Be aware If Yes has been set under Signal before programme programmable Prg sig start it is not possible to switch between programme running time programme remaining time during operation 8 5 Program runtime operating time display in operating mode Press the Time button for about 3 seconds to display the program runtime and or the remaining program runtime while a program is in operation...

Page 29: ...t date and time Factory setting Central European Time If you want to change the date and or the time of day select the relevant box press Line button to skip between the edit boxes and use the up or down buttons to make changes to the date or time When you leave the code see 4 7 Leaving code setting the entered changes will be saved Hours Minutes Seconds Day Month Year Automatic change over summer...

Page 30: ...bar in the operation window When a value has been activated you can during operation use the arrow buttons up or down to skip between values on the status bar Be aware Skipping between values on the status bar is not possible while you are entering values Display of program progression from V20 11 The progression of the program will be shown on the status bar as a progression bar The total program...

Page 31: ...t Program See Enabling VisuNet Program Code 8305 VisuNet The visualisation program aditec VisuNet allows you to connect one or several controllers to a superordinate program surveillance system This enables you to monitor and log temperature profiles and processes ensuring comprehensive quality control of the treated products in compliance with HACCP and IFS ISO 9000 Please contact aditec or your ...

Page 32: ...and average values are used for the regulation process and are displayed it depends on the configuration This means it is not always immediately obvious which measured value is used for regulation You can look at the actual values of the sensors separately under code setting Sensor info Hint QR Code Many mobile phones and PDAs have an integrated camera and Software that can recognise QR codes If y...

Page 33: ...val for the activation of the screen saver Entry range 00 10 bis 99 59 minutes seconds Testing the screen saver 10 Power failure If a running program was interrupted by a power failure or because the appliance was switched off the controller will automatically resume the interrupted program according to the configuration settings as soon as power is restored Be aware Your service technician can pr...

Page 34: ...subsequent program Program link is activated Press the Stop button Page 22 Linking programs Controller cannot be started Disruption of the power supply Take the controller off the power supply for at least a minute Now switch the controller on again and try to operate it Short circuit temp sensor Temperature sensor defect Running program is terminated Replace the sensor or assign a different senso...

Page 35: ...ervice program Recording documenting and archiving in compliance with HACCP with the aditec visualisation system VisuNet The visualisation program aditec VisuNet allows you to connect the controllers to a superordinate surveillance system This enables you to monitor and log temperature and humidity profiles of processes ensuring comprehensive quality control of the treated products in your plant i...

Page 36: ...am which includes the option of configuring and changing programs additional recording feature e g the status of the relays and the digital inputs etc Hint Enabling the COMFORT version If a controller has been enabled as COMFORT version it will be automatically recognised as such by VisuNet therefore it does not need to be specifically enabled for VisuNet A BASE version can always be converted int...

Page 37: ... Base or Comfort Enter PIN or PUK 3 Display of remaining attempts to enter PIN Select Base or Comfort 1 2 Information Enter PIN or PUK Confirm PIN or PUK If VisuNet Comfort has already been enabled the diplay will show the message VisuNet Comfort enabled for about 3 seconds Afterwards the controller will automatically leave the code ...

Page 38: ...User manual MKA 120 Conforms to Issue 07 07 2021_01 Page 38 13 Technical data See separate data sheet 14 Connection diagram 14 1 Expansion cards Options ZSL Add board Ethernet ZS4 Add board RS485 ...

Page 39: ... Heating 5 12 13 16 41 Housing 5 40 41 Humidity 33 34 40 41 I Information 4 17 24 25 31 Interface 5 34 35 41 L LED 5 8 20 23 26 27 38 Letters 9 Linking 21 33 List box 10 11 38 M Maintenance 5 34 Messages 25 N Negative numbers 8 Nominal temperature 12 Number entry 30 O Operating mode 23 24 27 Operating time 5 16 18 27 Operation 5 8 11 12 13 14 15 16 18 23 24 25 27 29 Optional 13 14 15 18 24 P Power...

Page 40: ...nforms to Issue 07 07 2021_01 Page 40 Version number 30 VisuNet 5 15 25 30 34 35 36 W Waiting mode 8 20 Hint For further search terms not included in the index directory please use the search function in Adobe Acrobat Reader ...

Page 41: ...ing is connected to the sensor housing itself 5 Relay outputs The relay outputs are potential free and the maximum load of 250V AC and 4A must not be overshot 6 Water and humidity Never use the unprotected appliance near water e g near a bath tub water basin sink washing machine a damp cellar or near a swimming pool The appliance is only waterproof on the front in compliance with IP65 or IP67 The ...

Page 42: ...d alterations will invalidate your warranty For enquiries orders and repair enquiries please contact us at the following address Measurement and Control technology Hardware development Software development Specialised electronics Food technology Process visualisation aditec gmbh Talweg 17 D 74254 Offenau Tel 49 0 7136 96122 0 Fax 49 0 7136 96122 20 www aditec net eMail info aditec net ...

Reviews: