ADJ Products, LLC - www.adj.com - 3 Sixty 2R Instruction Manual Page 43
ADJ Products, LLC - www.adj.com - 3 Sixty 2R Instruction Manual Page 42
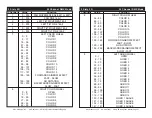
3 Sixty 2R 21 Channel DMX Mode
Channel Value
Function
1 0 - 255 PAN MOVEMENT 8bit (540° or 630°)
2 0 - 255 LEFT TILT MOVEMENT 8bit
3 0 - 255 RIGHT TILT MOVEMENT 8bit
4 LEFT COLOR WHEEL
0 - 8 OPEN
9 - 17 COLOR 1
18 - 26 COLOR 2
27 - 35 COLOR 3
36 - 44 COLOR 4
45 - 53 COLOR 5
54 - 62 COLOR 6
63 - 71 COLOR 7
72 - 80 COLOR 8
81 - 89 COLOR 9
90 - 98 COLOR 10
99 - 107 COLOR 11
108 - 116 COLOR 12
117 - 127 COLOR 13
128 - 189 FORWARD RAINBOW EFFECT
FAST - SLOW
190 - 193 NO ROTATION
194 - 255 BACKWARDS RAINBOW EFFECT
SLOW - FAST
5 RIGHT COLOR WHEEL
0 - 8 OPEN
9 - 17 COLOR 1
18 - 26 COLOR 2
27 - 35 COLOR 3
36 - 44 COLOR 4
45 - 53 COLOR 5
54 - 62 COLOR 6
63 - 71 COLOR 7
72 - 80 COLOR 8
3 Sixty 2R
Operation
DOWN buttons select “Alone” and press ENTER.
Master-Slave Operation (Sound Active or Auto Program):
This function will allow you to link up to 16 units together and oper-
ate without a controller. The units can run a built-in program or run in
sound actiive mode. In Master-Slave operation one unit will act as the
controlling unit and the others will react to the controlling units pro-
grams. Any unit can act as a Master or as a Slave.
1. Using standard XLR microphone cables, daisy chain your units
together via the XLR connector on the rear of the units. Remem-
ber the Male XLR connector is the input and the Female XLR
connector is the output. The first unit in the chain (master) will use
the female XLR connector only - The last unit in the chain will use
the male XLR connector only. For longer cable runs we suggest a
terminator at the last fixture.
2. On your “Master” unit, access the main menu, and press the UP
or DOWN buttons so that “Function” is highlighted, then
press ENTER.
3. Select your desired operating mode. Use the UP or DOWN but-
tons to select between “Auto Program” or “Sound Control”,
press ENTER to select your desired program.
4. Either “Master” or “Alone” will be displayed. Using the UP or
DOWN buttons select “Master” and press ENTER.
5. For your “Slave” units, access the main menu, and press the UP
or DOWN buttons so that “Function” is highlighted, then
press ENTER.
6. Press the UP or DOWN buttons until “Slave Mode” is displayed,
and press ENTER.
7. Either Slave 1, Slave 2, or Slave 3 will be displayed. Select your
desired Slave setting and press ENTER.
8. Press MODE/ESC if you want to return to the main menu.
9. You may change the show or invert the pan and tilt functions
in the system menu by following the directions on pages 27-28.


