DREAMWEAVER CS3
User Guide
193
See also
“Using visual aids for layout” on page 173
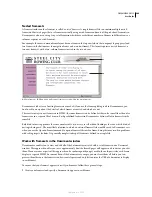
Fixed column width and autostretch columns
A table column in Layout mode can have either a fixed width or a width that automatically expands to fill as much
of the browser window as possible (
autostretch
).
Fixed-width columns
Have a specific numeric width, such as 300 pixels. Dreamweaver displays the column width for
each fixed-width column at the top or bottom of the column.
Autostretch columns
Change automatically depending on the browser window’s width. If your layout includes an
autostretch column, the layout always fills the entire width of the visitor’s browser window. You can make only one
column in a given layout table autostretch. An autostretch column displays a wavy line in the column width area.
A common layout is to make the column containing the main content of the page autostretch, which automatically
sets all the other columns to fixed width. For example, suppose your layout has a wide image on the left side of the
page and a column of text on the right. You might set the left column to a fixed width and make the sidebar area
autostretch.
When you make a column autostretch, Dreamweaver inserts spacer images in the fixed width columns to ensure that
those columns stay as wide as they should be, unless you specify that no spacer image should be used. A spacer image
is a transparent image, used to control spacing, that is not visible in the browser window.
Spacer images
A spacer image (also known as a
spacer GIF
) is a transparent image that’s used to control spacing in autostretch
tables. A spacer image consists of a single-pixel transparent GIF image, stretched out to be a specified number of
pixels wide. A browser can’t draw a table column narrower than the widest image contained in a cell in that column,
so placing a spacer image in a table column requires browsers to keep the column at least as wide as the image.
Dreamweaver automatically adds spacer images when you set a column to autostretch, unless you specify that no
spacer image should be used. You can manually insert and remove spacer images in each column if you prefer.
Columns that contain spacer images have a double bar where the column width appears.
You can manually insert and remove spacer images in specific columns or remove all spacer images in the page.
Switch from Standard to Layout mode
Before you can draw layout tables or layout cells, you must switch from Standard mode into Layout mode. When you
create tables for layout in Layout mode, but it’s a good idea to switch back to Standard mode before you add content
to or edit your tables.
Note:
If you create a table in Standard mode, then switch into Layout mode, the resulting layout table might contain
empty layout cells. You might need to delete these empty layout cells before you can create new layout cells or move layout
cells around.
Switch to Layout mode:
1
If you are working in Code view, change to Design view by selecting View > Design, or View > Code And Design.
Note:
You cannot switch to Layout mode in Code view.
2
Select View > Table Mode > Layout Mode.
September 4, 2007

