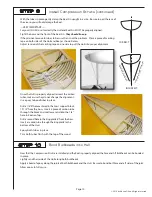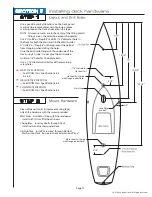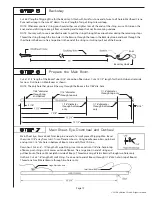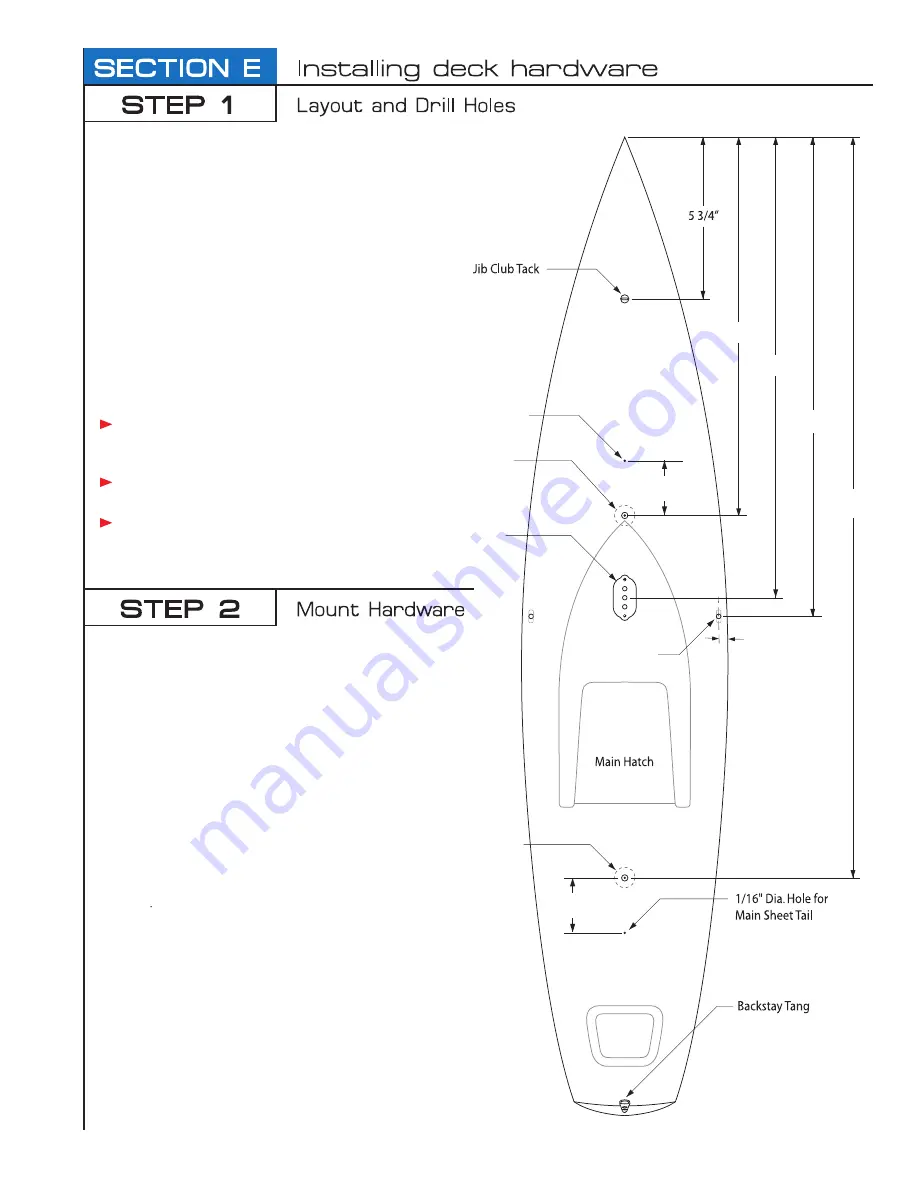
Use a pencil to mark all locations on the Deck, pencil
marks can be removed later with Acetone, or place
masking tape on the Deck and mark on the tape.
NOTE: All measurements are to the center of the fitting and all
fittings are on the centerline except Chainplates.
Use a “Uni-Bit” or “Step-Bit” to drill a 7/32” diameter hole in
the Deck for both the Main and Jib Sheet Exit Guides.
A “Uni-Bit” or “Step-Bit” will help prevent the gelcoat
from chipping when drilling the holes.
Glue the Exit Guide Flanges to the underside of the
Deck using CA Glue. Do not glue the Exit Guide in.
Drill two 1/8” holes for Chainplate bolts.
Use a 1/16” diameter drill bit for all the remaining
screw holes.
MAST STEP LOCATION:
••• See ODOM Class Specification 3.6.5
& 3.8.4
JIB CLUB TACK LOCATION:
••• See ODOM Class Specification 3.6.3
CHAIN PLATE LOCATION:
••• See ODOM Class Specification 3.6.4
Clean off pencil marks (or remove masking tape).
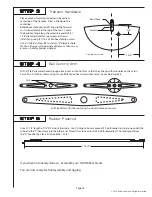
Attach the hardware with the screws provided.
Mast Step: Finish Mast Step with fine sandpaper.
Install with (2) small flat head screws.
Chainplates: Insert eyebolts through Deck.
Install nuts and washers under Deck.
Jib Club Tack: Install “Screw Eye” through Slotted
Washer into Deck. Be sure to check orientation of “Eye”.
3/8”
Page 15
Chain Plate
“eye bolt”
1
5
1/4”
19”
19 3/4”
2 1/4”
2 1/4”
30 1/4”
Jib Sheet Exit Guide
with Flange (under Deck)
1/16” Dia. Hole for
Jib Sheet Tail
Main Sheet Exit Guide
with Flange (under Deck)
Mast Step
© 2010 by Adrian Olson. All rights reserved.


