background image


Installation


Guide


for


the


iHub

3000B

ADT


and


the


Concord


4


Security


Panel


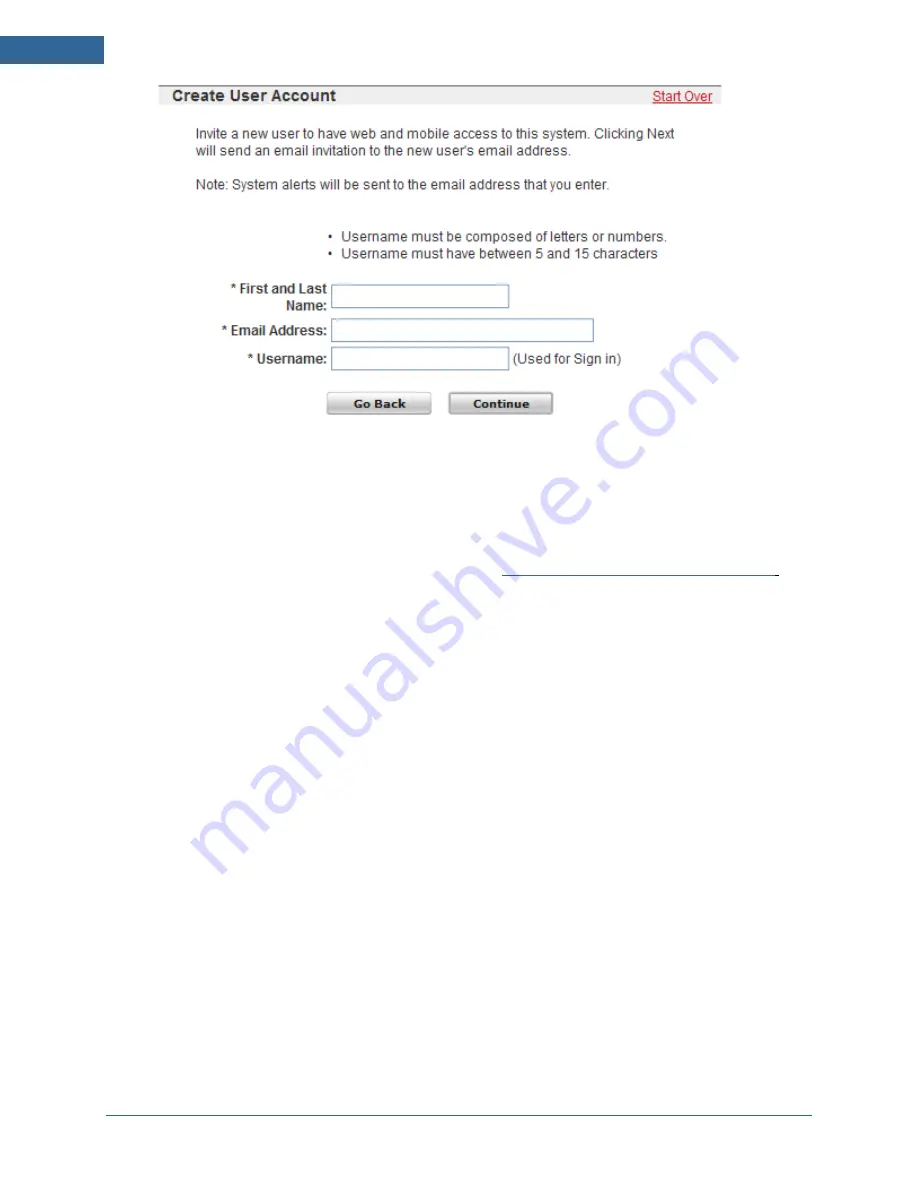
2.


Enter


the


required


information


for


the


customer.


Enter


the


username


that


the


customer


prefers.


Depending


on


how


your


the


system


is


configured,


the


username


might


be


restricted


to


a


certain


number


of


characters.


3.


Click


Continue

.


The


Site


Information


screen


appears.


Continue


with


"Configuring


Site


Information"


on


page


8

.


Configuring


Site


Information


When


you


click


Continue


on


either


the


user


selection


screen


or


the


Create


User


Account


screen,


the


Site


Information


screen


appears.


8


Summary of Contents for iHub-3000B

Page 1: ...iHub 3000B Installation Guide When used with the Concord 4 Security Panel ...

Page 2: ...on and special configurations that may be required for the security system components Refer to the manufacturer s documentation for each device for those specifics Overview of the Installation Process The installation utilizes a streamlined process for setting up the system All components are individually activated and tested before being physically installed in their final locations whenever poss...

Page 3: ...t and continue with the following instructions If you are installing a Touch Screen do not connect it to a power source until you are instructed to do so by the activation wizard To connect the gateway to the Concord 4 security panel 1 Wire the Automation Module to the Concord s bus as described in the GE Installation Manual 2 Gateway model iHub 3000B ADT connectors are labeled Tx Tx Rx and Rx The...

Page 4: ...DT and the Concord 4 Security Panel 3 After reading the information on the screen click Continue The Select Hardware screen appears 4 Select the type of hardware you are installing and click Continue The Enter Activation Key screen appears 4 ...

Page 5: ...etters O or I The activation process begins and then the Select Service Options screen appears 6 Select the appropriate options for the installation based on the information on the Installer Reference Sheet and click Continue The Physical Setup screen appears The exact wording on this screen varies based on the security panel you are installing and the service options you selected on the previous ...

Page 6: ... the screen and then click Continue A message displays a progress bar which indicates approximately how much longer the activation will take If an upgrade is required the activation application performs the upgrade automatically If the power light blinks amber it indicates that an upgrade is in process 6 ...

Page 7: ...e User Account screen appears Continue with Creating a User Account on page 7 If the customer already has a user account enter their username on the right side of the screen and click Continue Skip the next section and continue with Configuring Site Information on page 8 Creating a User Account For customers who do not yet have a user account you must create one The user account enables you to com...

Page 8: ...nding on how your the system is configured the username might be restricted to a certain number of characters 3 Click Continue The Site Information screen appears Continue with Configuring Site Information on page 8 Configuring Site Information When you click Continue on either the user selection screen or the Create User Account screen the Site Information screen appears 8 ...

Page 9: ...ss Code must match the same access code in the ADT Pulse portal For example if the user access code is 1234 not recommended the ADT Pulse setting must also be 1234 or remote control will not be possible The installer should inform the customer that if they ever change their keypad user code they must also change the code in the ADT Pulse web portal A message informs you that the service is now act...

Page 10: ...dicating that the site is in install mode 4 If you have not yet installed the security sensors continue with Adding GE Security Sensors and Remotes on page 13 If you have already installed the sensors continue with the next section Note If you click Run Diagnostics it launches the Site Diagnostics Tool Refer to the separate documentation for that internal tool Note To reset an inclusion controller...

Page 11: ...ace Processors and memory SoC Broadcom 5354 SDRAM DDR 32 MB Nor Flash 32 MB Connectors DC Power Jack Screw Terminal for RS422 2 RJ 45 for Ethernet LAN and WAN 2 USB for external USB device LED and Button LED Power Broadband Devices Button Reset Sync Antenna 1 WiFi Dipole antenna 1 Z Wave internal antenna Power Consumption 12 DC Max 10 5W Compliance FCC CA Power Supply UL Hardware Dimensions H x W ...

Page 12: ...essly approved by the party responsible for compliance could void your authority to operate the equipment This device complies with Part 15 of the FCC Rules Operation is subject to the following two conditions 1 this device may not cause harmful interference and 2 this device must accept any interference received including interference that may cause undesired operation IC Warning statement RSS GE...

Reviews: