Total Access 3000 23-Inch Chassis Installation and Maintenance Practice
8
61181001L1-5E
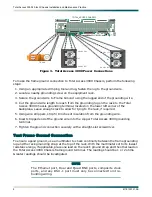
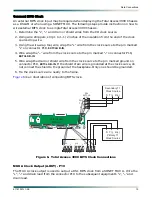
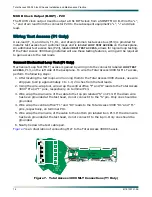
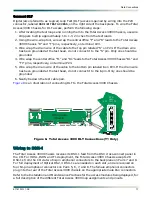
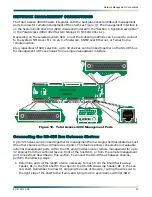
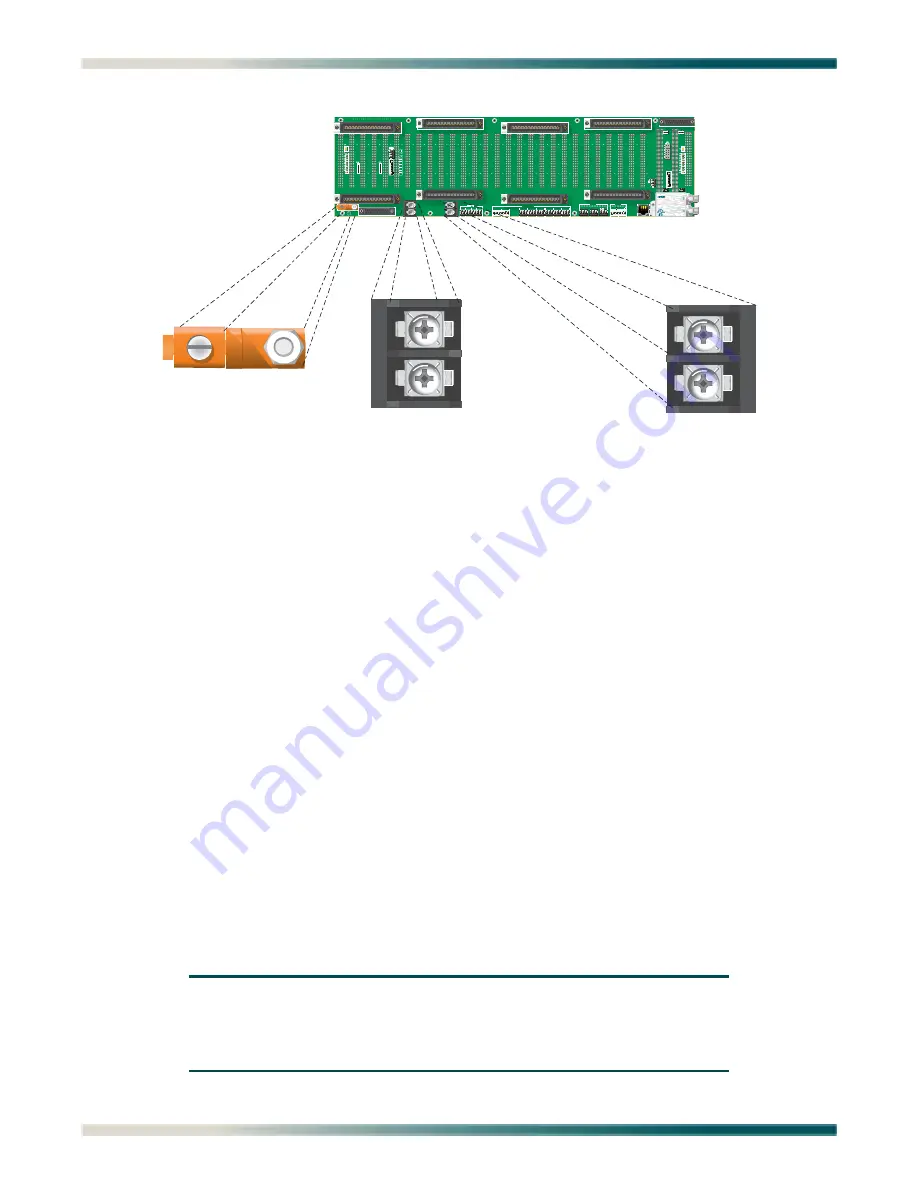
Figure 3. Total Access 3000 Power Connections
To make the frame ground connection to Total Access 3000 Chassis, perform the following
steps:
1. Using an appropriate crimping tool and lug, fasten the lug to the ground wire.
2. Locate a nearby grounding screw on the equipment rack.
3. Secure the ground wire to Frame Ground using the lugged end of the grounding wire.
4. Cut the ground wire length to reach from the grounding lug on the rack to the Total
Access 3000 Chassis grounding terminal, located on the lower left corner of the
backplane. Leave enough slack to allow for tying to the rack, if required.
5. Using wire strippers, strip 5/8 inches of insulation from the grounding wire.
6. Insert stripped end of the ground wire into the copper Total Access 3000 grounding
terminal.
7. Tighten the ground connection securely with a straight-slot screwdriver.
Test Frame Ground Connection
To ensure a good ground, use a multimeter to check continuity between the frame grounding
lug and the rack grounding strap at the top of the rack. With the multimeter set to its lowest
resistance range, if applicable, place one lead on the rack’s ground strap and the other lead on
the Total Access 3000 Chassis frame ground terminal. The reading should be 1 or 2 ohms.
Greater readings should be investigated.
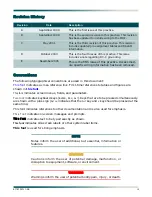
NOTE
The Ethernet port, Dual and Quad BNC ports, composite clock
ports, and any DSX-1 port must only be connected to intra-
building wiring.
TOTAL ACCESS CHASSIS
E D C B A
D C B A
F2
LOOP
TEST
ACCESS
33
1
64
32
33
1
64
32
33
1
64
32
33
1
64
64
32
ADMIN
J31
PAIR 2
P11
P12
P8
PAIR 3
PAIR 1
33
1
64
32
P10
PAIR 8
PAIR 6
PAIR 5
P9
P7
J33
EXTCLK
J23
J20
J26
1
64
1
33
1
33
32
C B A
C B A
C B A
C B A
C B A
C B A
C B A
C B A
C B A
C B A
C B A
J29
10
20
32
1
J28
10
20
32
1
J27
10
20
32
1
10
20
32
1
J25
10
20
32
1
J24
32
1
10
20
32
1
J22
10
20
32
1
J21
10
20
32
1
10
20
32
1
J19
10
20
32
J18
J16
10
C B A
C B A
C B A
C B A
C B A
C B A
C B A
C B A
C B A
C B A
C B A
C B A
C B A
PAIR 7
1
10
20
32
1
J17
10
20
32
1
10
20
32
1
J15
10
20
32
1
J14
10
20
32
1
J13
10
32
1
J12
20
20
32
1
J11
10
32
1
J10
10
20
20
32
1
J9
10
20
32
1
J8
10
20
32
1
J7
20
32
1
J6
10
10
20
32
C B A
C B A
C B A
C B A
1
J5
20
32
1
J4
10
10
20
32
1
J3
10
20
32
32
1
J2
10
20
1
10
20
32
1
64
32
33
1
NTWK MGMT
J30
-48 VDC PRI
-48 VDC
RET
P22
ACO
RMT
AUX1
AUX2
A
A
A
A
B
B
B
B
-48 VDC SEC
-48 VDC RET
P3
NO
NC
C
NO
NC
C
AUX1
AUX2
P21
CRI-A
NO C NC NO C NC NO C NC
MAJ-A
MIN-A
P1
P20
P2
J32
P19
P18
ALARM OUTPUTS
CRI-A
B - OUT
NO C NC NO C NC NO C NC
MAJ-A
MIN-A
A - OUT
B IN
E - NET
IN
OUT
+ –
+ – S
+ – S
+ – S
RS485
A B
A B
T
R
S
T1
R1
S
F1
10
30
20
40
48
E D C B A
P14
P15
S
S
30
40
48
1
6
T
R
T1
R1
P23
DSX1
TEST
ACCESS
F4
F3
PC2A 94V-0
2298
1
J1
S
1
R22
P24
EXTCLK
C-IN
1
10
20
8
+
–
R21
CUSTOM
TELECOM
E190349
1181004L1
PAIR 4
P5
-48 VDC PRI
TS1
-48 VDC RET
TS2
-48 VDC SEC
-48 VDC RET
FR GND
J33

