Total Access 3000 Hi-Cap RT Solution Installation and Maintenance Manual
18
64192MB3K2LX-1B
Installing Data Cables
This procedure assumes that required panels and covers are removed to facilitate the instal-
lation of data wiring from local sources. For more information, refer to Emerson document
631-205-071.
NOTE
The maximum cable outer diameter is 3 inches. Cables that do not
meet the minimum diameter must be built up to achieve a proper
seal.
Tapered plastic nozzles support the cables and provide a moisture and vermin seal between
the incoming conduit and the cabinet interior. The small end of the plastic nozzle is customer
trimmed to fit the incoming cable dimension and then sealed with compound, tape, and hose
clamps. The large end of the nozzle fits on to the bottom cone-shaped metal cable sleeve and is
also secured with a hose clamp.
The following procedure can be used in place of the procedure in Emerson document 631-
205-071. The procedure assumes that incoming cable stubs are present at the top of the
conduit inside the cabinet. If local conditions are different, revise the procedure to fit the
condition.
WARNING
All grounds must terminate at a known ground source. Ensure
metal-to-metal contact on all ground connections. Do not group or
stack connections. Verify ground circuit continuity.
To install data cables, complete the following steps:
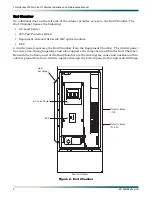
1. Gain access to the End Chamber.
2. Remove the plastic nozzle from the bottom of each cable sleeve where a cable is to be
installed.
3. Cut the small end of each plastic nozzle so that it can just fit over and be slipped onto an
incoming cable (or cable bundle), small end first.
4. Pull about 2 feet of cable into the cabinet. Slide the nozzle onto the cable then slide it
down until it meets the top of the incoming conduit.
5. Keeping the nozzle in that position, pull 15 feet of cable up through the cone-shaped cable
sleeve into the cabinet interior.
6. After the desired length of cable has been pulled, secure the small end of the nozzle to the
cable using one layer of sealing tape and the cable clamp provided. If more than one wire
is grouped in a nozzle, use “B” sealing compound to seal gaps in the wire bundle.
7. Maneuver the cable so the large end of the nozzle can slide onto the bottom cone shaped
cable sleeve until it is snug to the sleeve or seats against the cabinet bottom and then
secure with the hose clamp provided.
8. Repeat this process for all remaining cables.

