background image

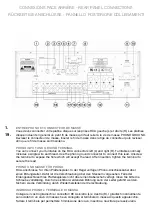
Before plugging in the amplifier, its master power switch must be in the OFF position. 

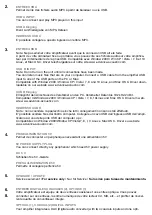
NETZANSCHLUSS / NETZSPANNUNGS-WAHLSCHALTER / HAUPTNETSCHALTER ON OFF

Bitte vergewissern Sie sich über die Netzspannung in Ihrem Land. Für den Fall das diese115V 

beträgt, muss der Netzspannungs-Wahlschalter auf die richtige Position gestellt werden und die 

Sicherung durch eine mit dem richtigen Wert ersetzt werden.(Siehe hierzu die Angaben auf der 

Rückseite des Gerätes).

Vor dem Einstecken des Netzkabels in den Verstärker, muss der Hauptschalter in der Position OFF 

sein.

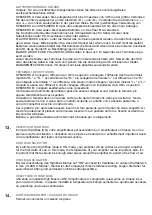
PRESA DI ALIMENTAZIONE, SELETTORE VOLTAGGIO, ACCENSIONE

In questa collocazione troviamo la presa di alimentazione, il selettore del voltaggio e l’interruttore di 

accensione. Prima di inserire il cavo nella presa attiva, l’interruttore principale deve essere su OFF 

ed allo stesso tempo accertarsi  della tensione del proprio paese. In caso si debba utilizzare 115 V si 

deve cambiare la posizione del selettore.

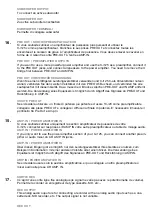
BORNIER HAUT-PARLEURS

Paire d’enceinte A:  Brancher des enceintes ayant une impédance minimale de 4 ohms. Brancher 

l’enceinte droite aux bornes repérées ‘R +’ et ‘R-’ en s’assurant que ‘R+’ est reliée à la borne ‘+’ de 

l’enceinte et ‘R-’ est reliée à la borne ‘-’ de cette même enceinte. Brancher le haut-parleur gauche 

aux bornes repérées ‘L+’ et ‘L-’ en

procédant de la même manière. Si les bornes SPEAKERS A et B sont utilisées

simultanément, ne raccorder que des haut-parleurs ayant une impédance minimale de 8

ohms.

Pour la deuxième paire d’enceinte (B) (seulement sur le X-i90)procéder de la même façon que la 

paire B.

On peut utiliser les bornes serre-fils pour courants élevés comme bornes à vis pour les câbles com-

portant des cosses plates, des broches, des prises “banane“, ou pour des câbles comportant des 

fils nus.

Les fils nus et les broches s’insèrent dans le trou diamétral percé dans la tige de la borne.

Desserrer la bague en plastique jusqu’à ce que le trou dans la tige soit visible. Insérer la

broche ou le fil nu dans le trou, puis fixer le câble en vissant la bague de la borne.

Eviter tout risque que le métal nu des câbles de haut-parleurs ne touche la face arrière ou

un autre connecteur. S’assurer que la longueur dénudée ou la longueur de la broche ne

dépasse pas 1/2” (1 cm) et qu’il n’y a aucun brin libre.

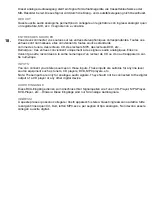
SPEAKER TERMINALS

SPEAKERS A: Connect speakers with impedance of 4 Ohms or greater. Connect the right

speaker to the terminals market ‘R +’ and ‘R-’ ensuring that the ‘R+’ is connected to the

‘+’ terminal on your loudspeaker and the ‘R-’ is connected to the loudspeaker’s ‘-’ terminal. Connect 

the terminals marked ‘L+’ and ‘L-’ to the left speaker in the same way. When

using both SPEAKERS A and SPEAKERS B connect speakers of impedance 8 Ohms or

greater.

SPEAKERS B (only for X-i90): use same method to connect the B pair.

The high current binding post terminals can be used as a screw terminal for cables

terminating in spade or pin connectors or for cables with bare wire ends.

SPADE CONNECTORS

These should be slotted under the terminal’s screw bushing, which is then fully tightened.

Ensure the connector is tightly secured and there is no danger of bare metal from spade

connectors touching the back panel or another connector as this may cause damage.

BARE WIRES AND PIN CONNECTORS

Bare wires and pin connectors should be inserted into the hole in the shaft of the terminal.

Unscrew the speaker terminal’s plastic bushing until the hole in the screw shaft is revealed. Insert 

the pin or bare cable end into the hole and secure the cable by tightening down the terminal’s 

bushing.

BANANA CONNECTORS

You also can use banana connectors on the speakers terminal.

Avoid any danger of bare metal from the speaker cables touching the back panel or

another connector.

12.

Summary of Contents for X-i125

Page 1: ...QuickStart X i125 Stereo audiophile integrated amplifier Amplificateur int gr st r o audiophile Audiophiler Stereo Vollvererst rker...

Page 2: ...para reciclagem na Uni o Europeia Para mais informa es queira contactar as autoridades locais ou o revendedor onde adquiriu o produto M rkningen av produkter och f rpackningar med denna symbol betyde...

Page 3: ...of electric shock to persons Das Blitzsymbol in einem gleichschenkligen Dreieck warnt vor nicht isolierten Komponenten mit gef hrlicher Stromspannung die zu ernsthaften Personensch den f hren kann Das...

Page 4: ...comp tent et qualifi Afin de connaitre la station technique la plus proche merci de contac ter votre distributeur national LEGGERE ATTENTAMENTE TUTTE LE ISTRUZIONI sulla sicurezza e sul funzionamento...

Page 5: ...arkedon the appliance GROUNDING OR POLARIZATION Precautions should be taken so that the grounding or polarization means of anappliance is not defeated POWER CORD PROTECTION Power supply cords should b...

Page 6: ...tsch chten fen und anderen W rme erzeugenden Ger ten einschlie lich Verst rkern entfernt aufzustellen Setzen Sie das Ger t nicht direkter Sonneneinstrahlung aus STROMQUELLEN Das Ger t darf nur an Stro...

Page 7: ...es Ger ts diese Taste daraufhin wird es mit Strom versorgt und ist betriebsf hig die Beleuchtung des Standby Knopfes wir wei Der Hauptnetzschalter befindet sich auf der Ger ter ckseite und muss auf ON...

Page 8: ...livel lo del volume In modalit INPUT indica la sorgente d ingresso selezionata In modalit BALANCE indica il livello destro e sinistro In modalit BPA se disattivata sono disponibili le regolazioni di m...

Page 9: ...e und schalten Sie anschlie end den Hauptnetz schalter auf der R ckseite auf ON Die Standby Taste auf der Frontplatte leuchtet in rot Dr cken Sie die Standby Taste Frontplatte und das Licht wird wei d...

Page 10: ...Arborescence des menus et options Options and menus arborescence Men struktur und Optionen menu e le opzioni...

Page 11: ...terminal to expose the hole which will accept the lead After insertion tighten the terminal to secure the lead PHONO UND MASSE F R PHONO RCA Anschl sse f r Ihren Plattenspieler In der Regel verf gen P...

Page 12: ...s 192 kHz 24 Bit Kompatibel mit Windows 2000 Windows XP Vista 7 8 10Linux und Mac OS X Driver am web site www advance acoustic com INGRESSO USB B Nota non accendere l apparecchio sinch tutti i collega...

Page 13: ...less elaborate but more importantly with a rendering more real and natural as possible The new audio wireless receiver X FTB01 from Advance Acoustic does this with real talent The X FTB01 can easily b...

Page 14: ...us Les fils nus et les broches s ins rent dans le trou diam tral perc dans la tige de la borne Desserrer la bague en plastique jusqu ce que le trou dans la tige soit visible Ins rer la broche ou le fi...

Page 15: ...8 Ohm o superiori SPEAKERS B collegarli esattamente come i precedenti I terminali ad alta corrente dei diffusori possono essere collegati ai cavi tramite le forcelle pin oppure direttamente al cavo s...

Page 16: ...desidera utilizzare un finale di potenza pi potente ed usare l X i20 come preamplificatore collegarlo alle prese PRE OUT e collegare i diffusori al finale di potenza E necessario rimuovere il pontice...

Page 17: ...analogiques Elles ne doivent pas tre raccord es la sortie num rique d un lecteur de CD ou d un autre appareil sor tie num rique INPUTS You can connect your stereo sources on those inputs These inputs...

Page 18: ...Augmente diminue le niveau des graves Bassregler BALANCE Increase level of left channel Augmenter ou diminuer le canal gauche Balanceregler L R DIMMER This button is desactivated Only available on the...

Page 19: ...E PHONO 47K ohms EINGANGSIMPEDANZ PHONO DAC DIGITAL AUDIO AKM AK4113 CONVERTER 24bit 192kHz USB B DAC asynchronous Wolfson WM8740 X Mos Adaptive for playback asynchronous for record IN LEVEL CD AUX 30...

Page 20: ...CD quality AptX 48kHz 24 bit digital out I2 S or S PDIF Below data is tested under these formats AAC WAV FLAC and APE Sampling rate 44 1 or 48kHz bit THD 0 003 at 1kHz Signal to noise ratio 95dB Frequ...

Page 21: ...nt les directives suivantes la compatibilit lectromagn tique CEM 2014 30 UE la basse tension 2014 35 UE KONFORMIT TSERKL RUNG Wir erkl ren in alleiniger Verantwortung dass das Ger t auf das sich diese...

Page 22: ...ign and development in France by Advance Paris Sarl 13 rue du coq gaulois 77390 Brie Comte Robert FRANCE Tel 33 0 160 185 900 Fax 33 0 160 185 895 email info advance acoustic com www advance acoustic...

Reviews: