AirFusion™ Inflatable Kayak Owner’s Manual
9
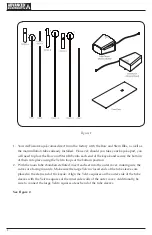
Figure 2
3.2 Set Up
1. Familiarize yourself with the different assembly parts.
a. All of the assembly poles have a number marked on them at one end.
b. The Front Thwart or “air bag” has two webbing sleeves stitched on the sides. The front
end of the thwart (this is the portion that will face the bow of the kayak) is smaller than
the back end (the portion that you will brace your feet against).
c. The Rear Thwart or “air bag” is overall larger than the Front Thwart. The front end of
the thwart (this is the end that will face the stern of the kayak) is smaller than the
back end (the portion that will be directly behind your seat).
2. Assemble the frame poles by interlocking the shock corded ends together.
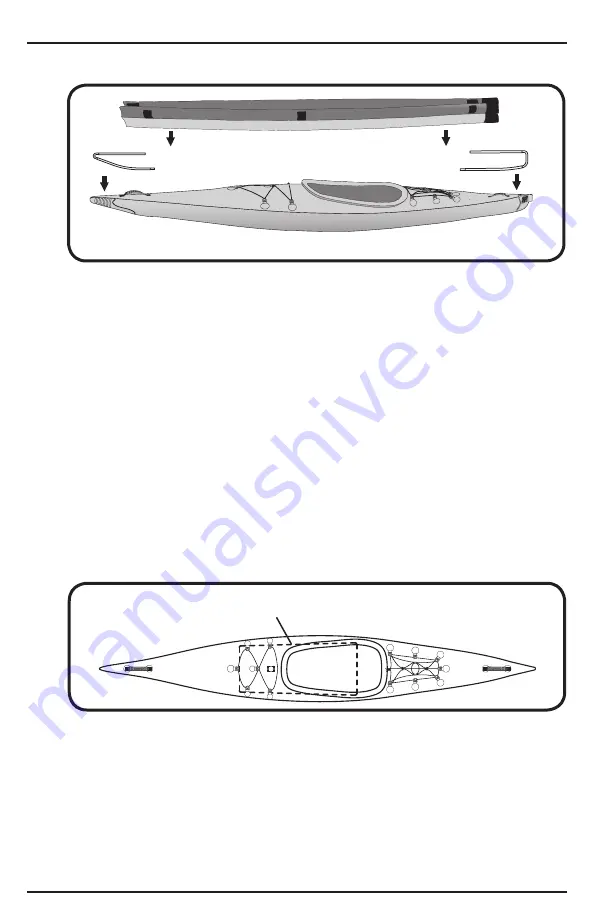
3. Install the Foam Floor. The Foam floor should be placed with the wider end at the cockpit.
You can use the front thwart alignment line, printed on the inside of the kayak, to align the
front end of the floor. Make sure that the Velcro loop on the hull of the kayak comes up
through the hole in the floor.
See Figure 3.
Figure 3
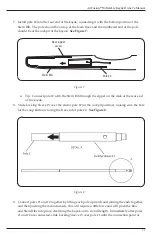
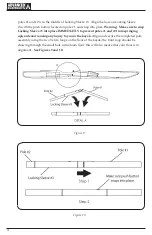
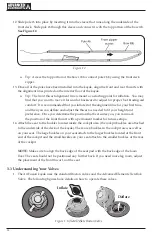
4. Once the poles are assembled and the floor is installed, begin by inserting pole #1 into the
sleeve on the bottom of the front thwart (leave deflated) making sure that the numbered end
of the pole is at the back end of the Front Thwart.
See Figure 4.
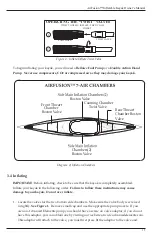
Main Inflation Chambers
Outer Cover
Main Inflation Chambers
Bow Rib
Stern Rib
Foam Floor
placement
Summary of Contents for AirFusion AE1040-Y
Page 22: ...TM 22 NOTES...
Page 23: ...AirFusion Inflatable Kayak Owner s Manual 23 NOTES...
Page 24: ...NOTES...


