background image

1314-900 Revision BA 

250W Precision Calorimeter


12 

5.


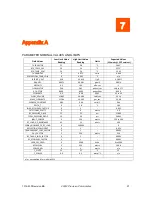
Once communication has been established, proceed to the parameter list shown in Appendix 
A and check the following parameters to display their real time data being streamed from the 
1314: 


RTD_TEMP_PRE 


RTD_TEMP_POST 


THERMISTOR 


FLOWRATE (GPM) 


THERMOPILE 


The RTDs and ambient values should now display real time data of values close to the current 
laboratory environment (typically ~ 25C). The thermopile should display a value close to 0 
(typically .0009 or so) as there is no temperature differential taking place yet with no fluid or flow 
present. The flowrate should display 0 as there is no fluid present and the pump has not been 
turned on yet. This flowrate value will guide you to establishing the proper flowrate once the 
pump has been turned on. The unit is now ready to prime the pump and the proper flowrate will 
be adjusted to a value of .5 to .55 GPM using the flow adjust knob on the rear of the 1314 unit as 
described in the next section

Connect the Chiller and Prime the Coolant Pump 

1.


Connect the chiller serial cable to the PC USB port.  

2.


Ensure the supply outlet hose of the chiller is connected to a filter then the inlet of the 1314. 

3.


 Make sure the outlet hose of the 1314 is connected to the return inlet of the chiller. 

4.


 Locate the main power switch on the back side of the chiller, turn it ON.  

Summary of Contents for 1314

Page 1: ...250W Model 1314 Precision Calorimeter User Manual February 2023 1314 900 Revision BA...

Page 2: ...nformation contained herein Product Usage Statement WARNING READ THIS ENTIRE MANUAL AND ALL OTHER PUBLICATIONS PERTAINING TO THE WORK TO BE PERFORMED BEFORE YOU INSTALL OPERATE OR MAINTAIN THIS EQUIPM...

Page 3: ...ergy s technical writing staff has carefully developed this manual using research based document design principles However improvement is ongoing and the writing staff welcomes and appreciates custome...

Page 4: ...e Location Where the Unit Will Be Installed 9 Fill the Coolant Reservoir 9 Establish Communication with the 1314 10 Connect the Chiller and Prime the Coolant Pump 12 Adjusting Coolant Flow 15 Adjustin...

Page 5: ...er v Appendix A 27 Appendix B Service Assistance 28 Returns for Repairs 28 Warranty 28 Warranty Limitations 29 Statement of Calibration 29 Storage and Shipment 30 Drain the calorimeter system of all c...

Page 6: ...ot designed for operation in explosive environments WARNING DO NOT OPERATE WITHOUT COVERS This device should be operated with all panels and covers in place Operation with missing panels or covers cou...

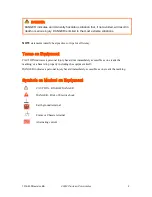
Page 7: ...practices or tips for efficiency Terms on Equipment CAUTION indicates a personal injury hazard not immediately accessible as one reads the marking or a hazard to property including the equipment itse...

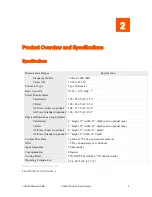
Page 8: ...A4 AC Power Standard optional 100 240 VAC 10A4 Physical Dimensions Approximate Calorimeter 4 height 19 width 23 depth not in optional rack Chiller 7 height 19 width 28 depth not in optional rack AC Po...

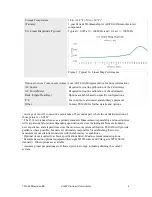
Page 9: ...options 1 Average of ten 10 consecutive points taken 25 seconds apart where the standard deviation of those points is 0 05 W 2 The 1314 is intended for use as a primary standard Measurement repeatabi...

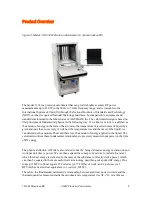
Page 10: ...en conversely if we know the temperature rise and the mass of the liquid we can determine the amount of heat and therefore the amount of energy applied to the liquid The calorimeter utilizes these fun...

Page 11: ...Since temperature is read out as a difference rather than an absolute quantity within the thermopile the only absolute measurement required is the rate of flow made by the flow meter and this can be m...

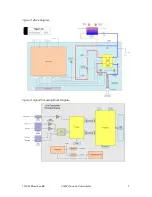
Page 12: ...1314 900 Revision BA 250W Precision Calorimeter 7 Figure 3 Block Diagram Figure 4 Signal Processing Block Diagram...

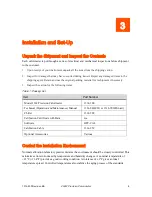
Page 13: ...arton for the following items Table 1 Packing List Item Part Number Model 1314 Precision Calorimeter 1314 300 Technical Operation and Maintenance Manual 1314 840 CD or 1314 900 Printed Chiller 1314 38...

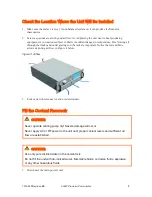
Page 14: ...e intake and outlet gratings on the rack are important Notice the red and blue arrows depicting air flow in Figure 4 below Figure 5 Airflow 3 Lock caster wheels once location is determined Fill the Co...

Page 15: ...O NOT USE AUTOMOTIVE COOLANT Automotive coolant uses unknown and or inadequate corrosion protection systems that may be incompatible with materials in your calorimeter 4 Add a drop of ordinary dishwat...

Page 16: ...14 is ready for further commands it will display a power measurement value and a frequency setting value It will be necessary to find the Ethernet address assigned to the unit under the softkey setup...

Page 17: ...flow present The flowrate should display 0 as there is no fluid present and the pump has not been turned on yet This flowrate value will guide you to establishing the proper flowrate once the pump ha...

Page 18: ...ed excess air back into the reservoir without intervention 6 When the pump is properly primed the orange light will be illuminated on the right side of the chiller display PUMP SET Figure 8 Chiller Po...

Page 19: ...valve adjust knob or by pinching either the inlet or outlet hose and observing the bubbles in the flow as they are encouraged to disappear using this technique This isn t as easy as it sounds so take...

Page 20: ...for some time after flow has been established looking for any air bubbles in the clear PVC tubing and around the filter at the rear of the unit 2 Check chiller display If there is insufficient less th...

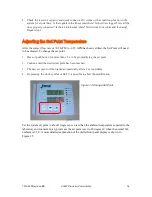
Page 21: ...nt will need to be adjusted To change the set point 1 Press or push button for more than 1 5 s to begin modifying the set point 2 Continue until the desired set point has been reached 3 The new set po...

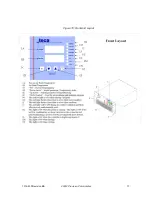
Page 22: ...1314 900 Revision BA 250W Precision Calorimeter 17 Figure 15 Front End Layout...

Page 23: ...tic is the reduced fan noise as the system approaches set point The fan speed is directly related to the amount of cooling required This feature has been factory preset Changes while not recommended c...

Page 24: ...DO NOT APPLY MORE THAN THE MAXIMUM RATED AC OR RF TO THE LOAD USE ONLY DISTILLED WATER AS A SOURCE OF COOLANT Always allow coolant to circulate at least 3 minutes after AC or RF input power is remove...

Page 25: ...s error term by storing the RF load reflection data in memory and then applying it as a frequency correction term to obtain the final calibrated RF answer in watts Correction of Error Terms All of the...

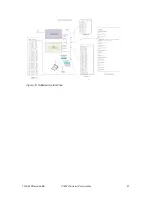
Page 26: ...1314 900 Revision BA 250W Precision Calorimeter 21 Figure 16 Software System Files...

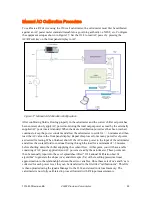
Page 27: ...isplay Repeat this process for as many power level points as desired for testing When finished shut off the AC source power to the input of the calorimeter and allow the coolant fluid to continue flow...

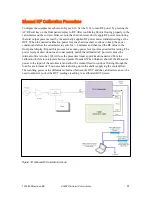
Page 28: ...and then read the RF value in the front panel display Repeat this process for as many power level points as desired for testing The power levels desired do not need to necessarily match the calibrated...

Page 29: ...oximately 20 000 hours The following should be performed at intervals of one to six months depending upon usage Remove cover to access internal components Remove accumulations of dust dirt and other o...

Page 30: ...resistance values is used by the control feedback algorithm within the CalProg program to set the requested power on the 6811B or other AC power source under automated conditions not under manual oper...

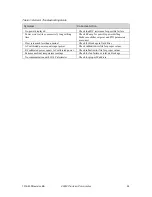
Page 31: ...er drifting Make sure chiller set point and PID parameters are correct Flow rate much less than nominal Check for blockage in fluid filter AC calibrated power equals input power Check calibration ini...

Page 32: ...ATE 0 5 058 GPM 51 to 55 FLOW_VOLUME 31 861 34 386 cm3 sec 33 14 MASS_FLOWRATE 31 784 34 302 gm_sec 33 06 SEEBECK_CONSTANT 0 04 0 06 volts C 0 04 DELTA_T 0 1 8 C 1 65 LOAD_EFFICIENCY_FACTOR 0 1 0 995...

Page 33: ...ny detailed information provided to our technicians will assist them in identifying and correcting the problem in the quickest possible manner Use a copy of the Repair and Calibration Service form pro...

Page 34: ...to fuses batteries or damage to the instrument caused by battery leakage Statement of Calibration This instrument has been inspected and tested in accordance with specifications published by TEGAM In...

Page 35: ...d Drain the individual hoses completely by removing the connectors on their respective ends 2 Place a quick connect connector with an open hose end onto the return inlet of the chiller 3 Put the end o...

Page 36: ...nical Contact Phone Number Additional Info R E P A I R I N S T R U C T I O N S E v a l u a t i o n R e p a i r C a l i b r a t i o n C a l i b r a t i o n O n l y R e p a i r o n l y P r o v i d e D a...

Reviews: