S
ET
THE
IP A
DDRESS
AND
P
ROTOCOL
SMD23E2 and SMD24E2 User’s Manual
ADVANCED MICRO CONTROLS INC.
100
2.2c Use the AMCI Net Configurator Utility (continued)
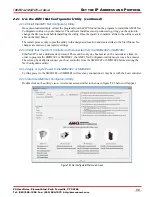
2.2c.6 Press the [SCAN] button and Connect to the SMD23E2 or SMD24E2
Pressing the [Scan] button will open the window shown in figure T2.4. The SMD23E2 or SMD24E2 will
appear in the scan list only if the unit and your network interface are on the same subnet. Optionally, you can
press the [Manual Connect] button and enter the IP address of the unit.
Figure T2.4 Scan for SMD23E2 or SMD24E2
If scanning for the SMD23E2 or SMD24E2, click on the IP Address of the unit and click on the [Connect]
button. The Net Configurator utility will connect to the unit.
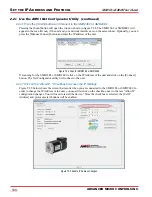
2.2c.7 Click on the "Allow IP..." Checkbox to Access the IP Settings
Figure T2.5 below shows the screen that results when you are connected to the SMD23E2 or SMD24E2. In
order to change the IP Address of the unit, you must first click on the checkbox next to the text “Allow IP
configuration changes. You will need to restart the device.” Once the checkbox is selected, the [Set IP
Address] and protocol select buttons will be enabled.
Figure T2.5 Enable IP Address Changes


