3.3
Teflon Advancement
Teflon will wear with continued use and prematurely tear if contacting the product when sealing. If the
Teflon wears or tears affecting the seals, the Teflon can be advanced to bring new Teflon into the seal
area. To advance the Teflon, insert a small flathead (common) screwdriver into the bottom 1/4” hole
located on the right side panel of the unit. When you feel the screwdriver enter into the slot of the Teflon
rod, turn the screwdriver counterclockwise to advance new Teflon into position.
After turning new Teflon into position, turn the rod clockwise slightly so that there is very little tension
on the Teflon sheet.
Note: Teflon that is too tight will cause Anti-Jam issues and may also cause the Teflon to tear.
CAUTION: The following maintenance procedures should only be performed by trained and qualified
maintenance technicians.
3.4
Teflon Sheet Replacement
When the Teflon sheet has been exhausted, it will become loose from the upper Teflon rod and will
require replacement. There are three phases when replacing the Teflon, Phase 1: Disassembling parts of
the machine to get to the Teflon Bracket, Phase 2: Changing the Teflon, and Phase 3: Reassembling the
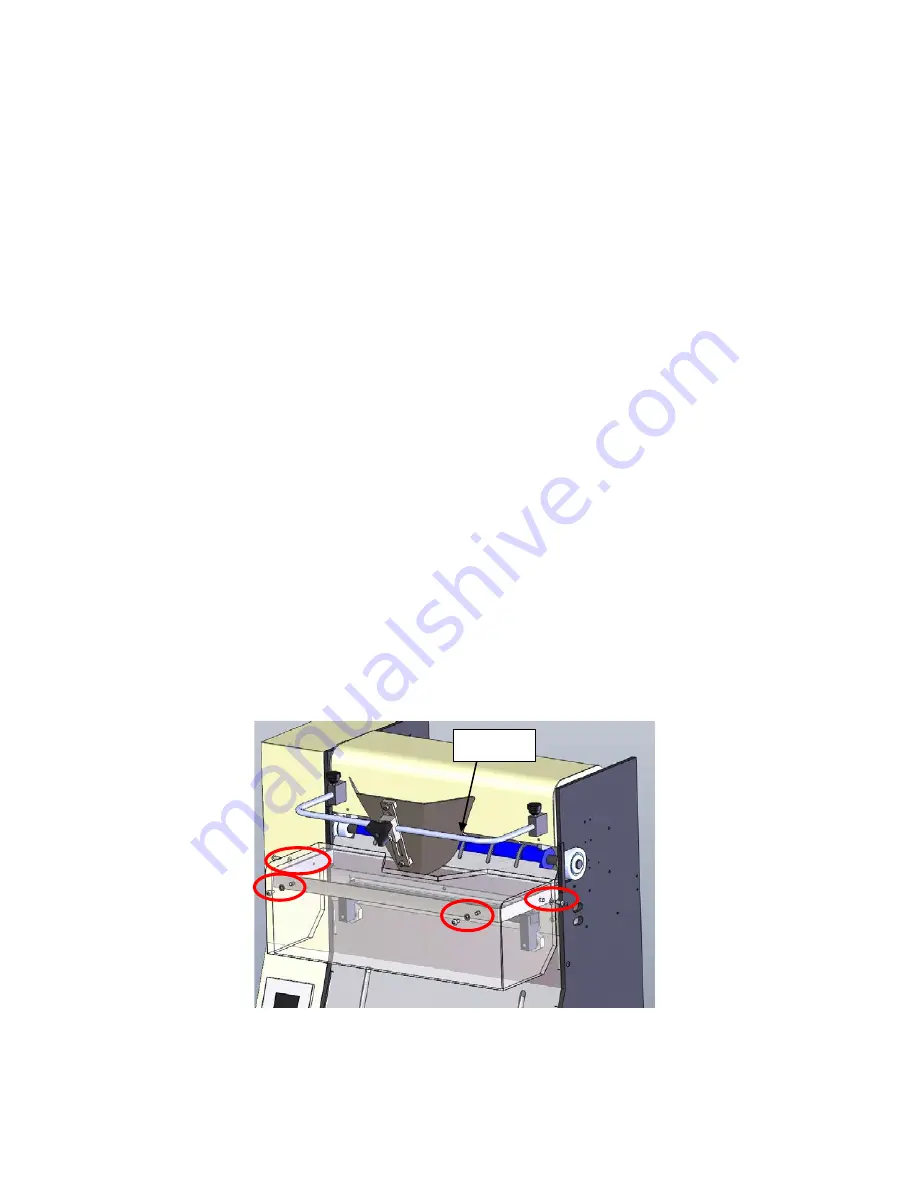
machine parts taken off to get to the bracket. Use Figure 3-2,
Figure 3-3, and the T-200 Heater Bar Assembly Diagram in 4.2C with the following instructions. Call
APPI Service (800)754-4403 if additional help is needed.
Phase 1:
1.
Remove air from the unit, turn the T-200 power “OFF” and unplug the power cord.
2.
Remove Stainless Steel Cover from back of machine.
3.
Lift the funnel assembly and top cover upward.
4.
Remove four screws from the guard assembly and remove the Lexan guard, see Figure 3-2.
5.
Allow the sealer mechanism to cool for at least 30 minutes.
Lift Up
Figure 3-2
18
Summary of Contents for T-200
Page 10: ...This page intentionally left blank 9 ...
Page 15: ...T 200 Threading Diagram Figure 2 1 14 ...
Page 16: ...This page intentionally left blank 15 ...
Page 27: ...T 200 Electronics Assembly PN TA T8 1000 26 ...
Page 29: ...T 200 Heater Bar Assembly PN TA T8 2000 28 ...
Page 32: ...T 200 Main Frame Assembly PN TA T8 4000 31 ...
Page 34: ...F T 200 Pneumatic Layout Dwg NO T 200 PNE 33 ...
Page 35: ...G T 200 Electrical Layout 34 ...


