22
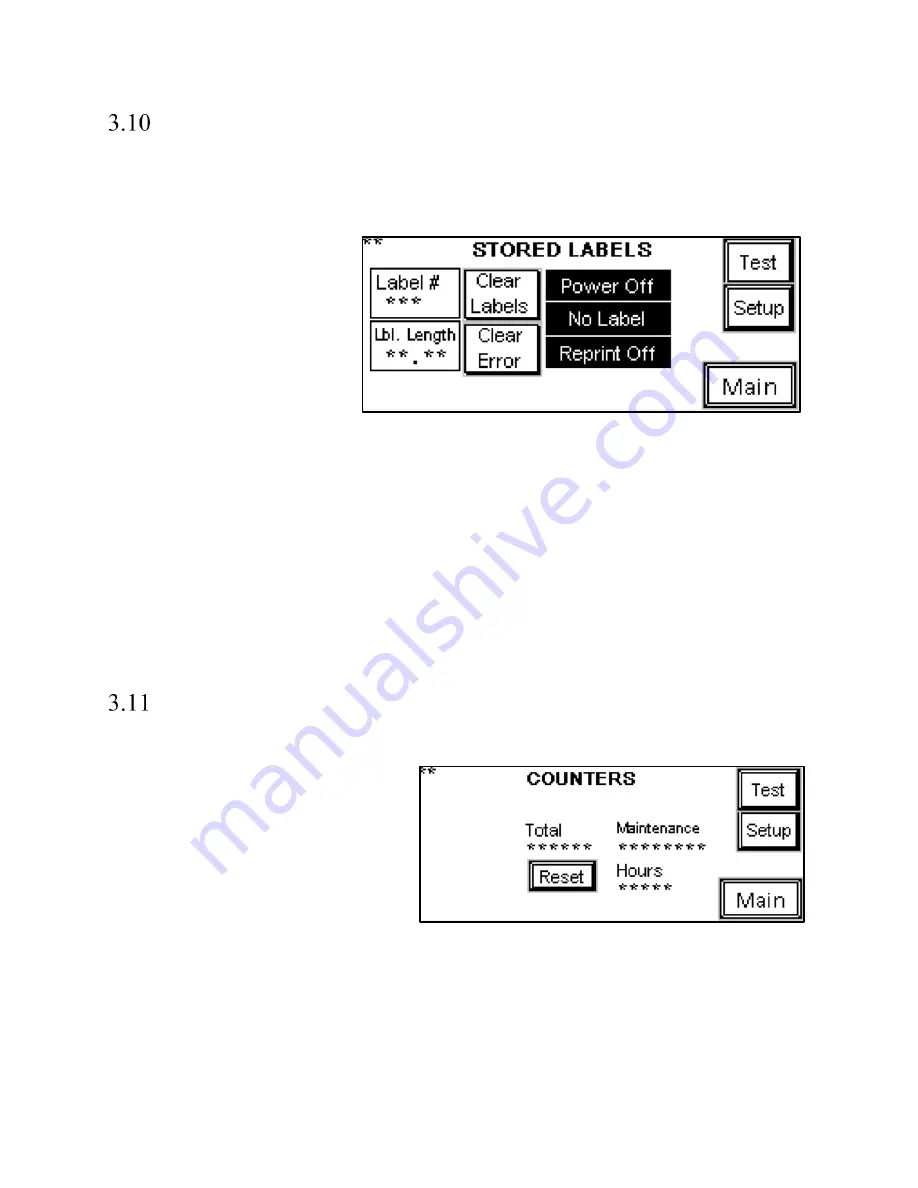
Stored Labels
Label #
: This button allows the operator to recall a label. To recall a label, press the
Label#
button and
type in a number from 001 to 999, depending on the label you would like to recall. Enter the desired label
number into the numeric keypad and press the
ENT
button. From the factory, APPI has included at least
one sample label format (001) for testing.
Length
: This setting allows the
operator to adjust the label length.
Because the length of the label is
not saved when downloading labels
in memory, APPI recommends that
stored labels are the same length.
Otherwise, you must use a chart
that describes the label format
length for each stored label. To
change this setting, press the
Length
button, enter a value into
the numeric keypad and press the
ENT
button.
The
Clear Labels
button can clear the downloaded label format or the label format that is recalled from
stored memory. However, if data records are downloaded from a database, this button will not erase
stored labels unless there are less than 90 records remaining. Press the
Clear Error
button to clear an
error with the printer and continue operation.
NOTE: APPI resells several software packages including: Labelview, Zebra Design Pro and Bartender.
If you are using other software, APPI may not be familiar with the specific settings available in your
software. Refer to your software manual for print speed and darkness settings.
Counters
Total: displays how many cycles between resets. Only total can be reset.
Maintenance: Displays the amount of cycles
the printer has ran. This cannot be reset.
Hours: Displays the amount of time the
machine has been turned on and operating.
Figure 3-5
Figure 3-6
Summary of Contents for Ti-1000ZR
Page 1: ...0 Ti 1000ZR Operation Guide Version 1A Setup Operation and Parts Manual ...
Page 6: ...5 This page intentionally left blank ...
Page 16: ...15 Ti 1000Z THREADING DIAGRAM Figure 2 1 ...
Page 17: ...16 Ti 1000Z WITH T 1000 S14 THREADING DIAGRAM SINGLE DANCER Figure 2 2 ...
Page 18: ...17 Ti 1000Z RIBBON THREADING DIAGRAM Figure 2 3 ...
Page 26: ...25 Figure 3 15 Figure 3 16 Figure 3 17 Figure 3 18 ...
Page 33: ...32 4 14 1 TIZ E1_110VAC Electrical Drawing Figure 4 1 ...
Page 34: ...33 4 14 1 TIZR E2_FPG IO Electrical Drawing Figure 4 2 ...
Page 35: ...34 4 14 1 TIZ E3_AXH_rev1 Electrical Drawing Figure 4 3 ...
Page 36: ...35 4 14 1 TIZR E6_ZebraIF Electrical Drawing Figure 4 4 ...
Page 37: ...36 Figure 4 5 4 14 1 TIZR E7_FP0R GT02 Electrical Drawing ...
Page 38: ...37 4 14 1 TIZR E9_CB IF Electrical Drawing Figure 4 6 ...
Page 39: ...38 4 14 1 TIZ E8_AuxIF_rev4 Electrical Drawing Figure 4 7 Figur ...
Page 40: ...39 This page intentionally left blank ...
Page 44: ...43 Electronics Assembly TA T2Z 1000 ...
Page 46: ...45 Mounting Assembly TA T2Z 2000 ...
Page 48: ...47 Nip Roll Assembly TA T2Z 2000 1 ...
Page 50: ...49 Printer Register TA T2Z 4000 ...


