6
2. To avoid visual or physical obstruction, route the microphone cable down inside
the door molding. Allow sufficient slack in the connector end of the cable to reach
the Junction Box.
3. Plug the connector side of the external microphone cord into the Junction Box as
shown in diagram 3 above
Note! The microphone should not be mounted near a window or in a spot where
road and ambient background noise would be substantially high
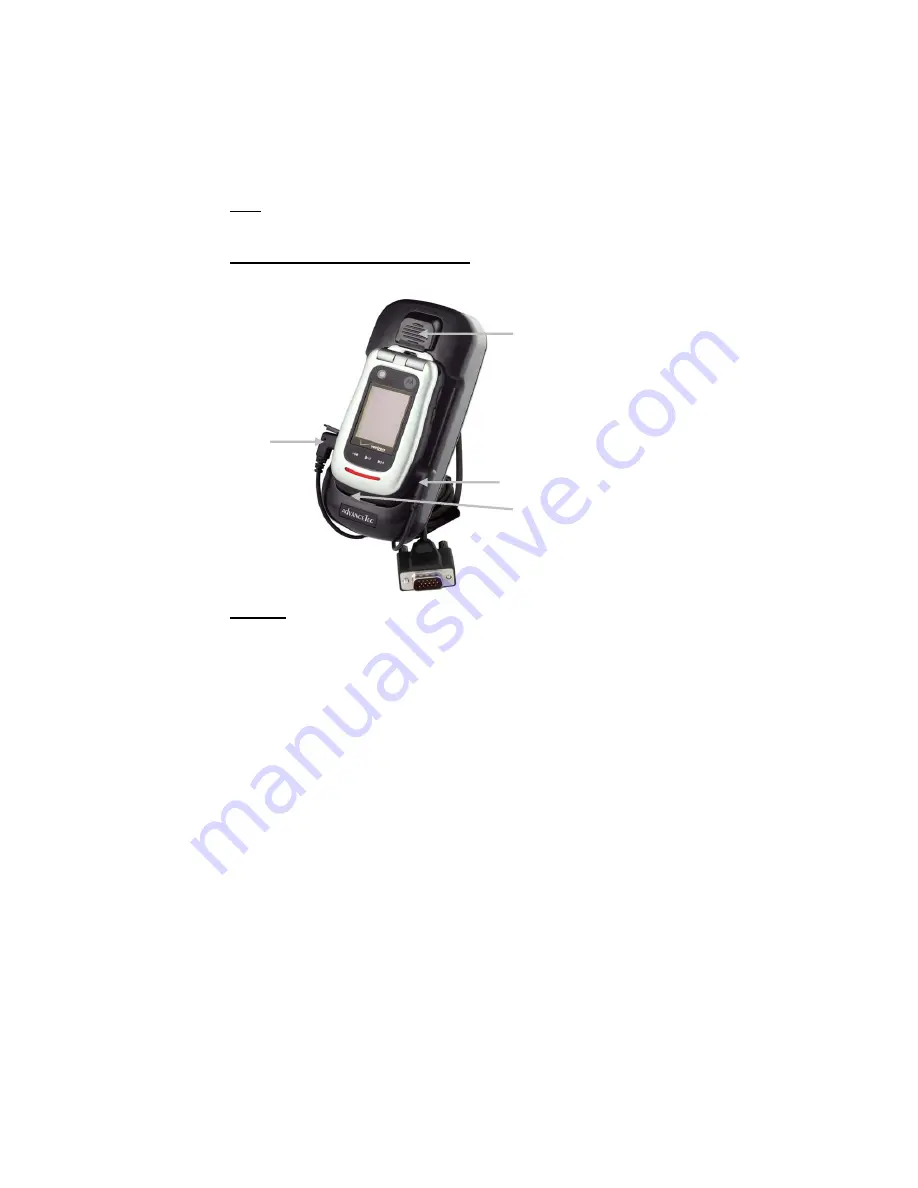
Inserting and removing handset from cradle
Diagram 8
1. Remove the rubber protective cover from the connector receptacle covering the
micro USB connector on the left side of the handset (handset facing you) and align
the micro USB connector at the end on the one cable from the back of the cradle
and insert the connector into the handset with the cable facing DOWN.
2. Remove the rubber protective cover from the connector receptacle covering the
audio connector on the right side of the handset (handset facing you) and align the
pin connector at the end of the other cable from the back of the cradle and insert the
connector into the handset with the cable facing UP.
3. Insert the handset into the cradle by aligning the groove at the bottom of the
handset with the ridge on the cradle and press the top of the handset back into the
Cradle as shown in Diagram 8 above until it snaps into place.
4. Turn the Handset on.
Press To
Release
Insert Side
Audio Cable
Insert Side
Micro USB
Cable
t
Align groove on
portable with ridge
on cradle


