


3.6
(Optional) Replace Melter Cable
3.6.1
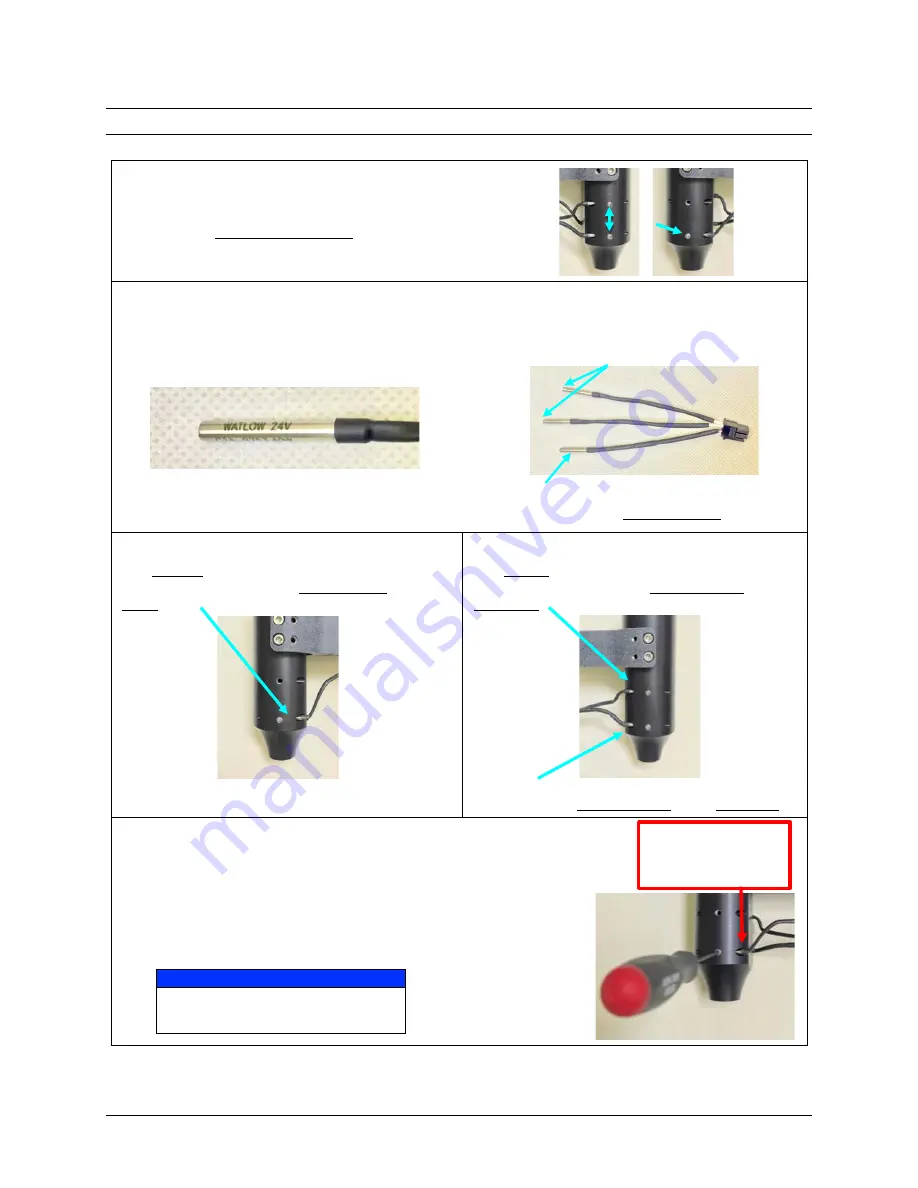
(Optional) Remove the Melter Cable
Use a 2 mm hex wrench to loosen the
setscrews securing the heater cartridges
and the RTD. Remove and discard.
3.6.2
(Optional) Identify Cartridges on New Melter Cable
If you are installing a new melter cable (Advanjet P/N 06-1042-0-0), it is extremely important to
identify the cartridges before proceeding.
3.6.3
(Optional) Shorter Heater Cartridge
The shorter heater cartridge is inserted on the
side of the melter that has one setscrew, in the
lower slot.
3.6.4
(Optional) Longer Heater Cartridge
The longer heater cartridge in inserted on the
side of the melter that has two setscrews, in the
upper slot.
The RTD cartridge is inserted on the side of the
melter that has two setscrews in the lower slot.
3.6.5
(Optional) Install Cartridges and Tighten Setscrews
Insert the cartridge up to the edge of the heat shrink.
Apply a small amount of Loctite to the threads of the cartridge
setscrews. Wipe off excess.
Use a 2 mm hex wrench to tighten the setscrews just until the
cartridges are secured in place.
NOTICE
To avoid damaging the cartridges,
do not over-tighten the setscrews.
THE HEATER CARTRIDGES ARE
INSCRIBED WITH “WATLOW 24V”
ONE HEATER CARTRIDGE WIRE
IS LONGER THAN THE OTHER
THE RTD CARTRIDGE IS THE SAME LENGTH
AS THE SHORTER HEATER CARTRIDGE
BUT HAS NO INSCRIPTION
INSERT TO THE
EDGE OF THE
HEAT SHRINK
Page 22 of 28
Advanjet HM-2600 Hotmelt Jet Maintenance and Repair
3A6328A


