3.7
Reassemble the Jet
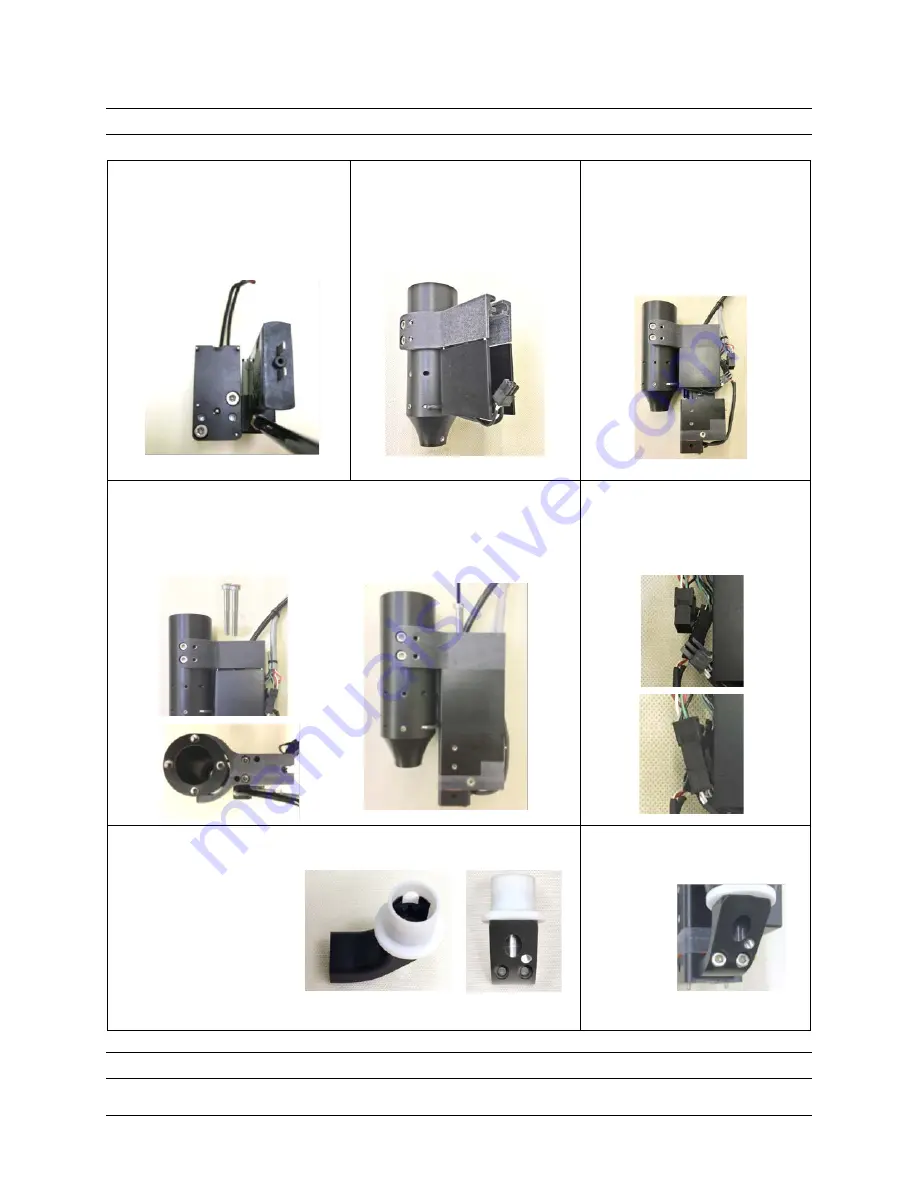
3.7.1
Insert the Nozzle Plate
Screws
Drop the two nozzle plate screws
(two washers each) into the jet
body.
3.7.2
Position the Melter
Assembly
Set the melter assembly on the
top cover, using the alignment
pins as a guide.
3.7.3
Position the Top
Cover
Set the top cover (and melter
assembly) on the jet body.
Make sure that the melter
cable is not pinched by the top
cover.
3.7.4
Attach Top Cover
Apply Loctite 242 to the tips of the top cover screws. Carefully
insert top cover screws through the melter holder into the jet body
and use the 3 mm hex wrench to tighten.
3.7.5
Connect the Melter
Attach the melter cable and jet
heater cable connector to the
jet cable.
3.7.6
Install Feed Tube Spacer
Position the hole in the spacer over the notch in the upper feed tube
enclosure.
The luer lock
thumbscrew passes
through this opening.
3.7.7
Attach Upper Feed
Tube Enclosure
Use the
2.5 mm
driver to
install the
two upper
feed tube
enclosure
screws.
3.7
Reassemble the Jet, continued
TOP VIEW
FRONT VIEW
3A6328A
Advanjet HM-2600 Hotmelt Jet Maintenance and Repair
Page 23 of 28


