background image

AIMB-540  User’s Manual

74

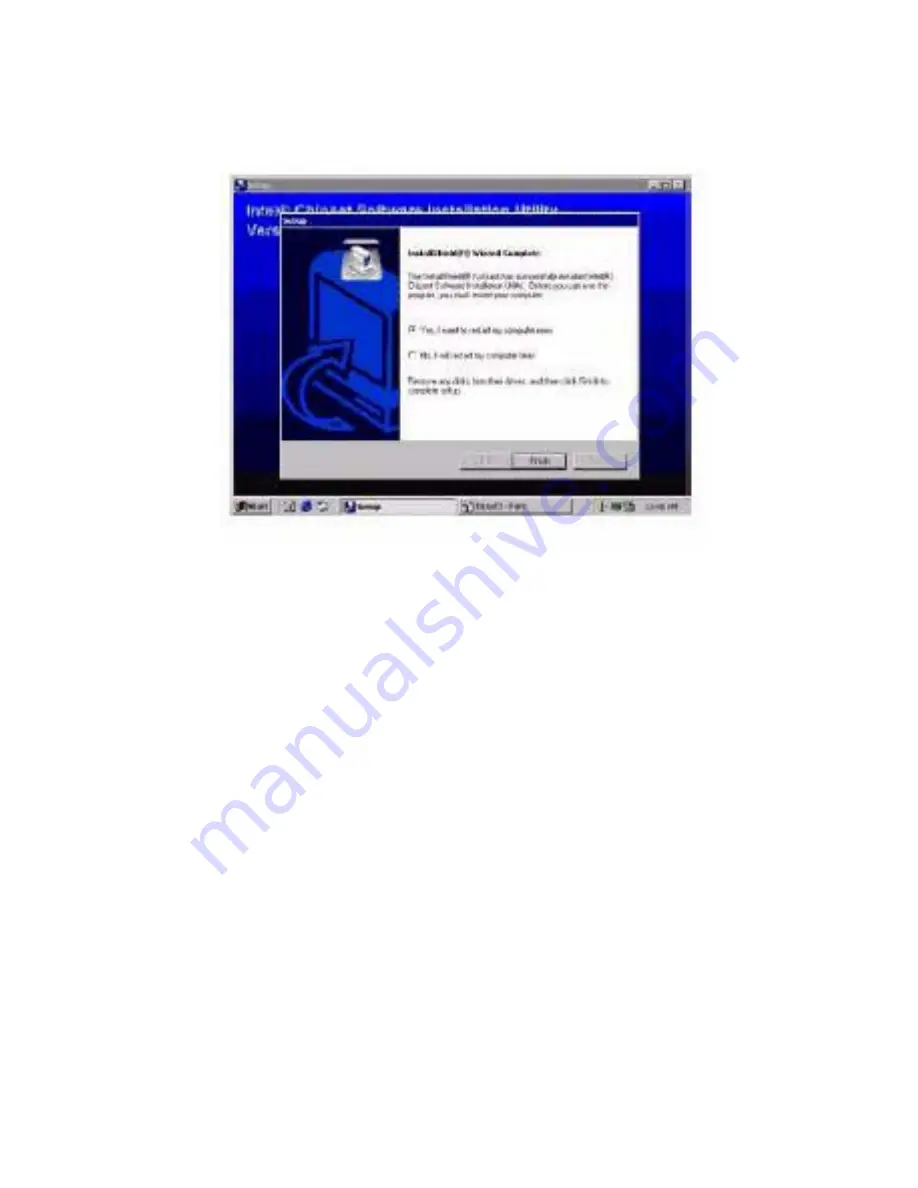
5. When the following message appears, click “Finish”to complete the 
installation and restart windows.

5.5.5 Install Audio Driver

Introduction

The AIMB-540’s on-board audio interface provides high-quality stereo 
sound and FM music synthesis (ESFM) by using the Realtek ALC202 
Audio Codec from Realtek. The audio interface can record, compress, 
and play back voice, sound, and music with built-in mixer control.

The AIMB-540’s on board audio interface also supports the Plug and 
Play (PnP) standard and provides PnP configuration for the audio, FM, 
and MPU-104 logical devices. It is compatible with Sound Blaster; Sound 
Blaster Pro version 3.01, voice and music functions. The ESFM synthe-
sizer is register compatible with the OPL3 and has extended capabilities.

5.5.6 Driver installation

Before you begin

Please read the instructions in this chapter carefully before you attemptv 
installation. The audio drivers for the AIMB-540 board are located on the 
audio driver CD. Run the supplied SETUP program to install the drivers; 
don’t copy the files manually.

Note: 1. Note1: Before try to install driver, please install “Chipset Soft-
ware Installation Utility” first.

Summary of Contents for AIMB-540

Page 1: ...AIMB 540 Socket 478 MicroATX SBC for Industrial Applications User s Manual ...

Page 2: ... receiver 3 Connect the equipment onto an outlet on a circuit different from that to which the receiver is connected 4 Consult the dealer or an experienced radio TV technician for help Shielded interconnect cables and shielded AC power cable must be employed with this equipment to insure compliance with the pertinent RF emission limits governing this device Changes or modifications not expressly a...

Page 3: ...y person of such revision or changes Trademark Recognition Microsoft and Windows are registered trademarks of Microsoft Corp Intel and Pentium 4 are registered trademarks of Intel Corporation Other product names used in this manual are the properties of their respective owners and are acknowledged ...

Page 4: ...AIMB 540 User s Manual iv ...

Page 5: ...ket 12 Figure 2 1 Fan Heatsink assembly retention mechanism 12 2 3 3 System Memory Sockets 12 Figure 2 2 DDR DIMM memory sockets 13 2 3 4 PCI Expansion Slots 13 Figure 2 3 PCI Expansion slots 14 2 3 5 Drive Connectors 14 2 3 6 IDE Drive Connectors 14 Figure 2 4 IDE Drive Connector 15 2 3 7 Floppy Disk Drive Connector 15 Figure 2 5 Floppy Drive Connector 16 2 3 8 Other Internal Connectors 16 2 3 9 ...

Page 6: ...ectors 26 2 3 25 External Audio Jacks 26 Figure 2 20 External Audio Jack 26 2 3 26 Jumpers 26 2 3 27 JCMOS1 Clear CMOS 26 Figure 2 21 JCMOS1 Clear CMOS 27 2 3 28 JDIMMVOLT1 DDR Voltage 27 Figure 2 22 JDIMMVOLT1 DDR Voltage 27 2 3 29 JUSBV1 USB Standby Voltage 27 Figure 2 23 JUSBV1 USB Standby Voltage 28 2 3 30 JPSKMV1 PS 2 Standby Voltage 28 Figure 2 24 JPSKMV1 PS 2 Standby Voltage 28 2 3 31 Drive...

Page 7: ...alling Memory Modules 45 4 2 11 System Memory Recognition 46 4 2 12 Installing the Motherboard in a System Housing 47 4 2 13 Motherboard Installation Procedure 47 4 2 14 Connecting Front Panel Components 48 4 2 15 Completing System Configuration 48 Chapter 5 System Configuration 52 5 1 Introduction 52 5 2 Installing or Connecting Internal Peripherals 52 5 2 1 Connecting Internal Devices 52 5 2 2 C...

Page 8: ... 7 VGA Setup 77 Chapter 6 Using the Motherboard 84 6 1 Introduction 84 6 2 Using System Features 84 6 2 1 Front Panel System Controls Indicators 84 6 2 2 System Controls 84 6 2 3 Power Button 84 6 2 4 Reset Switch 85 6 2 5 Note On Reset Rebooting 85 6 2 6 Suspend Button 85 6 2 7 Indicator LEDs 85 6 3 Installing Configuring An IR Port 86 6 4 Performance Optimization 87 6 4 1 System Memory 87 6 4 2 ...

Page 9: ...1 Chatper 1 CHAPTER 1 Introduction ...

Page 10: ...opics Chapter 1 Introduction Explains the manual structure and conventions and indicates the most important topics in the manual In addition there is a list of what you should find in the motherboard package and some pointers on things to do before you configure or install the board Chapter 2 Key Features Components Details the motherboard s hardware features and important components and indicates...

Page 11: ... Motherboard Is Already Installed You may receive the motherboard installed in a working system If this is the case you should still probably review the sections on configuring and using the board especially if an Operating System is not installed yet 1 3 2 If You Need To Install This Motherboard We recommend that only experienced users and technicians install this motherboard Otherwise we suggest...

Page 12: ... Before you install and use the motherboard please do the following 1 Check Package Contents Please compare the package contents to the Packing List on the previous page and confirm that all items are present and undamaged 2 Missing or Damaged Accessories If anything is missing please contact your vendor 3 Motherboard Damage If the motherboard has been visibly damaged return the complete package t...

Page 13: ...5 Chatper 1 You will also need whatever external system peripherals you intend to use which will normally include at least a keyboard a pointing device and a video display monitor ...

Page 14: ...AIMB 540 User s Manual 6 ...

Page 15: ...7 Chapter2 CHAPTER 2 Key Features Com ponents ...

Page 16: ... details the software that comes on the Power Installer support CD ROM disc Please review this chapter if you are installing the motherboard It is also useful for reference regarding feature functions after the board is installed in a working sys tem Chapter Topics 1 Hardware Features 2 Motherboard Layout 3 Key Features Components 4 Software Features 5 Driver Software 6 Utility Software ...

Page 17: ... of key com ponents on the motherboard Table 2 1 Components CPU1 mPGA478 CPU socket for Intel Pentium 4 processor JATXPWR2 JATXPWR1 Power connectors for ATX power supply DDR1 DDR2 DIMM memory sockets for DDR SDRAM modules PCI 1 3 32 bit PCI expansion slots JUSB3 Onboard internal USB 2 0 port ...

Page 18: ...port bracket connector JP1 IR port module connector JCDIN1 CD In CD ROM drive audio in connector JAUX1 AUX auxiliary audio in connector JPANEL1 Housing front panel feature connector Smart Panel audio feature connector Table 2 3 Smart Panel Connectors JAUDIO1 IDE2 IDE drive connectors JUSB1 USB 2 0 ports 5 6 connector Table 2 4 Jumpers JCMOS1 Clear CMOS jumper JDIMMVOLT1 DDR voltage jumper JUSBV1 U...

Page 19: ...motherboard uses the Intel 845GV Chipset a multi func tion chipset for higherend performance and mainstream systems Intel 845GV chipset includes a high performance onboard display graphics controller Table 2 5 Rear I O Panel Ports This figure show the ports on the rear I O panel The ports include from top to bottom PS 2 ports Serial Parallel VGA ports Three USB ports LAN port Audio ports The ports...

Page 20: ... socket The motherboard comes with a retention mechanism mounting frame on the board to attach the heat sink and cooling fan assembly required by the Pentium 4 CPU More Information See the section in Chapter 4 on Installing CPUs for information supported CPUs and their installation procedure Technical specifications are listed in Chapter 7 mPGA478B Socket This socket is for 478 pin Pentium 4 CPUs ...

Page 21: ...ry in Chapter 4 for configuration specifications and installation instructions Technical specifications are listed in Chapter 7 DIMM Sockets System memory sockets are for PC1600 200MHz PC2100 266MHz PC2700 333MHz unbuffered DDR SDRAM modules See Chapter 4 for important installa tion information Figure 2 2 DDR DIMM memory sockets 2 3 4 PCI Expansion Slots Function The PCI expansion slots are for in...

Page 22: ...2 3 6 IDE Drive Connectors Function The two IDE connectors marked Primary and Secondary are for connecting IDE drives to the motherboard Description The IDE controller on the motherboard supports IDE devices running in all modes up through ATA 100 There are two IDE drive connectors Each connector supports two drives a Master and a Slave which connect to the motherboard with a ribbon cable The sup ...

Page 23: ...r supports connecting one floppy disk drive to the motherboard The Floppy drive connector uses a standard FDD ribbon cable The floppy disk drive connected to the end of the cable will function as Drive A A second drive can be added as Drive B if required More Information See the section on Connecting Internal Peripherals in Chapter 4 for instructions on connecting a floppy disk drive Technical spe...

Page 24: ...board for leads from an ATX power supply The power supply leads plug into the connectors The connector designs prevent incorrect orientation There are two connectors the standard 20 pin ATX connector and the extra ATX12V 4 pin connector which supplies additional 12 volt current More Information Please refer to Chapter 4 Installing the Board in a System Housing chapter 7 lists technical specificati...

Page 25: ... Both the CPU and system fan connectors support fan speed monitoring A temperature monitor detects the CPU and internal system temperatures which are displayed in the PC Health section of the CMOS Setup Utility You can set a system shutdown temperature in that section that will automatically shut down the computer to protect the CPU if it reaches one of the three temperature options listed More In...

Page 26: ...e two audio in connectors on the motherboard are for audio cables from optical drives such as a CD ROM or DVD ROM drive The connectors provide an audio input connection between a device and the integrated audio subsystem More Information Please see the Connecting internal peripherals sec tion in Chapter 5 Audio In Connectors The JCDIN1 CD In connector is for CD ROM or other optical drives Use the ...

Page 27: ...ng an external 2 port USB port bracket to JUSB1 provides two additional Hi Speed USB 2 0 ports that have their own Root Hub JUSB3 is a port mounted directly on the board for connecting inter nal USB 2 0 devices More Information See the Connecting Internal Peripherals section of Chapter 5 Other USB Ports Connecting a port bracket to JUSB1 provides two additional USB ports JUSB3 is a single port for...

Page 28: ...ions to install it More Information Please see the Integrated Peripherals section of Configuring the CMOS Setup Utility in Chapter 5 for information IR Connector JP1 The IR connector is for both IrDA and ASKIR port modules You must use the CMOS Setup Utility to configure the board to use the IR feature Figure 2 10 IR Connector JP1 2 3 14 Smart Panel Audio Connector JAUDIO1 Function Connector for t...

Page 29: ...1 JAUDIO1 Connector 2 3 15 Front Panel Connector JPANEL1 Function Multifunction pin header connector for system housing front panel features Description This connector supports the following front panel features Reset Switch IDE device activity LED System ACPI Suspend switch System Power LED System Activity LED Housing mounted speaker More Information See Chapter 4 Installing the Board In A System...

Page 30: ... current from the power supply extends the life of the battery More Information See the Standard CMOS Features section of Con figuring the CMOS Setup Utility in Chapter 5 to adjust the real time clock settings Battery Housing The battery is a CR2032 Lithium coin cell Figure 2 13 Battery Housing 2 3 17 External I O Ports There are several external Input Output ports on the rear edge of the motherbo...

Page 31: ... the system is turned on Figure 2 14 PS 2 Ports 2 3 19 Parallel Port Function Connecting a device with a parallel interface to the system Description The parallel port is generally used to connect a printer to the system The port supports common parallel port modes and allows bidi rectional communication Use an IEEE 1284 compliant cable with the default ECP mode configuration More Information See ...

Page 32: ...ires disabling COM2 Figure 2 16 COM1 Serial Port 2 3 21 VGA Port Function Connecting a display monitor Description This external display port uses a 15 pin VGA connector The connector is for the onboard display graphics controller Do not con nect or disconnect a display cable when the system is turned on More Information See the Integrated Peripherals section of Configur ing the CMOS Setup Utility...

Page 33: ...iption This is an RJ 45 connector for standard Cat 5 LAN cabling with RJ 45 jacks The connector is for the optional onboard LAN control ler You can connect or disconnect a LAN cable when the system is turned on More Information See the System Features section of Chapter 6 for information LED modes LAN RJ 45 Jack Right LED Activity Left LED Link Figure 2 19 LAN RJ 45 Jack 2 3 24 Audio Jacks Connect...

Page 34: ...ility in Chapter 5 for information on audio set tings 2 3 25 External Audio Jacks The onboard audio supports stereo speakers audio input and a micro phone Figure 2 20 External Audio Jack 2 3 26 Jumpers There are five jumper switches on this motherboard Jumpers function like switches to establish a hardware configuration setting 2 3 27 JCMOS1 Clear CMOS Function Clears the CMOS Setup Utility config...

Page 35: ...jumper Default Setting 2 5V More Information See Chapter 3 for configuration information and System Features in Chapter 6 Figure 2 22 JDIMMVOLT1 DDR Voltage 2 3 29 JUSBV1 USB Standby Voltage Function Sets the voltage status for the USB ports Description A 3 pin jumper Default Setting 5V More Information See Chapter 3 for information on configuring this jumper ...

Page 36: ...age 2 3 31 Driver Software This motherboard requires that you install driver software to support the onboard hardware You will need to install the following 1 Intel 845GV chipset support software driver that supports the chipset and the Intel Application Accelerator that enhances system performance 2 Audio driver software Audio driver and utilities for the onboard audio subsystem 3 Graphic driver ...

Page 37: ...in Chapter 5 for more information 2 3 32 In This Chapter The Default Configuration 1 Hardware Configuration Jumper Settings 2 Firmware Configuration The BIOS CMOS Setup Utility Reconfig uring the Motherboard 3 Hardware Reconfiguration 4 Firmware Reconfiguration ...

Page 38: ...AIMB 540 User s Manual 30 ...

Page 39: ...31 Chapter3 CHAPTER 3 Motherboard Configu ration ...

Page 40: ...uration There are also a few hardware settings The hardware set tings are configured using standard jumper switches The motherboard has three jumper switches The first section is about the IOS related jumper and the second about the two hardware configuration jumpers 3 4 Jumper JCMOS1 Clear CMOS Memory JCMOS1 is a jumper switch but it does not set a hardware configuration setting The BIOS CMOS Set...

Page 41: ... of the CMOS Setup Utility has a Load Optimized Defaults item that loads the default operation settings After you per formthe Clear CMOS procedure load the defaults as follows 1 Select Load Optimized Defaults and press the Enter key 2 A message will appear asking you to confirm 3 Type a Y to confirm and press the Enter key again 4 Make other settings you require 5 Select Save Exit Setup and press ...

Page 42: ...lled in the board s DIMM sockets The default setting is the normal voltage The alternate voltage settings are for use in overclocking If you are not overclocking the system you don t need to change this jumper setting Table 3 2 JDIMMVOLT1 DDR Memory Voltage Setting Function Open 2 5 Volt Default Short 1 2 2 6 Volt Short 3 4 2 7 Volt Short 5 6 2 8 Volt Short 7 8 2 9 Volt ...

Page 43: ...number of the variable settings such as CPU and IDE device settings are set to be automatically detected in the default configuration While these settings can also be established manually automatic detection is more convenient safe and reliable We strongly recommend that you leave all auto detec tion settings undisturbed unless you have a specific reason not to and you are certain of what you are ...

Page 44: ...ction description of the highlighted item 3 7 2 BIOS CMOS Setup Utility Main Screen Load the CMOS Setup Utility during the POST by pressing the Delete or Del key The utility interface commands are explained at the bottom of each screen and General Help is available by pressing the F1 key See the section on Configuring the CMOS Setup Utility in Chapter 5 for information on how to use this program T...

Page 45: ...BIOS Flash Protection feature using the CMOS Setup Utility If you want to use a sound card instead of the onboard audio you should disable the onboard audio You can also disable the onboard LAN on the P4D N if the need arises though you don t need to do this to add another LAN card to the system 3 10 Firmware Reconfiguration You can initially specify or customize the CMOS Setup Utility settings wh...

Page 46: ...cord follow the Clear CMOS proce dure described in this chapter In This Chapter Pre Installation Preparation Installing CPUs Installing System Memory Installing the Motherboard in a System Housing Motherboard Installation Procedure Completing System Configuration ...

Page 47: ...39 Chapter4 CHAPTER 4 Installing the Mother board ...

Page 48: ...rk prop erly Please review the instructions in this section in detail and follow them carefully The procedures are not complex 4 2 1 Installing A CPU This motherboard uses the 478 pin Intel Pentium 4 processor To install an Intel Pentium 4 CPU on the motherboard it is very important to precisely and entirely follow the procedure for installing both the CPU and its cooling assembly Failure to do so...

Page 49: ...ly handle the processor by the side edges and always fully observe precautions against electrostatic discharge We assume here that you are installing an Intel Pentium 4 boxed processor that comes with a heatsink and Thermal Interface Material applicator The illustrations show these If you are installing a non boxed processor the procedure is the same but the acces sory items may have a different a...

Page 50: ...ied in an applicator with boxed Intel Pentium 4 processors or an exact equivalent to the top of the installed 1 Raise the locking lever of the processor locking mechanism to a perpendicular position 2 Align the processor to the socket by matching the Pin 1 cor ner of the socket to the Pin 1 cor ner on the socket Raise the socket lever to the vertical position Match the Pin 1 positions on the socke...

Page 51: ... of the TIM in the applicator to the center of the CPU s top plate Next install the processor Fan Heatsink assembly as detailed below 4 2 6 Install the Fan Heatsink To install the processor Fan Heatsink assembly do as follows 1 Place the Fan Heatsink on top of the Pentium 4 CPU so that it s retain ing clip frame snaps into the recesses in the Retaining Mechanism The Fan Heatsink will only fit into...

Page 52: ... into the recesses in the Retaining Mechanism The Fan Heatsink will only fit into the mechanism frame in the correct orientation 2 Hold the Fan Heatsink steady and press one of the clip assembly s lock ing levers down into the locked posi tion 3 Repeat the process for the second clip Keep holding the Fan Heatsink steady so that you don t damage the TIM The locking levers should now hold the heatsi...

Page 53: ... 10 Installing Memory Modules Installing DIMM modules is simple The modules insert in the sockets and are held in place by the socket retaining arms The edge connectors on the modules are of different widths and there are key notches in each module These ensure that you can not insert a module incorrectly Before you install any modules you should choose a configuration You should then prepare the ...

Page 54: ...omatically recognize the installed memory and config ure the CMOS Setup Utility No other action is required to complete sys tem memory installation Module Installation Modules will only insert in one orienta tion The width of the two edge connector sections vary slightly and prevent incorrect insertion Module Installation All modules insert in the DIMM sockets in the same way 1 Align the module to...

Page 55: ...le housing We also assume you have prepared the board for installation as previously described in this manual If the housing you are using normally stands vertically place the open housing on it s side before you start installing the board Please follow this procedure to install this motherboard 1 Review any instructions that came with the system housing and prepare the necessary mounting hardware...

Page 56: ...herboard is installed in the system housing you can proceed to connect or install whatever internal devices you will use to complete the system These will at least include an AGP display card and disk drives and connecting the housing power supply leads After that having replaced the system housing cover you can connect external peripherals to complete the process Mounting Holes There are 5 mounti...

Page 57: ... installing Operating System and support software In This Chapter Installing or Connecting Internal Peripherals Connecting Internal Devices Connecting External System Peripherals Configuring the CMOS Setup Utility Installing an OS Support Software ATX Power Connectors The main power connector from the system power supply plugs into the 20 pin JATXPWR2 connector on the board The ATX12V power lead p...

Page 58: ...AIMB 540 User s Manual 50 ...

Page 59: ...51 Chapter5 CHAPTER 5 System Configuration ...

Page 60: ...s with your internal system peripherals for additional installation instructions and information This section covers the mini mum components you will need to connect to the motherboard to create a functioning system You may plan to add other devices as well 5 2 1 Connecting Internal Devices To assemble a complete system capable of completing the installation of this motherboard you will need to in...

Page 61: ...r position If you will use only the supplied ribbon cable connect a CD ROM drive to the Primary Slave position If you obtain an additional IDE ribbon cable you can install a second hard disk drive in the primary Slave position an install the CD ROM as the Secondary Master This is a good idea if the CD ROM drive uses a slower data transfer mode than the hard disk drive Follow any instruc tions that...

Page 62: ...bon cable The Slave drive connects to the connector in the middle of the ribbon cable Floppy Drive Connector The floppy drive connector supports two floppy disk drives The first drive Drive A connects to the connector on the end of the floppy drive connector cable A second drive Drive B would connect to the middle connector on the cable although systems now commonly only have one floppy disk drive...

Page 63: ...55 Chapter5 Note The ribbon cable used must support the transfer mode of the fastest device connected to it to avoid degraded performance ...

Page 64: ...ay monitor cable to the appropriate display connector on the AGP card according to the instructions that come with the card and monitor 5 3 2 Connecting a Keyboard Mouse You can use either PS 2 or USB input devices with this motherboard 5 3 3 Connecting PS 2 Devices Connect a PS 2 keyboard and mouse to the Keyboard and Mouse PS 2 ports on the rear I O port panel Don t connect or disconnect a devic...

Page 65: ...ings that you may need to change depending on your system configuration This section gives brief profiles of the several sections of the CMOS Setup Utility and indicates settings you might need to change and those which you should not 5 4 1 The CMOS Setup Utility User Interface The CMOS Setup Utility user interface is simple and largely self evident The utility can only be operated from the keyboa...

Page 66: ...t up The utility s main screen will then appear CMOS Setup Utility Interface commands 5 4 3 CMOS Setup Utility Program Sections The CMOS Setup Utility is divided into several subsections and some top level commands including the following sections 1 Standard CMOS Features 2 Advanced BIOS Features 3 Advanced Chipset features 4 Integrated Peripherals 5 Power Management Setup 6 PnP PCI Configurations...

Page 67: ...might want to change and things to leave alone To open one of the program sections highlight the item you want and press the Enter key To change a setting highlight an item and use the Value keys indicated to change the setting Alternatively press the Enter key and all options for that item will display and you can choose from those listed CMOS Setup Utility Main Screen 5 4 4 Standard CMOS Feature...

Page 68: ...tion Functions This section mainly configures boot options including boot devices and their boot order and some power functions There are also some miscella neous boot configuration settings Default Autodetected Settings The screen illustration shows the default settings These do not need to be changed You can customize the settings to suit your purposes if neces sary and you know what you re doin...

Page 69: ...mized default or is autodetected Setting Options Constraints We don t suggest changing anything in this section above the Memory Hole AT 15M 16M line You can change the thermal warning timeout and the AGP Aperture if needed The default AGP setting will work You can also disable to onboard display and change its Frame Buffer video memory size CMOS Setup Utility Standard Advanced Chipset Options ...

Page 70: ...onboard audio and LAN features if you need to The IDE HDD Block Mode feature should work with newer IDE hard disk drives The Power On Function line sets what actions will turn the computer on The default is just the power button and there are several other options The KB Power ON Password line lets you enter a password to protect the Keyboard Power On feature CMOS Setup Utility Integrated Peripher...

Page 71: ...t Setting Options Constraints You can select the Minimum or Maximum configurations rather than the User Defined defaults You can customize all settings in User Defined mode If your OS supports power management configure it there The Soft Off by PWR BTTN line controls the function of the system housing power button The default sets it to turn the system on and off when you press the button The alte...

Page 72: ...stall an expansion card set Reset Con figuration Data to Enabled to rewrite the ESCD Don t change the resource settings they re set to be handled automati cally by the BIOS While you can set them manually there shouldn t be any need to do so The PCI VGA Palette Snoop item is for PCI display card that has a problem displaying a screen image properly at startup You should not need to use this featur...

Page 73: ...ormation Default Autodetected Settings The Shutdown Temperature setting is an optimized default The list of system information is autodetected and displayed Setting Options Constraints You can select a Shutdown Temperature setting from the listed options If the detected CPU temperature reaches that point the system will auto matically shut down to protect the CPU ...

Page 74: ...t the CPU settings The Spread Spec trum setting reduces interference generated by the board circuitry Setting Options Constraints Don t change the auto detected settings unless you really know what you are doing You can configure the CPU settings manually Configuring CPU settings at variance with Intel s specifications can damage the CPU and void the CPU warranty CMOS Setup Utility CPU Smart Setti...

Page 75: ...t need to use this it s mainly for technicians 5 4 13 Load Optimized Defaults This loads the Optimized Defaults Do this if the configuration record has been corrupted or mistakenly configured or after the Clear CMOS proce dure has been performed See Chapter 3 for more information on this pro cedure To load the defaults select this item press the Enter key type a Y and press Enter again ...

Page 76: ...m the new password by asking you to type it in a second time Carefully type the password again and press Enter or just press Enter if you are deleting a password that is already installed 5 If you have used the correct format the password will be installed If you decide not to set a password after bringing up the password entry window press the Enter key not Esc to exit the password entry window 5...

Page 77: ...g Operating System software and the support software on the Power Installer support CD ROM disc Once you have configured the CMOS Setup Utility you should install an OS If you install a supported Microsoft OS you should also install the driver soft ware on the Power Installer disc ...

Page 78: ...vers Install CSI Utility Before you begin To facilitate the installation of the enhanced display device drivers andu tility software you should read the instructions in this chapter carefully before you attempt installation The device drivers for the AIMB 540 board are located on the software installation CD The auto run function of the driver CD will guide and link you to the utilities and device...

Page 79: ...nts will be configured This is needed for the proper functioning of the following features Core PCI and ISA PnP services IDE Ultra ATA 100 66 33 interface support USB 1 1 support USB 2 0 driver needs to be installed separately Identification of Intel chipset components in the Device Manager Note The files on the software installation CD are compressed Do not attempt to install the drivers by copyi...

Page 80: ...4 Installing the CSI Utility 1 CInsert the driver CD into your system s CD ROM drive In a few sec onds the cd main menu appears Move to AIMB540 Chipset IntelInf Disk1 click setup icon 2 Click Next when you see the following message ...

Page 81: ...73 Chapter5 3 Click Yes when you see the following message 4 Click Next when you see the following message ...

Page 82: ...the Plug and Play PnP standard and provides PnP configuration for the audio FM and MPU 104 logical devices It is compatible with Sound Blaster Sound Blaster Pro version 3 01 voice and music functions The ESFM synthe sizer is register compatible with the OPL3 and has extended capabilities 5 5 6 Driver installation Before you begin Please read the instructions in this chapter carefully before you at...

Page 83: ...tall the drivers by copying the files manually You must use the supplied SETUP program to install the drivers Windows 9x 2000 Me XP drivers Step 1 Click right mouse botton to open My computer property Find Hardware and open Device Manager Double click Multi Audio Controler and press Reinstall Driver ...

Page 84: ...AIMB 540 User s Manual 76 Step 2 In the Hardware Update Wizard window click Next Step 3 In the following Hardware Update Wizard window click Fin ish for Windows to complete audio driver installation ...

Page 85: ... MPEG 2 decoding Software DVD at 30 fps Full Screen Dynamic Video Memory Technology The following is quoted from Intel 845GV Chipset Dynamic Video Memory Technology Rev 1 2 June 2002 Dynamic Video Memory Tech nology DVMT is an enhancement of the UMA concept wherein the optimum amount of memory is allocated for balanced graphics and system performance through Direct AGP known as Non Local Video Mem...

Page 86: ...ity has been installed in your system See Chapter 4 for information on installing the CSI utility Note Press CRTL Alt F1 hotkey to enable CRT mode in Windows 98 1 Insert the driver CD into your system s CD ROM drive In a few sec onds the cd main menu appears Move to AIMB 540 VGA 845G xp2k and click setup icon For the other OS please find your OS s folder in 845G folder and click setup with the sam...

Page 87: ...79 Chapter5 2 You will see a welcome window Please chick on Next to continue the installation 3 Click Yes when you see the following message ...

Page 88: ...AIMB 540 User s Manual 80 4 Click on Yes to continue the installation 5 VGA driver is now installing ...

Page 89: ...ssage appears you can choose to restart the computer now or later In This Chapter Using System Features Front Panel Controls Indicators Additional System Features Installing Configuring An IR Port Performance Optimization Troubleshooting ...

Page 90: ...AIMB 540 User s Manual 82 ...

Page 91: ...83 Chapter6 CHAPTER 6 Using the Motherboard ...

Page 92: ...e or all of the front panel features that connect to the motherboard These enable the User to determine some information on the systems operational status and pro vide some system controls 6 2 2 System Controls The front panel connector on the motherboard supports several system controls that mount on the front panel of the system housing 6 2 3 Power Button Function Turns the system On and Off Use...

Page 93: ...first if it is supported Otherwise you will need to use the Reset button 6 2 6 Suspend Button Function Toggles system in and out of Suspend mode Use Press the button to cause the system to enter or resume from Sus pend mode Note The front panel feature connector supports a system Suspend button the ACPI connector but not all system housings have this button The same function can be performed at th...

Page 94: ...e installs in an expansion slot opening 1 Turn off and unplug the system if necessary 2 Remove the system housing cover 3 Locate the JP1 IR pin header connector on the motherboard It is below the FDD connector 4 Remove the expansion slot cover in the system housing that corre sponds to an open PCI slot There may be a slot cover retaining screw to remove and put aside for later use 5 Insert the por...

Page 95: ...nstructions 6 4 Performance Optimization This section covers things you can do to increase the performance of a system based on this motherboard The topics covered include system memory disk subsystems and processor upgrades or adjustments 6 4 1 System Memory Adding system memory will increase system performance and capability under any of the supported Operating System This motherboard supports a...

Page 96: ...quency Voltage Setting section will automatically detect and configure whatever processors are installed Manual configuration is also available but setting the Intel Pen tium 4 processor to operating parameters outside those specified can damage the CPU and void the warranty 6 5 Troubleshooting This section details some things you can do to evaluate problems that could possibly occur in the course...

Page 97: ... is connected to the motherboard with an ATA 100 cable to ensure maximum performance 3 Check that all expansion cards are correctly installed and fully inserted in the expansion slots Pay particular attention to the AGP display card if one is installed 4 Make sure the processor and its fan heatsink cooling assembly are properly installed 5 Check all the hardware settings on the motherboard and mak...

Page 98: ...s possible for the system configuration record can become cor rupted or lost If this occurs the system will not operate properly or at all This is not a serious problem You can restore a working configuration using the CMOS Setup Utility to create a new configuration record by loading the Optimized Defaults and reentering any other settings you had made 6 6 5 Loading Optimized Defaults The CMOS Se...

Page 99: ... the Optimized Default set tings Now make any other settings you need to 3 Select Save Exit Setup and press the Enter key A confirmation message will appear Press the Enter key again to confirm The CMOS Setup Utility will close and the system will reboot The sys tem should then start properly and run normally ...

Page 100: ...AIMB 540 User s Manual 92 ...

Page 101: ...93 Chapter7 CHAPTER 7 Technical Specifica tions ...

Page 102: ...entium 4 Celeron Willamette Northwood processors Auto detects CPU type external clock and multiplier CPU external clock adjustment at 1MHz step in BIOS CMOS Setup Util ity CPU Power Follows VRM 9 0 specification VRD design Two phases Memory PC1600 PC2100 PC2700 DDR SDRAM Unbuffered DDR SDRAM 2 DIMMs up to 2GB Chip Set North Bridge Intel 845GV South Bridge ICH4 Winbond Super I O W83637HF Graphics O...

Page 103: ...ROM Audio In header One 4 pin Audio In AUX header General I O 2 Bus Master capable IDE connectors support up to Ultra DMA ATA100 IDE drives and ATAPI compliant devices Floppy Controller for up to two drives Rear I O Panel PS 2 Keyboard PS 2 Mouse COM1 Serial Port ECP EPP Parallel Port VGA Port 3 USB Ports LAN Jack Mic Line In Line Out Audio Ports mP4G no Line In on mP4G U model BIOS Award BIOS 2MB...

Page 104: ...nd controller for Monitoring Alerts One 3 pin CPU Fan header Two 3 pin Chassis Fan headers One CPU temperature sensor Seven Voltage monitoring Vcore 1 5V 2 5V 3 3V 5V 12V Bat tery 5VSTB Form Factor uATX Other 4 Layer Construction Certification WHQL Windows 2000 Approval FCC class B CE mark 89 336 ECC EMV ...

Reviews: