ASMB-781 User Manual
20
2.11
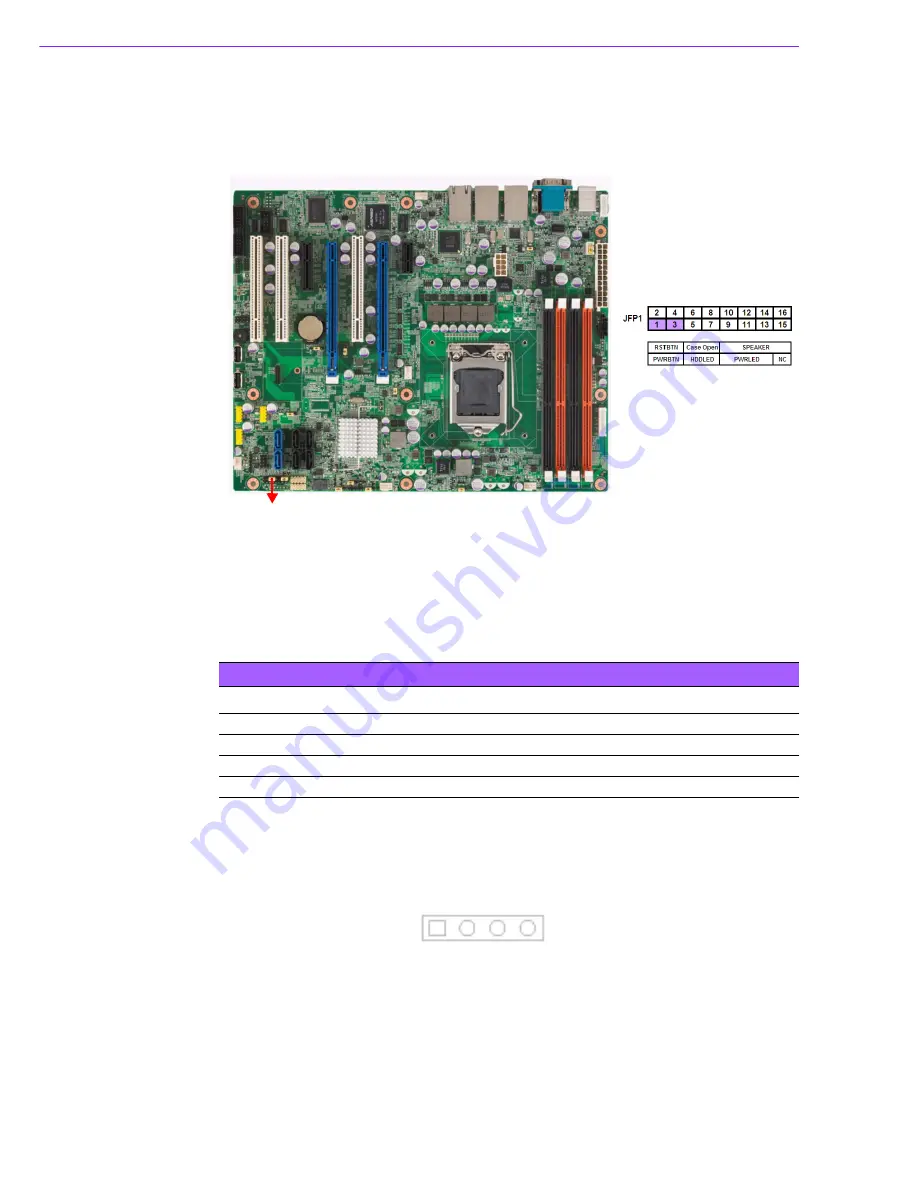
Front Panel Connectors (JFP1)
There are several external switches and LEDs to monitor and control the ASMB-781.
2.11.1
Power LED (JFP1)
JFP1 pin9 and pin13 are for the power LED. Refer to Appendix B for detailed infor-
mation on the pin assignments. If a PS/2 or ATX power supply is used, the system’s
power LED status will be as indicated as follows.
2.11.2
External Speaker (JFP1 pins 10, 12, 14, 16)
JFP2 pins 10, 12, 14, 16 connector for an external speaker. The ASMB-781 provides
an onboard buzzer as an alternative. To enable the buzzer, set pins 14-16 as closed.
2.11.3
HDD LED Connector (JFP1 pins 5 & 7)
You can connect an LED to connector JFP1 to indicate when the HDD is active.
JFP1
Table 2.1: PS/2 or ATX power supply LED status
Power mode
LED (PS/2 power)
LED (ATX power)
System On
On
On
System Suspend
Fast flashes
Fast flashes
System Off
Off
Off
System Off in deep sleep
Off
Off
10 12 14 16
Summary of Contents for ASMB-781
Page 11: ...Chapter 1 1 Hardware Configuration ...
Page 22: ...ASMB 781 User Manual 12 ...
Page 23: ...Chapter 2 2 Connecting Peripherals ...
Page 38: ...ASMB 781 User Manual 28 ...
Page 39: ...Chapter 3 3 BIOS Operation ...
Page 63: ...Chapter 4 4 Chipset Software Installation Utility ...
Page 66: ...ASMB 781 User Manual 56 ...
Page 67: ...Chapter 5 5 VGA Setup ...
Page 69: ...Chapter 6 6 LAN Configuration ...
Page 71: ...Appendix A A Programming the Watchdog Timer ...
Page 79: ...Appendix B B I O Pin Assignments ...
Page 90: ...ASMB 781 User Manual 80 ...
Page 91: ...81 ASMB 781 User Manual Appendix B I O Pin Assignments ...


