background image

HPC-7400 User Manual

/ 用户手册

iv

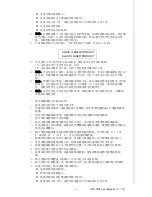
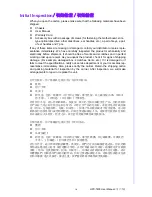
17.

CAUTION: 

The computer is provided with a battery-powered real-time clock cir-

cuit. There is a danger of explosion if battery is incorrectly replaced. Replace 
only with same or equivalent type recommended by the manufacture. Discard 
used batteries according to the manufacturer’s instructions.

18.

THE COMPUTER IS PROVIDED WITH CD DRIVES COMPLY WITH APPRO-
PRIATE SAFETY STANDARDS INCLUDING IEC 60825.

19.

This device complies with Part 15 of the FCC rules. Operation is subject to the 
following two conditions: 

(1) this device may not cause harmful interference, and 

(2) this device must accept any interference received, including interference

that may cause undesired operation.

20.

CAUTION:

 Always completely disconnect the power cord from your chassis 

whenever you work with the hardware. Do not make connections while the 
power is on. Sensitive electronic components can be damaged by sudden 
power surges. 

21.

CAUTION: 

Always ground yourself to remove any static charge before touching 

the motherboard, backplane, or add-on cards. Modern electronic devices are 
very sensitive to static electric charges. As a safety precaution, use a grounding 
wrist strap at all times. Place all electronic components on a static-dissipative 
surface or in a static-shielded bag when they are not in the chassis.

22.

CAUTION: 

Any unverified component could cause unexpected damage. To 

ensure the correct installation, please always use the components (e.g., screws) 
provided with the accessory box.

1.

请仔细阅读此安全操作说明。

2.

请妥善保存此用户手册供日后参考。

3.

用湿抹布清洗设备前,请从插座拔下电源线。请不要使用液体或去污喷雾剂清洗
设备。

4.

对于使用电源线的设备,设备周围必须有容易接触到的电源插座。

5.

请不要在潮湿环境中使用设备。

6.

请在安装前确保设备放置在可靠的平面上,意外跌落可能会导致设备损坏。

7.

若该设备是上架式机箱 , 请务必使用机柜里的层板或滑轨 , 确实将设备安稳的安
装固定在机柜内。

8.

请不要把设备放置在超出我们建议的温度范围的环境,即不要低于 0°C

(32°F)或高于 40°C (104°F),否则可能会损坏设备。

9.

设备外壳的开口是用于空气对流,从而防止设备过热。请不要覆盖这些开口。

10.

当您连接设备到电源插座上前,请确认电源插座的电压是否符合要求。

11.

请将电源线布置在人们不易绊到的位置,并不要在电源上覆盖任何杂物。

12.

请注意设备上的所有警告和注意标语。

13.

如果长时间不使用设备,请将其同电源插座断开,避免设备被超标的电压波动损
坏。

14.

请不要让任何液体流入通风口,以免引起火灾或者短路。

15.

请不要自行打开设备。为了确保您的安全,请由经过认证的工程师来打开设备。

16.

如遇下列情况,请由专业人员来维修:



电源线或者插头损坏;

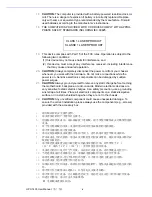
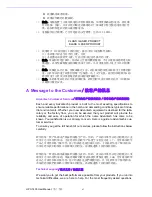
CLASS 1 LASER PRODUCT

KLASSE 1 LASER PRODUKT

Summary of Contents for HPC-7400

Page 1: ...User Manual HPC 7400 4U Compact Rackmount Tower Server Chassis for EATX ATX Motherboard EATX ATX 4U EATX ATX 4U...

Page 2: ...ted in any form or by any means without the prior written permission of Advantech Co Ltd Information provided in this manual is intended to be accurate and reliable How ever Advantech Co Ltd assumes n...

Page 3: ...F it may damage the equipment 9 The openings on the enclosure are for air convection Protect the equipment from overheating DO NOT COVER THE OPENINGS 10 Make sure the voltage of the power source is co...

Page 4: ...n 20 CAUTION Always completely disconnect the power cord from your chassis whenever you work with the hardware Do not make connections while the power is on Sensitive electronic components can be dama...

Page 5: ...v HPC 7400 User Manual 17 18 CD IEC 60825 19 FCC 15 1 2 20 21 22 1 2 3 4 5 6 7 8 0 C 32 F 40 C 104 F 9 10 11 12 13 14 15 16 CLASS I LASER PRODUCT KLASS I LASER PRODUKT...

Page 6: ...he factory floor you can be assured that your product will provide the reliability and ease of operation for which the name Advantech has come to be known Your satisfaction is our primary concern Here...

Page 7: ...ree from defects in materials and workmanship for two years from the date of pur chase This warranty does not apply to any products which have been repaired or altered by persons other than repair per...

Page 8: ...return more quickly 4 Carefully pack the defective product a fully completed Repair and Replacement Order Card and a photocopy proof of purchase date such as your sales receipt in a shippable containe...

Page 9: ...e sentative immediately We have carefully inspected the product mechanically and electrically before shipment It should be free of marks and scratches and in perfect working order upon receipt As you...

Page 10: ...HPC 7400 User Manual x...

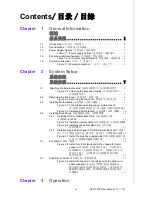
Page 11: ...cover 9 2 3 Installing Motherboard 9 Figure 2 3 Yellow label indicating copper stub locations 9 Figure 2 4 Installing a Motherboard 10 2 4 Installing Disk Drives 10 2 4 1 Installing HDD or Optical Dis...

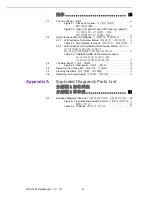
Page 12: ...tor functions 17 3 2 2 LED Indicators for SAS SATA HDD Power Status SAS SATA LED SAS SATA LED 17 Table 3 2 SAS SATA HDD LED indicator functions SAS SATA LED SAS SATA LED 17 3 3 The Rear Panel 18 Figur...

Page 13: ...Chapter 1 1 General Information...

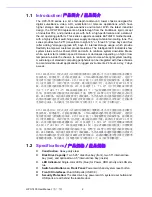
Page 14: ...ystem status such as Power HDD and LAN to minimize system downtime Mean while system fan s rotation speed increases or decreases depending on high or low temperature inside the chassis to minimize sys...

Page 15: ...D LED LAN I O USB USB 3 0 USB 3 8 cm x 8 cm 142 CFM PWM 2 6cm 1 TBD W x H x D 482 x 177 x 448 mm 19 x 7 0 x 17 6 2 5 25 HDD 2 3 5 HDD 2 LED LED LAN I O USB USB 3 0 USB 3 8 cm x 8 cm 142 CFM PWM 2 6cm...

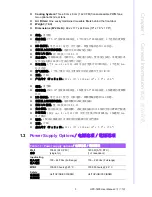
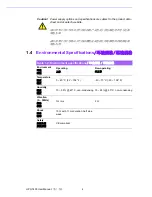
Page 16: ...the product data sheet on Advantech website Table 1 2 Environment specifications Environment Operating Non operating Temperature 0 40 C 32 104 F 40 70 C 40 158 F Humidity 10 95 40 C non condensing 10...

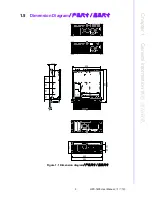
Page 17: ...5 HPC 7400 User Manual Chapter 1 General Information 1 5 Dimension Diagram Figure 1 1 Dimension diagram 508 50 448 426 465 482 177 101 60 74 92 92 92 81 20...

Page 18: ...HPC 7400 User Manual 6...

Page 19: ...Chapter 2 2 System Setup...

Page 20: ...taching the ears and handles Note Use caution when installing or operating the components with the chas sis open Be sure to turn off the power unplug the power cord and ground yourself by touching the...

Page 21: ...re 2 2 Removing the top cover 2 3 Installing Motherboard Figure 2 3 Yellow label indicating copper stub locations A B C F F1 G R S H H1 J J1 K K1 L L1 M M1 X Y Y1 Z ASMB 822 ASMB 784 ASMB 782 ASMB 781...

Page 22: ...HPC 7400 User Manual 10 Figure 2 4 Installing a Motherboard 2 4 Installing Disk Drives 2 4 1 Installing HDD or Optical Disk Drive Figure 2 5 Installing internal HDD...

Page 23: ...11 HPC 7400 User Manual Chapter 2 System Setup Figure 2 6 Installing the optical disk drive...

Page 24: ...HPC 7400 User Manual 12 2 4 2 Install an Upgrade Kit of dual 3 5 HDD Storage Devices 2 3 5 2 3 5 Figure 2 7 Install the disk drive upgrade kit...

Page 25: ...Chapter 2 System Setup 2 5 Foot Stand Figure 2 8 Install four foot stands under the chassis for tower usage 4 4 2 6 Slide Rail or Pallet Figure 2 9 Install the chassis in the cabinet with the slide r...

Page 26: ...HPC 7400 User Manual 14...

Page 27: ...Chapter 3 3 Operation...

Page 28: ...nterfaces Momentary Power switch Press this switch to turn the system power on or off Please use system shutdown or press this switch for few seconds to turn off the sys tem ATX power System Reset but...

Page 29: ...System Power Normal Abnormal Hard Disk Hard Disk Drive Activity Data access No light LAN LAN1 LAN2 status LAN1 LAN2 LAN1 LAN2 Normal No light Data transmit through LAN LAN LAN Blinking Table 3 2 SAS S...

Page 30: ...HPC 7742 User Manual 18 3 3 The Rear Panel Figure 3 3 Rear panel 3 4 Replacing the Cooling Fan Figure 3 4 Replacing the system cooling fan without removing the top cover...

Page 31: ...Chapter 3 Operation 3 5 Cleaning the Filters Figure 3 5 Removing the Filters 3 6 Replacing the Power Supply Figure 3 6 Replacing the power supply module Figure 3 7 Power cord plugs should have same or...

Page 32: ...HPC 7742 User Manual 20...

Page 33: ...Appendix A A Exploded Diagram Parts List...

Page 34: ...HPC 7400 User Manual 22 A 1 Exploded Diagram Parts List Figure A 1 Exploded Diagrams Parts List 19 20 17 15 14 7 12 10 6 8 5 4 3 2 1 9 11 13 16 18 21 22 23 24 25 26 27 28 29 30...

Page 35: ...5 System fan cover 20 Top cover 6 System fan 21 Upper layer chassis 7 Handle 22 Internal HDD handle 8 Rackmount ear 23 Internal HDD tray 9 System fan guard 24 Internal HDD tray housing 10 Door frame H...

Page 36: ...No part of this publication may be reproduced in any form or by any means electronic photocopying recording or otherwise without prior written permis sion of the publisher All brand and product names...

Reviews: