9
9
DIAGRAM C
DIAGRAM B
WARNING – DISCLAIMER
Any elements applied on the vehicle roof changes the normal vehicle handling.
The manufacturer disclaims all responsibility in case of accidents due to improper use, wrong
Maintenance , or checking the tightness of the brackets regarding the installation of the roof rack
system.
ROO SYSTEMS – The wholesaler/manufacturer shall not be liable for special, indirect incidental or
consequential damages including but not limited to lost profits. ROO SYSTEMS reserves the right to change
design.
WARRANTY
12 month limited warranty applies to original purchaser under the following conditions. ROO SYSTEMS will
warrant against manufacturing faults and defects for a period of 12 months from original purchased
date. This warranty does not include damage caused by mould, insects, animals, children, misuse,
incorrect set up or set down, weather, accidents, abuse, wear and tear.
To make a claim, please ensure you retain your sales receipt of purchase.
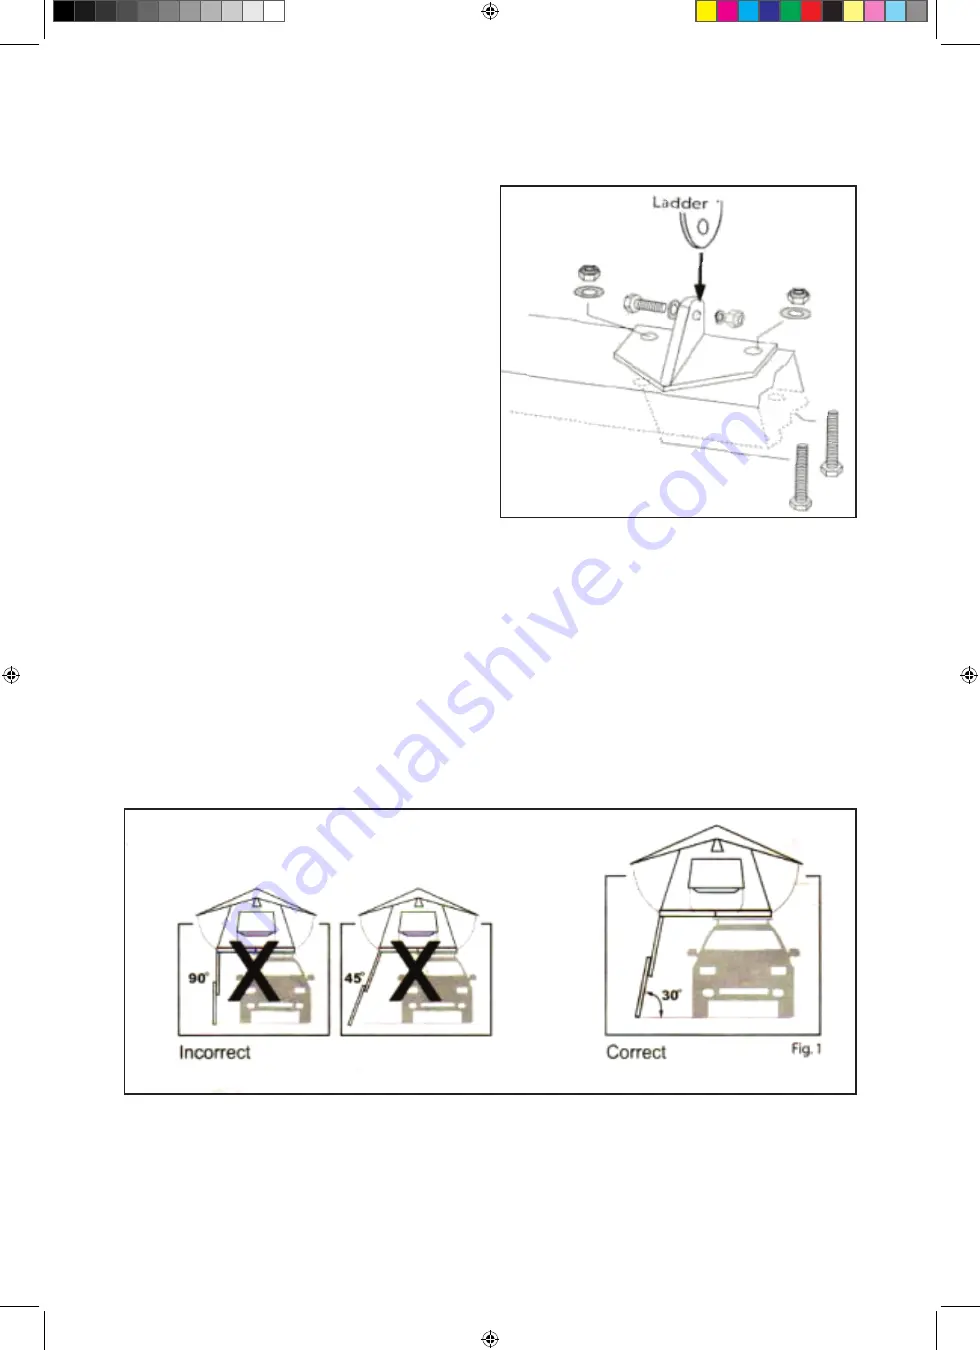
For your safety and protection see Diagram C below for correct placement and angle
of ladder. DO NOT CLIMB ON LADDER UNTIL CORRECT ANGLE IS ACHIEVED (approx.
30 degrees between ladder and ground). NOTE: If the angle of the ladder is at 90
degrees and/or does not reach the ground, you will need a ladder extension (not
included). The ladder placed in correct position also acts as a brace for the suspended
base of your tent.
ATTACHING THE LADDER
1. Flip the tent base over.
2. Locate the pre-drilled holes at the
edge of the base and attach the
ladder bracket to the base using
40mm Steel M6 bolt, washers, and
nylock nuts.
J001157 - Adventure Kings RTT Manual-Insert2.indd 9
7/05/2014 10:11:36 a.m.
AK_RTT_Manual.indd 9
29/08/2014 12:24 pm


