AE TECHRON MULTI-AMP CONFIGURATION GUIDE
97-8002465_09-19-14
Information subject to change
19
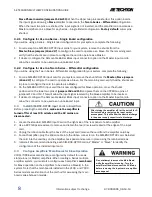
ELECTRIC SHOCK HAZARD. Output potentials
from the amplifier can be lethal. Make
connections only with amplifier AC power OFF
and input signals removed.
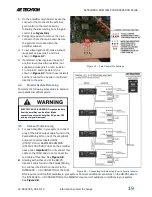
On the amplifier main board, locate the
1.
connector that connects the external
gain control to the main board by
following the wire leading from the gain
control (see
Figure 4.6).
Pull gently upward to remove the 3-pin
2.
connector from the main board. Secure
the gain-control cable within the
amplifier cabinet.
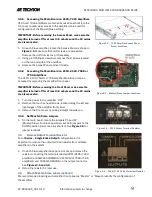
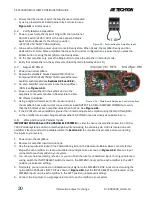
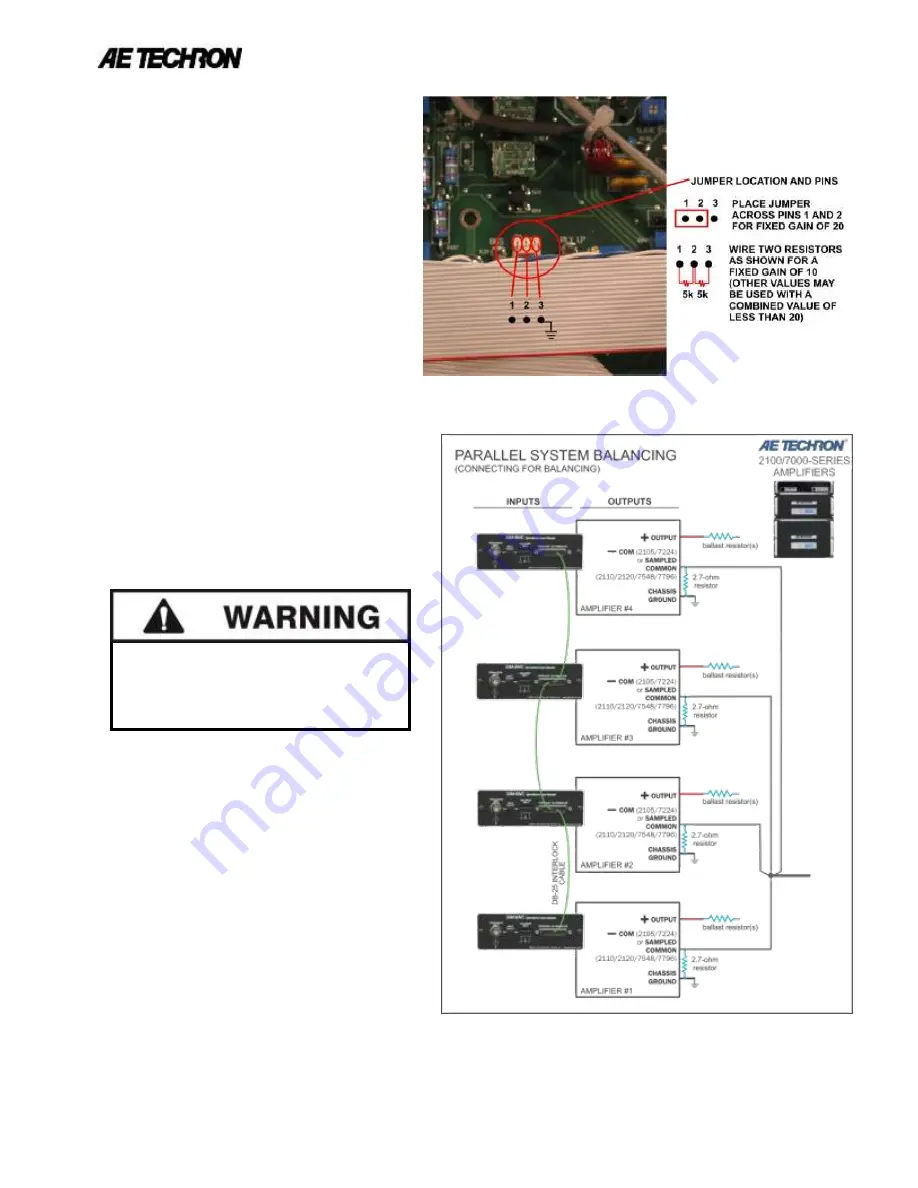
To set a fixed gain of 20, place a shunt
3.
(supplied) across pins 1 and 2 as
shown in
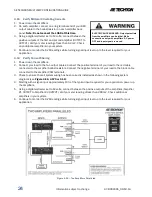
Figure 4.7.
If preferred, a fixed gain can be set at
4.
another level; place two resistors (not
supplied) across pins 1 and 2 (resistor
1) and pins 2 and 3 (resistor 2) as
shown in
Figure 4.7.
Note: these resistors
can be mounted to a header or soldered
directly to the pins.
4.4
Parallel System Balancing
Complete the following procedures to balance
your parallel amplifier system.
4.5
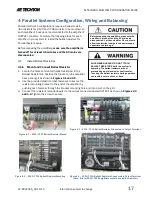
Connect for Balancing
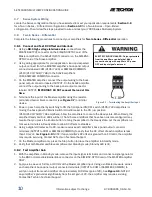
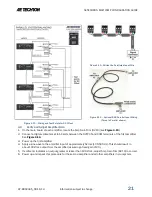
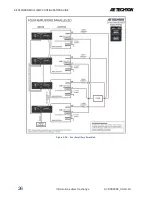
For each amplifier in your system, connect
1.
a leg of the black output cable found in the
Parallel Wiring Kit to one of the amplifier’s
output connectors labeled COM
(2105/7224) or SAMPLED COMMON
(2110/2120/7548/7796) on the amplifier
back panel.
Important:
Do not connect this
cable to the LOAD and do not connect the
red cable at this time. See
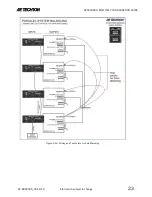
Figure 4.8.
Starting with either end of the DB-25
2.
Interlock cable found in the Parallel Wiring
Kit, connect the DB-25 connector to the
INTERLOCK – I/O CONNECTOR on the SIM-
BNC input card of the first amplifier in your system. Connect additional connectors on the DB-25 cable to
the INTERLOCK – I/O CONNECTOR on the SIM-BNC input card of additional amplifiers in your system.
See
Figure 4.8.
Figure 4.7 – Gain Control Pin Settings
Figure 4.8 – Connecting for Balancing (Four in Parallel shown)


