FINAL ADJUSTMENTS
Make these adjustments before racing
30
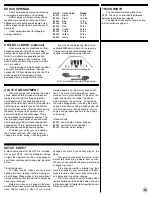
ADJUSTING CAMBER
To set the camber we recommend using
our supplied #1719 camber/rear toe-in gauge.
When adjusting camber you need to have the
car ready to run with no body.
1.
Set your car on a flat surface.
2.
When using the camber / rear toe gauge,
make sure that the number you want to set it at
is down at the bottom of the tire. The gauge
has 1°, 2°, and 3° notations marked on it.
Find the 2° and push it against the tire at the
bottom.
Use your 5/64 Allen wrench to adjust the
upper pivot ball to get 2°. We recommend 2°
for most conditions.
#1719 camber/rear toe-
in gauge
CHECKING REAR TOE-IN
We recommended for you to start with 2°
of rear toe-in, which is the default setup in the
manual. To check or change rear toe-in use the
supplied #1719 camber / rear toe-in gauge.
1.
Stand your car up vertically on the rear arm
mount.
2.
When using the camber/rear toe gauge,
make sure that the number you want to set it at
is down at the bottom of the tire. The gauge
has 1°, 2°, and 3° notations marked on it. Find
the 2° and push it against the tire at the bottom.
3.
Use your supplied
#6956 molded
turnbuckle wrench
to adjust the rear
turnbuckle to get the
degrees you want.
ADJUSTING RIDE HEIGHT
The collars on the bodies can easily adjust
the ride height. Use the supplied #1719 track
width/ride height tool. The ride height tool will
set your car at 5.5mm high.
1.
When adjusting the ride height, have the car
ready to run with no body.
2.
Set the car on a flat surface.
3.
Slide the height gauge underneath the rear of
the chassis, as shown, until the gauge just
touches the chassis. To get a better measure-
ment on the chassis, you might need to slide
the gauge in the corner of the car. Check both
corners of the rear.
4.
Slide the gauge underneath the front of the
car. Check both corners of the front.
#1719 track width/ride height tool
CHECK RADIO / LINKAGE
SETUP
CAUTION:
Always turn your transmitter
on first
and
off last.
Remember this rule. If
you start your car before turning on your
transmitter then you may lose control of the car
and damage the engine quickly.
Test the following radio functions without
the engine started. These following steps will
help you understand the operation of your
transmitter.
1.
Turn on the transmitter.
2.
Turn the car receiver battery pack switch on.
Both the steering servo and throttle servo
should move to their respective neutral
settings.
3.
Turn the steering wheel on the transmitter
left and right. The front wheels should turn left
and right, then go to a perfectly straight-ahead
position when the wheel is released. If theyre a
little off, set the steering with your steering trim.
See your radio instruction manual for this
setting.
4.
Pull the throttle trigger, which should open
the carburetor on your engine.
5.
Push the trigger forward, which should
activate the brakes.
Hold the throttle open and roll the car over the
ground. The car should roll freely. While it is
rolling, push on the brakes. The car should
come to a stop. If these steps do not produce
these results refer to the linkage assembly
setup in this manual.
stand the car up vertically
ADD AIR FILTER
NEVER run your touring car without an air
filter. The filter is essential for keeping the dirt
out of the engine. Refer to your engine manual
for the recommended air filter for your
engine. If you use a foam filter, use
Associateds #7710 foam filter treatment.
BODY
This kit accepts most 200mm touring car
bodies. See body manufacturers instructions
on trimming and painting the body.
air filter

