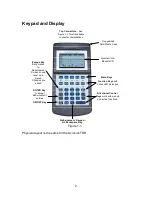


14
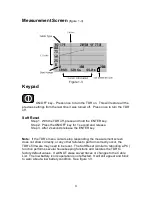
Use the Escape key to
1. Save changes and exit the menu to the Measurement
Screen.
2. Exit back up one menu level
3. Exit a completed step in Setup Wizard and go on to the
next step
4. Exit Cable Table without changing selection
5. Exit Sample Cable or VF Search without saving changes
Use the ENTER key where indicated to make a value or name
change (entry is made from the alpha-numeric pad). This will set the new
value or name and exit back to the menu item or features list.
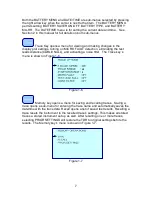
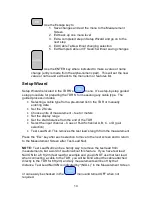
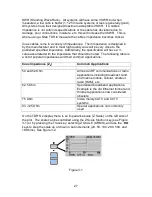
Setup Wizard
Setup Wizard is located in the TDR’S’s
menu. It’s a step-by-step guided
setup procedure for preparing the TDR’S for measuring any cable type. The
guided process includes:
•
Selecting a cable type from a pre-stored list in the TDR or manually
entering data
•
Set the Z Scale
•
Choose units of measurement – feet or meters
•
Set the display range
•
Set the start distance from the end of the TDR
•
Select the input channel – Coax or RJ-45 channel A, B, C, or D (pair
selection)
•
Test Lead Null. This removes the test lead’s length from the measurement
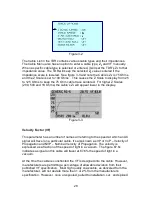
Press the “Esc” key after each selection to move to the next screen and to return
to the Measurement Screen after Test Lead Null.
NOTE: Test Lead Null can be a handy way to remove the test lead from
measurements, but a word of caution about this feature. If you have test lead
Null ON for a 6 ft (2m) test lead for example and you do NOT use that test lead
when connecting a cable to the TDR, you will be blind about the cable attached
directly to the TDR for 6ft (2m) and any measurements will be off by that
distance. Test Lead Null ON is indicated by “(NULL)” in the Measurement Screen
or can easily be checked in the
menu and turned OFF when not
required.