aee.com
AEE AP11 Pro Quick Start Guide
Disclaimer
Please read this disclaimer carefully before using the product of quadcopter. This product is not suitable for people under the age of 18. By using this product, you
hereby agree to this disclaimer and signify that you have read them fully. You agree that you are responsible for your own conduct and content while using this
product, and for any consequences there of. You agree to use this product only for purposes that are proper and in accordance with the terms and any applicable or
guidelines AEE may make available.
1. AEE Aviation Technology reserves the right of final interpretation of this disclaimer. de.aee.com aeeusa.com aee.com
2. Any part of this disclaimer is subject to change without prior notice.
3. This disclaimer is available in multiple languages. In case of any discrepancy, the Chinese version shall prevail.
Instructions
111-------+
,,,
)7)
,,,
{11)
1121
[14]
116]
[16)
[19]
[2)
J1,----11��1---[5)
[6)
JG)
[10]
(13]
[15]
[171
-fr=ilmr1'----""==-1-1--120J
l"lllllB------tt--1211
Note: When the airborne camera is S60 Plus, the shutter button,
video recording button and video stop button are invalid.
Function is effective only when compatible with AEE S61.
Operating Instructions
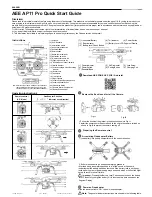
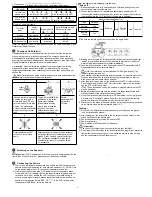
[ 1 ]Antenna
[ 2] Wi-Fi Repeater
[ 3 ] Smartphone Holder
[ 4] Hook open/close button
[ 5] Repeater base
[ 6 ] Return button
[ 7] Speed control switch S1
[ 8 ] Calibration switch S2
[ 9 ] Gimbal control switch S3
[ 10 ] Flight mode switch S4
[ 11 ] Remote Control Power Indicator
[ 12] Status Indicator
[ 13] Photo Shooting & Video Recording
Indicator
[ 14] Buzzer hole
[ 15 J Strap Hole
[ 16 ] Left Joystick
[ 17] Right Joystick
[ 18 ] Airborne Video Recording Button
[ 19 ] Airborne Shutter Button
[ 20 ] Video Stop Button
[ 21 ] Remote Control Power Switch
[ 22 ] Battery Compartment
Remote control
(U.S. Mode)
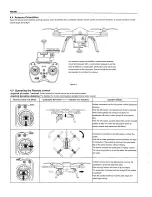
Quadcopter Direction
(" ·< . .::::iw, " indicates nose direction)
[i
i
I 1 I----:;""'=���==~
I 2 I
I 3 I
r -1, 0 .............. 11 ......
r '1, 1\11 .... + ......
r,:,, c ........... + 1 ... ....i;,.. .... + .......
[ 7 ] Quadcopter Battery
[ 10 ] Rear Indicator
[ 8] Tail Indicator
[ 9] Power Switch
[ 11 ] Battery Level LCD Segment Display
[ 12 ] Battery Level Check Button
[1)--------�
�----(4]
[2J7
=
t===:':r::g,!r,-
[5]
[6]
[ 1 ] Power Indicator
[ 4 ] Power Switch
[ 2] Wi-Fi Indicator
[ 5] Pairing Button
[ 3 ] Lock Screw
[ 6] Charging Port
[ 7 ] Repeater Base
0
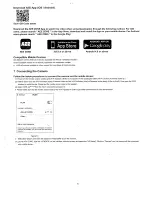
Download AEE ZONE APP (iOS / Android)
8
Remove the Buckle and Install the Camera:
Fig.A
Fig. B
1.Pull out the buckle of the gimbal in the direction shown in Fig. A.
2.lnstall the camera onto the aircraft and fix the clip to the camera reliably as
shown in Fig. B to prevent the camera coming off.
8
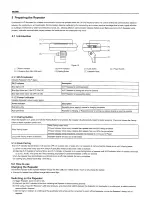
Preparing the Remote control
E)
Assembling Quadcopter Battery
1) Load battery into battery compartment in the correct direction.
2) Ensure that the battery has been completely pushed in.
After the battery is completely pushed in,
a"click"
sound will be heard,
indicating that the battery has been fastened. If the battery lock is not tightly
locked, poor contact of power supply may be caused, which will affect the flight
safety or result in take-off failure.
&.
Important:
Pressing the Battery Level Check button to check the battery
level. Please fully charge the battery if it is less than two bars showed on the
Segment Display.
C,
Power on Quadcopter
Slide the power switch to "ON" to power on quadcopter.
&_Note:
The general indicator instructions are showed in the following table.
Summary of Contents for AP11 Pro
Page 1: ......
Page 5: ......
Page 7: ......
Page 8: ......
Page 9: ......
Page 10: ......
Page 11: ......
Page 12: ......
Page 14: ......
Page 15: ......
Page 16: ......
Page 17: ......
Page 18: ......
Page 19: ......
Page 20: ......
Page 21: ......
Page 22: ......
Page 23: ......
Page 24: ......
Page 25: ......
Page 26: ......
Page 27: ......
Page 28: ......
Page 31: ......

