background image

1.

Druk op de ON/OFF-knop voor 5 seconden.

2.

Het display wordt uitgeschakeld.

3.

Trek de stekker uit het stopcontact om de stroomtoevoer naar het apparaat af te slui

-

ten.

Temperatuurregeling

De ingestelde temperatuur van de vriezer kan worden aangepast door op de temperatuur

-

knop te drukken.

Standaard ingestelde temperatuur:
• -18 °C voor de vriezer

De temperatuurweergave toont de ingestelde temperatuur.

De ingestelde temperatuur zal binnen 24 uur worden bereikt.
Na een stroomonderbreking blijft de ingestelde temperatuur opgeslagen.

FROSTMATIC-functie

Om de functie aan te zetten:
1.

Druk op de Mode-toets tot het bijbehorende pictogram verschijnt.
Het FROSTMATIC-lampje knippert.

2.

Druk op de toetsOK om te bevestigen.
Het FROSTMATIC-lampje wordt getoond.

Deze functie stopt automatisch na 52 uur.

Om de functie uit te schakelen voor deze automatisch afloopt:
1.

Druk op de Mode-knop tot het FROSTMATIC-lampje knippert.

2.

Druk op de toetsOK om te bevestigen.

3.

Het FROSTMATIC-lampje gaat uit.

De functie gaat uit door een andere ingestelde vriezertemperatuur te selecteren.

Minute Minder-functie

DeMinute Minder -functie wordt gebruikt om een akoestisch alarm in te stellen op een ge

-

kozen tijd. Dit is bijvoorbeeld nuttig wanneer een recept gedurende een bepaalde tijd moet

afkoelen of wanneer u niet wilt vergeten dat u flessen in de vriezer hebt geplaatst om ze

snel te laten afkoelen.

Om de functie aan te zetten:
1.

Druk op de Mode-toets tot het bijbehorende pictogram verschijnt.
Het Minute Minder -lampje knippert.
De timer toont gedurende enkele seconden de ingestelde waarde (30 minuten).

2.

Druk op de timerknop om de waarde van de timer te wijzigen van 1 tot 90 minuten.

3.

Druk op de OK-toets om te bevestigen.
Het Minute Minder -lampje wordt getoond.
De timer begint te knipperen (min).

Op het einde van de aftelling knippert het Minute Minder -lampje en klinkt een alarm:

8

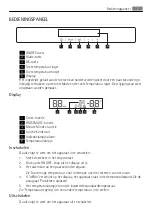
Bedieningspaneel

Summary of Contents for A62500GNW0

Page 1: ...A62500GNW0 NL VRIEZER GEBRUIKSAANWIJZING 2 EN FREEZER USER MANUAL 21 PT CONGELADOR MANUAL DE INSTRUÇÕES 39 ...

Page 2: ...inuten de tijd om het door te lezen zodat u er optimaal van kunt profiteren ACCESSOIRES EN VERBRUIKSARTIKELEN In de AEG webshop vindt u alles wat u nodig heeft om al uw apparaten van AEG mooi te houden en perfect te laten functioneren Ook vindt u hier een groot aantal accessoires die zijn ontworpen en gebouwd volgens de hoge kwaliteitsnormen die u verwacht van speciaal kookgerei tot bestekmandjes ...

Page 3: ...iging 13 Problemen oplossen 15 Technische gegevens 15 Montage 18 Geluiden 20 Het milieu In deze gebruiksaanwijzing worden de volgende symbolen gebruikt Belangrijke informatie over uw persoonlijke veiligheid en informatie over het voorkomen van schade aan het apparaat Algemene informatie en tips Milieu informatie Wijzigingen voorbehouden Inhoud 3 ...

Page 4: ... hebben ontvangen over het gebruik van het apparaat Houd kinderen uit de buurt om te voorkomen dat ze met het apparaat gaan spelen Houd alle verpakkingsmateriaal buiten het bereik van kinderen Gevaar voor verstikking Als u het apparaat afdankt trek dan de stekker uit het stopcontact snij de voedingskabel door zo dicht mogelijk bij het apparaat en verwijder de deur om te voorkomen dat kin deren een...

Page 5: ...er de afdekking van het lampje1 voor de binnenverlichting Dit apparaat is zwaar Wees voorzichtig als u het apparaat verplaatst Haal geen artikelen uit het vriesvak en raak ze niet aan als uw handen vochtig nat zijn dit kan uw huid beschadigen of vrieswonden veroorzaken Stel het apparaat niet langdurig bloot aan direct zonlicht Gloeilampjes2 gebruikt voor dit apparaat is een speciaal lampje voor hu...

Page 6: ...te voor komen dat hete onderdelen compressor condensator aangeraakt kunnen worden en brandwonden veroorzaken Het apparaat mag niet vlakbij radiatoren of kooktoestellen geplaatst worden Verzeker u ervan dat de stekker bereikbaar is nadat het apparaat geïnstalleerd is Sluit het apparaat alleen aan op een drinkwaterleiding 4 Onderhoud Alle elektrotechnische werkzaamheden die noodzakelijk zijn voor he...

Page 7: ...dicatielampje alarm 6 Temperatuurlampje Inschakelen Ga als volgt te werk om het apparaat in te schakelen 1 Steek de stekker in het stopcontact 2 Druk op de ON OFF knop als het display uit is 3 Het alarm kan na een paar seconden afgaan Zie Alarm hoge temperatuur voor informatie over het resetten van het alarm 4 If dEMo verschijnt op het display het apparaat staat in de demonstratiestand Zie de para...

Page 8: ...atisch afloopt 1 Druk op de Mode knop tot het FROSTMATIC lampje knippert 2 Druk op de toetsOK om te bevestigen 3 Het FROSTMATIC lampje gaat uit De functie gaat uit door een andere ingestelde vriezertemperatuur te selecteren Minute Minder functie DeMinute Minder functie wordt gebruikt om een akoestisch alarm in te stellen op een ge kozen tijd Dit is bijvoorbeeld nuttig wanneer een recept gedurende ...

Page 9: ...ond Voor uitschakeling van de functie 1 Druk op de Mode knop tot het indicatielampje Kinderslot knippert 2 Druk op de OK knop om te bevestigen 3 Het indicatielampje Kinderslot gaat uit Alarm hoge temperatuur Een toename van de temperatuur in de vriesruimte bijvoorbeeld door een eerdere stroom uitval wordt aangegeven door knipperende indicatielampjes van het alarm en de vriezertemperatuur het gelui...

Page 10: ...en is aan gegeven op het typeplaatje een label dat zich aan de binnenkant van het apparaat be vindt Het invriesproces duurt 24 uur voeg gedurende deze periode niet meer in te vriezen voed sel toe Het bewaren van ingevroren voedsel Als u het apparaat voor het eerst of na een periode dat het niet gebruikt is inschakelt het apparaat minstens 2 uur op een hoge instelling laten werken voordat u er prod...

Page 11: ...reid het voedsel in kleine porties voor zo kan het snel en volledig worden ingevroren en zo kunt u later alleen die hoeveelheid laten ontdooien die u nodig heeft wikkel het voedsel in aluminiumfolie of plastic en zorg ervoor dat de pakjes luchtdicht zijn leg vers nog niet ingevroren voedsel niet tegen het al ingevroren voedsel om te voorko men dat dit laatste warm wordt smalle pakjes zijn makkelij...

Page 12: ...r vlak beschadigen en een sterke geur achterlaten Maak de condensor zwart rooster en de compressor op de achterkant van het apparaat schoon met een borstel of stofzuiger Deze handeling zal de prestatie van het apparaat ver beteren en het elektriciteitsverbruik besparen Zorg ervoor dat u het koelsysteem niet beschadigt Veel normaal verkrijgbare keukenreinigers bevatten chemicaliën die de kunststoff...

Page 13: ...ekker goed in het stop contact Het apparaat krijgt geen stroom Er staat geen spanning op het stopcontact Sluit een ander elektrisch appa raat aan op het stopcontact Neem contact op met een gekwa lificeerde elektricien Het alarmlampje knippert De temperatuur in het vriesvak is te hoog Zie Alarm hoge temperatuur De compressor werkt con tinu De temperatuur is niet goed in gesteld Stel een hogere temp...

Page 14: ...reden in de temperatuurmeting Neem contact op met de klanten service het koelsysteem blijft werken om uw levensmiddelen koud te houden maar de tempe ratuur kan niet aangepast wor den dEMo verschijnt op het display Het apparaat staat in de demon stratiestand dEMo Houd de knop OK ongeveer 10 se conden ingedrukt tot er een lang zoemgeluid klinkt en het display even uit gaat het apparaat start regelma...

Page 15: ...en droog 11 Steek de stekker in het stopcontact 12 Schakel het apparaat in TECHNISCHE GEGEVENS Afmetingen van de uitsparing Hoogte 1800 mm Breedte 600 mm Diepte 650 mm Tijdsduur 20 h Spanning 230 240 V Frequentie 50 Hz De technische gegevens staan op het typeplaatje aan de linker binnenkant in het apparaat en op het energielabel MONTAGE WAARSCHUWING Lees voor uw eigen veiligheid en correcte werkin...

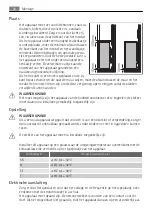
Page 16: ...en WAARSCHUWING Het moet mogelijk zijn het apparaat van de hoofdstroomtoevoer af te koppelen de stekker moet daarom na installatie gemakkelijk toegankelijk zijn Opstelling WAARSCHUWING Als u een oud apparaat weggooit dat voorzien is van een deurslot of vergrendeling zorg er dan voor dat dit onbruikbaar gemaakt wordt zodat kinderen er niet in opgesloten kunnen raken De stekker van het apparaat moet...

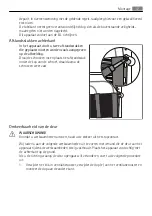
Page 17: ...aats het afstandsstuk onder de kop van de schroef draai daarna de schroeven weer vast Omkeerbaarheid van de deur WAARSCHUWING Voordat u werkzaamheden uitvoert haalt u de stekker uit het stopcontact Wij raden u aan de volgende werkzaamheden uit te voeren met iemand die de deur van het apparaat tijdens de werkzaamheden stevig vasthoudt Plaats het apparaat voorzichtig met de achterkant op de grond Al...

Page 18: ...en die na de ver wijdering van de hendel zijn overgeble ven daarmee dicht 9 Verzeker u ervan dat de voorste plaat van de deur zich evenwijdig bevindt aan de voorste plaat van de bovenkant 10 Zet het apparaat op zijn plaats water pas en wacht minstens vier uur voordat u de stekker in het stopcontact steekt Voer een laatste controle uit om te zorgen dat Alle schroeven zijn aangehaald De magnetische ...

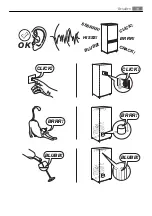
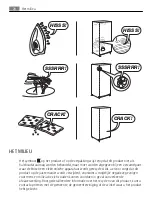
Page 19: ...BRRR HISSS CLICK BLUBB CRACK SSSRRR OK CLICK CLICK BRRR BRRR BLUBB BLUBB Geluiden 19 ...

Page 20: ...en elektronische apparatuur wordt gerecycled Als u ervoor zorgt dat dit product op de juiste manier wordt verwijderd voorkomt u mogelijke negatieve gevolgen voor mens en milieu die zich zouden kunnen voordoen in geval van verkeerde afvalverwerking Voor gedetailleerdere informatie over het recyclen van dit product kunt u contact opnemen met de gemeente de gemeentereiniging of de winkel waar u het p...

Page 21: ...e spend a few minutes reading to get the very best from it ACCESSORIES AND CONSUMABLES In the AEG webshop you ll find everything you need to keep all your AEG appliances looking spotless and working perfectly Along with a wide range of accessories designed and built to the high quality standards you would expect from specialist cookware to cutlery baskets from bottle holders to delicate laundry ba...

Page 22: ...o if 33 Technical data 33 Installation 36 Noises 38 Environmental concerns The following symbols are used in this user manual Important information concerning your personal safety and information on how to avoid damaging the appliance General information and tips Environmental information Subject to change without notice 22 Contents ...

Page 23: ...e plug out of the socket cut the connection cable as close to the appliance as you can and remove the door to prevent playing chil dren to suffer electric shock or to close themselves into it If this appliance featuring magnetic door seals is to replace an older appliance having a spring lock latch on the door or lid be sure to make that spring lock unusable before you discard the old appliance Th...

Page 24: ... appliance to direct sunlight Bulb lamps7 used in this appliance are special purpose lamps selected for household ap pliances use only They are not suitable for household room illumination Daily Use Do not put hot pot on the plastic parts in the appliance Do not store flammable gas and liquid in the appliance because they may explode Do not place food products directly against the air outlet on th...

Page 25: ...s plug is accessible after the installation of the appliance Connect to potable water supply only 9 Service Any electrical work required to do the servicing of the appliance should be carried out by a qualified electrician or competent person This product must be serviced by an authorized Service Centre and only genuine spare parts must be used Environment Protection This appliance does not contai...

Page 26: ...ture alarm 4 If dEMo appears on the display the appliance is in demonstration mode Refer to What to do if paragraph 5 The temperature indicators show the set default temperature To select a different set temperature refer to Temperature regulation Switching off To switch off the appliance do these steps 1 Press the ON OFF button for 5 seconds 2 The display switches off 3 To disconnect the applianc...

Page 27: ...rresponding icon appears The Minute Minder indicator flashes The Timer shows the set value 30 minutes for a few seconds 2 Press the Timer regulator button to change the Timer set value from 1 to 90 minutes 3 Press the OK button to confirm The Minute Minder indicator is shown The Timer start to flash min At the end of the countdown the Minute Minder indicator flashes and an audible alarm sounds 1 R...

Page 28: ...m indicator continue to flash until the normal conditions are restored When the alarm has returned the alarm indicator goes off Door open alarm An acoustic alarm will sound when the door is left open for around 80 seconds When normal conditions are restored door closed the acoustic alarm will stop FIRST USE Cleaning the interior Before using the appliance for the first time wash the interior and a...

Page 29: ...in months for the appropriate types of frozen goods Whether the upper or lower value of the indicated storage time is valid depends on the quality of the foods and treating before freezing Thawing Deep frozen or frozen food prior to being used can be thawed in the refrigerator compart ment or at room temperature depending on the time available for this operation Small pieces may even be cooked sti...

Page 30: ...ary Once defrosted food deteriorates rapidly and cannot be refrozen Do not exceed the storage period indicated by the food manufacturer CARE AND CLEANING CAUTION Unplug the appliance before carrying out any maintenance operation This appliance contains hydrocarbons in its cooling unit maintenance and recharging must therefore only be carried out by authorized technicians Periodic cleaning The equi...

Page 31: ...revent unpleasant smells If the cabinet will be kept on ask somebody to check it once in a while to prevent the food inside from spoiling in case of a power failure WHAT TO DO IF WARNING Before troubleshooting disconnect the mains plug from the mains socket Only a qualified electrician or competent person must do the troubleshooting that is not in this manual Problem Possible cause Solution The ap...

Page 32: ...ts are too near to each other Store products so that there is cold air circulation A large quantity of drops ice covers the top com partment inside the appli ance There is too much frost and ice on the evaporator of the appli ance the door was open for too long time Refer to Cleaning the evapora tor Upper or lower square is shown in the temperature Display An error has occurred in meas uring the t...

Page 33: ...ke several hours if the problem started long before 9 Move the appliance to the original posi tion 10 Clean and dry the inside of the appli ance 11 Connect the mains plug into the mains socket 12 Switch on the appliance TECHNICAL DATA Dimension of the recess Height 1800 mm Width 600 mm Depth 650 mm Rising Time 20 h Voltage 230 240 V Frequency 50 Hz The technical information are situated in the rat...

Page 34: ...be easily accessible after installation Positioning WARNING If you are discarding an old appliance that has a lock or catch on the door you must ensure that it is made unusable to prevent young children being trapped inside The appliance shall have the plug accessible after installation Install this appliance at a location where the ambient temperature corresponds to the cli mate class indicated o...

Page 35: ...t the following operations we suggest that this be made with another person that will keep a firm hold on the door of the appliance during the operations Gently lay the appliance on its back To change the opening direction of the door do these steps 1 Remove the clip in ventilation grille remove the plug e from the ventilation grille and install it on the opposite side 2 Remove the bottom hinge A ...

Page 36: ...ont board of the door is parallel to the front board of the top 10 Reposition level the appliance wait for at least four hours and then connect it to the power socket Do a final check to make sure that All screws are tightened The magnetic seal adheres to the cabinet The door opens and closes correctly If the ambient temperature is cold i e in Winter the gasket may not fit perfectly to the cabinet...

Page 37: ...CLICK CLICK BRRR BRRR BLUBB BLUBB HISSS HISSS Noises 37 ...

Page 38: ...cal and electronic equipment By ensuring this product is disposed of correctly you will help prevent potential negative consequences for the environment and human health which could otherwise be caused by inappropriate waste handling of this product For more detailed information about recycling of this product please contact your local council your household waste disposal service or the shop wher...

Page 39: ...lguns minutos para tirar o máximo partido do produto ACESSÓRIOS E CONSUMÍVEIS Na loja web AEG encontrará tudo aquilo de que necessita para manter os seus aparelhos AEG imaculados e a funcionarem na perfeição A par de uma vasta gama de acessórios projectados e concebidos de acordo com os padrões de elevada qualidade que esperaria de utensílios de cozinha especializados a cestos de talheres de supor...

Page 40: ...eza 50 O que fazer se 52 Dados técnicos 52 Instalação 55 Ruídos 57 Preocupações ambientais Os símbolos que se seguem são utilizados no presente manual Informações importantes relativas à segurança de pessoas e à prevenção de danos a aparelhos Informações gerais e conselhos úteis Informações ambientais Sujeito a alterações sem aviso prévio 40 Índice ...

Page 41: ... alcance das crianças Existe o risco de asfixia Se eliminar o aparelho retire a ficha da tomada corte o cabo eléctrico o mais perto do aparelho possível e retire a porta para evitar que crianças a brincar sofram choques eléctricos ou se fechem dentro do aparelho Se este aparelho com vedantes de porta magnéticos for substituir um aparelho mais ve lho com fecho de mola lingueta na porta ou tampa cer...

Page 42: ...to do congelador se estiver com as mãos húmidas molhadas pois pode causar abrasões na pele ou queimaduras provocadas pelo gelo Evite a exposição prolongada do aparelho à luz solar directa Lâmpadas 12 utilizadas neste aparelho são lâmpadas especiais seleccionadas apenas para aparelhos domésticos Não são adequadas para iluminação doméstica Utilização diária Não coloque panelas quentes nas partes de ...

Page 43: ...ntes compressor condensador e possíveis queimaduras Não coloque o aparelho perto de radiadores ou fogões Certifique se de que a ficha de alimentação fica acessível após a instalação do aparelho Ligue apenas a uma fonte de água potável 14 Assistência Quaisquer trabalhos eléctricos necessários para a manutenção do aparelho devem ser efectuados por um electricista qualificado ou pessoa competente A m...

Page 44: ...para crianças 5 Indicador de alarme 6 Indicador de temperatura Ligar Para ligar o aparelho efectue os seguintes passos 1 Ligue a ficha do aparelho à tomada 2 Prima o botão ON OFF se o display estiver desligado 3 O alarme sonoro poderá funcionar após alguns segundos Para reiniciar o alarme consulte Alarme de temperatura elevada 4 Se o display indicar dEMo o aparelho está em modo de demonstração Con...

Page 45: ...botão Mode até o indicador FROSTMATIC ficar intermitente 2 Prima o botão OK para confirmar 3 O indicador FROSTMATIC apaga se A função é desligada se for seleccionada uma temperatura diferente para o congelador Função Minute Minder A função Minute Minder destina se a ser utilizada para regular um alarme acústico para uma hora escolhida sendo útil por exemplo quando uma receita requer o arrefeciment...

Page 46: ...mar O indicador Bloqueio de Segurança para Crianças é apresentado Para desligar a função 1 Prima o botão Mode até o indicador Bloqueio de Segurança para Crianças piscar 2 Prima o botão OK para confirmar 3 O indicador Bloqueio de Segurança para Crianças apaga se Alarme de temperatura elevada Um aumento da temperatura no compartimento do congelador por exemplo devido a uma falha de alimentação é ind...

Page 47: ... de identificação uma etiqueta presente nas paredes internas do aparelho O processo de congelação dura 24 horas durante este período não introduza novos ali mentos a congelar Armazenamento de alimentos congelados Quando ligar pela primeira vez ou após um período sem utilização antes de colocar os pro dutos no compartimento deixe o aparelho em funcionamento durante no mínimo 2 horas nas definições ...

Page 48: ... e com pletamente congeladas e para tornar possível subsequentemente descongelar apenas a quantidade necessária embrulhe os alimentos em folha de alumínio ou politeno e certifique se de que as emba lagens são herméticas Não permita que os alimentos frescos e descongelados entrem em contacto com os ali mentos já congelados evitando assim o aumento de temperatura dos alimentos congela dos os aliment...

Page 49: ... o condensador grelha preta e o compressor que está no fundo do aparelho com uma escova Esta operação irá melhorar o desempenho do aparelho e poupar consumo de electricidade Tenha cuidado para não danificar o sistema de arrefecimento Muitos agentes de limpeza de superfícies de cozinhas contêm químicos que podem atacar danificar os plásticos usados neste aparelho Por esta razão é aconselhável que a...

Page 50: ...e um aparelho eléctrico dife rente à tomada Contacte um electricista qualifi cado A luz de alarme está inter mitente A temperatura no congelador está demasiado elevada Consulte Alarme de temperatura elevada O compressor funciona continuamente A temperatura não está definida correctamente Defina uma temperatura mais elevada A porta não está correctamente fechada Consulte a secção Fechar a por ta A ...

Page 51: ... quadrado su perior ou inferior Ocorreu um erro na medição da temperatura Entre em contacto com o seu re presentante de assistência o sis tema de refrigeração continuará a manter os produtos alimentares frios mas o ajuste da temperatu ra não será possível dEMo aparece no display O aparelho está no modo de de monstração dEMo Mantenha o botãoOK premido durante 10 segundos após ouvir um sinal sonoro ...

Page 52: ...ue a ficha do aparelho à tomada de alimentação 12 Ligue o aparelho DADOS TÉCNICOS Dimensão do nicho de instala ção Altura 1800 mm Largura 600 mm Profundidade 650 mm Tempo de reinício 20 h Tensão 230 240 V Frequência 50 Hz As informações técnicas encontram se na placa de características no lado esquerdo interno do aparelho e na etiqueta de energia INSTALAÇÃO ADVERTÊNCIA Leia as Informações de segur...

Page 53: ...corrente Assim a ficha tem de estar facilmente acessível após a instalação Posicionamento ADVERTÊNCIA Se for eliminar um aparelho velho que tem um bloqueio ou um fecho na porta certifique se de não funciona para evitar que as crianças fiquem trancadas lá dentro O aparelho deverá ter a ficha acessível após a instalação Instale este aparelho num local com uma temperatura ambiente que corresponde à c...

Page 54: ...VERTÊNCIA Antes de efectuar qualquer operação retire a ficha da tomada Recomendamos que execute as seguintes operações com outra pessoa que irá segurar a porta do aparelho durante as operações Apoie cuidadosamente o aparelho sobre a parte traseira Para alterar o sentido de abertura da porta execute estes passos 1 Retire a grelha de ventilação de encaixe retire o tampão e da grelha de ventilação e ...

Page 55: ...aca frontal da porta está paralela à placa frontal do tampo 10 Volte a colocar o aparelho no sítio e ni vele o aguarde pelo menos quatro ho ras e de seguida ligue o à tomada Faça uma verificação final para se certificar de que Todos os parafusos estão apertados A junta magnética adere ao armário A porta abre e fecha correctamente Se a temperatura ambiente for baixa por exemplo no Inverno a junta p...

Page 56: ...BRRR HISSS CLICK BLUBB CRACK SSSRRR OK CLICK CLICK BRRR BRRR BLUBB BLUBB 56 Ruídos ...

Page 57: ...co Ao garantir uma eliminação adequada deste produto irá ajudar a evitar eventuais consequências negativas para o meio ambiente e para a saúde pública que de outra forma poderiam ser provocadas por um tratamento incorrecto do produto Para obter informações mais pormenorizadas sobre a reciclagem deste produto contacte os serviços municipalizados locais o centro de recolha selectiva da sua área de r...

Page 58: ...58 ...

Page 59: ...59 ...

Page 60: ...www aeg com shop 222356702 A 132011 ...
Reviews: