6. Switch on the appliance.
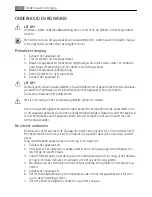
CAUTION!
Do not use detergents, abrasive products, highly perfumed cleaning products or wax pol
-
ishes to clean the inner side of the appliance.
Prevent damage to the cooling system.
There is no need to clean the compressor area.
Many proprietary kitchen surface cleaners contain chemicals that can attack/damage the
plastics used in this appliance. For this reason it is recommended that the outer casing of
this appliance is only cleaned with warm water with a little washing-up liquid added.
Defrosting the freezer
Defrost the freezer when the frost layer reaches a thickness of about 10-15 mm.
The best time to defrost the freezer when it contains no or only a little food.
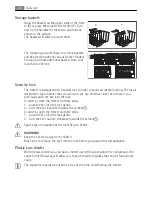
To remove the frost, do these steps:
1. Switch off the appliance.
2. Remove any stored food, wrap it in several layers of newspaper and put it in a cool
place.
3. Leave the lid open , remove the plug from the defrost water drain and collect all de
-
frost water on a tray. Use a scraper to remove ice quickly.
4. When defrosting is completed, dry the interior thoroughly and refit the plug.
5. Switch on the appliance.
6. Set the temperature regulator to obtain the maximum coldness and run the appli
-
ance for two or three hours using this setting.
7. Reload the previously removed food into the compartment.
Never use sharp metal tools to scrape off frost as you could damage the appliance. Do
not use a mechanical device or any artificial means to speed up the thawing process oth
-
er than those recommended by the manufacturer. A temperature rise of the frozen food
packs, during defrosting, may shorten their safe storage life.
Periods of non-operation
When the appliance is not in use for long periods, take the following precautions:
1. Switch off the appliance.
2. Disconnect the mains plug from the mains socket.
3. Remove all food.
4. Defrost and clean the appliance and all accessories.
5. Leave the lid open to prevent unpleasant smells.
If the cabinet will be kept on, ask somebody to check it once in a while to prevent the
food inside from spoiling in case of a power failure.
24
Care and cleaning
Summary of Contents for A63190GT
Page 57: ...57 ...
Page 58: ...58 ...
Page 59: ...59 ...
Page 60: ...www aeg electrolux com shop 820419625 00 052010 ...

