


1.
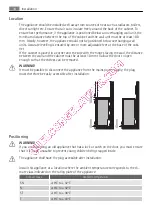
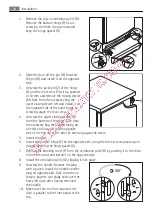
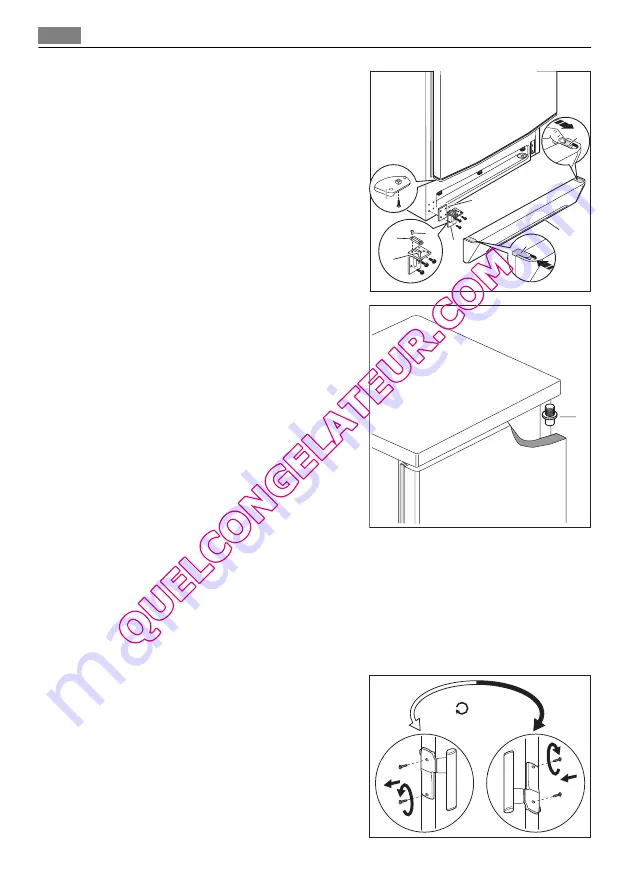
Remove the clip-in ventilation grille (D).
Remove the bottom hinge (E) by un
-
screwing the three fixing screws and
keep the hinge gasket (X).
2.
Slide the door off the pin (G). Unscrew
the pin (G) and install it on the opposite
side.
3.
Unscrew the pivot pin (Z) of the hinge
(E) and the rear screw (Y) with a spanner
of 10 mm and remove the closing device
(M). Take from the accessory bag the
lower closing device left and install it on
the opposite side of the same hinge by
screwing again the rear screw.
4.
Unscrew the upper closing device (N)
from the bottom of the door. Take from
the accessory bag the upper closing de
-
vice left and install it on the opposite
side of the bottom of the door by screwing again the screw.
5.
Install the door.
6.
Install the bottom hinge (E) on the opposite side, using the three screws previously re
-
moved inserting the hinge gasket (X).
7.
Remove the blanking cover (F) from the ventilation grille (D) by pushing it in the direc
-
tion of the arrow and install it on the opposite side.
8.
Install the ventilation grille (D), clipping it into place.
9.
Unscrew the handle. Remove the plug
with a punch. Install the handle and the
plug on opposite side. Take from the ac
-
cessory bag the two plugs and cover the
holes left open after having removed
the handle.
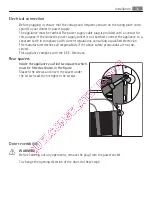
10. Make sure that the front board of the
door is parallel to the front board of the
top.
N
F
F
X
E
D
Y
M
Z
G
180°
36
Installation
Summary of Contents for A72000GNW0
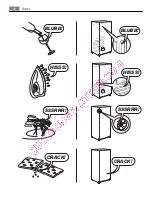
Page 19: ...BRRR HISSS CLICK BLUBB CRACK SSSRRR OK CLICK CLICK BRRR BRRR BLUBB BLUBB Geluiden 19 ...
Page 38: ...BLUBB BLUBB HISSS HISSS SSSRRR SSSRRR CRACK CRACK 38 Noises ...
Page 58: ...BRRR BRRR BLUBB BLUBB HISSS HISSS SSSRRR SSSRRR 58 Bruits ...
Page 78: ...CLICK CLICK BRRR BRRR BLUBB BLUBB HISSS HISSS 78 Geräusche ...


