background image

BKS18BR

Original instructions

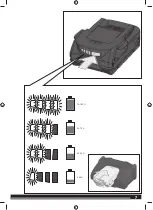
Summary of Contents for BKS18BR

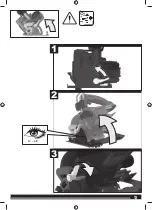
Page 1: ...BKS18BR Original instructions ...

Page 2: ...2 2 Important It is essential that you read the instructions in this manual before assembling operating and maintaining the product Subject to technical modifications ...

Page 3: ...lade guard handle 7 Blade 8 Lower blade guard 9 Rafter hook 10 Spindle lock button 11 Front handle 12 LED light 13 Edge guide knob 14 Bevel adjustment lever 15 Blade screw 16 Outer flange 17 Hex key 18 Depth adjustment lock lever 19 battery port 20 Edge guide fence 1 2 8 7 17 5 11 12 9 14 6 13 19 10 3 4 18 16 15 20 ...

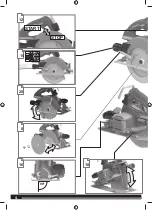
Page 4: ...4 4 15 10 20 8 16 90 STOP START 12 ...

Page 5: ...5 5 6 18 14 19 11 13 21 ...

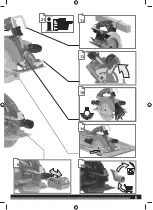
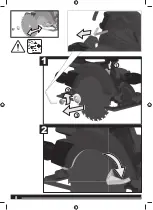
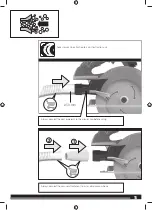
Page 6: ...6 6 Remove the battery pack before starting any work on the machine 1 1 2 2 Click ...

Page 7: ...7 7 75 100 50 75 25 50 0 25 ...

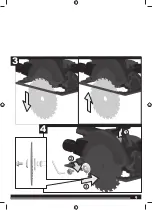
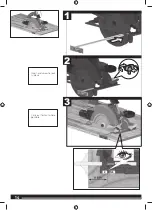
Page 8: ...8 8 1 2 1 2 3 ...

Page 9: ...9 9 3 4 1 2 3 ...

Page 10: ...10 10 0 54 mm 1 2 3 ...

Page 11: ...ust the cutting depth to the thickness of the workpiece Less than a full tooth of the blade teeth should be visible below the workpiece Doing this provides increased cutting efficiencies and longer runtimes 2 1 ...

Page 12: ...12 12 START STOP For safety reasons this power tool is fitted with a switch lock and the On Off switch cannot be locked in the On position 1 2 ...

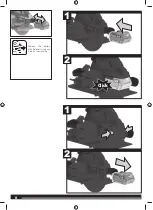
Page 13: ...13 13 0 45 2 1 3 ...

Page 14: ...14 14 1 2 3 Carry out test cut where possible Insert and screw to lock in place Û Û ...

Page 15: ...15 15 Always connect the vacuum attachment to a standard vacuum hose Accessory can be attached to a dust extraction unit ø 30 mm 1 2 Always connect the dust pipe joint to the circular saw before using ...

Page 16: ...16 16 If a correction of the 90 angle of the guide plate to the saw blade is necessary use the correction screw 90 ...

Page 17: ...17 17 0 1 4 2 3 ...

Page 18: ...18 18 This tool is equipped with LED lights for work piece illumination The LED can be activated by either the trigger when the saw is running or by the handle switch without the saw running ...

Page 19: ...19 19 1 2 3 1 1 2 Replace the dust pipe joint if worn or broken before use ...

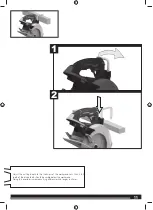
Page 20: ...20 20 1 2 ...

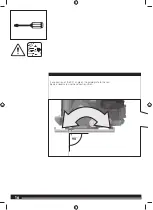
Page 21: ...21 21 9 max 68mm Let the tool do the work Pushing this saw will reduce efficiencies ...

Page 22: ...22 22 Always work on a stable level work piece Guide rail sold separately 4932430067 Guide rail adaptor sold separately 4931416518 ...

Page 23: ...ade causing an uncontrolled saw to lift up and out of the workpiece toward the operator when the blade is pinched or jammed tightly by the kerf closing down the blade stalls and the motor reaction drives the unit rapidly back toward the operator if the blade becomes twisted or misaligned in the cut the teeth at the back edge of the blade can dig into the top surface of the wood causing the blade t...

Page 24: ...e markings Do not use any abrasive wheels Identify the correct saw blade to be used for the material to be cut Use only saw blades that are marked with a speed equal or higher than the speed marked on the tool Use only saw blades recommended by the manufacturer which conform to EN 847 1 if intended for wood and analogous materials Avoid overheating the blade tips and melting the plastic Wear a dus...

Page 25: ...ansport of Lithium Ion batteries by third parties is subject to Dangerous Goods regulations Transport preparation and transport are exclusively to be carried out by appropriately trained persons and the process has to be accompanied by corresponding experts When transporting batteries Ŷ Ensure that battery contact terminals are protected and insulated to prevent short circuit Ŷ Ensure that battery...

Page 26: ......

Page 27: ......

Page 28: ...verley VIC 3149 Australia Techtronic Industries N Z Limited Unit C 70 Business Parade South Highbrook Auckland 2013 New Zealand www aegpowertools com au www aegpowertools co nz AEG is a registered trademark used under license from AB Electrolux publ 961099007 01A ...

Reviews: