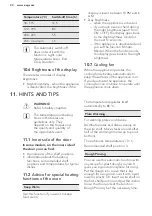
Temperature (°C)
Switch-off time (h)
30 - 115
12.5
120 - 195
8.5
200 - 245
5.5
250 - maximum
1.5
The Automatic switch-off
does not work with the
functions: Light, core
temperature sensor, End
Time, Duration.
10.6
Brightness of the display
There are two modes of display
brightness:
• Night brightness - when the appliance
is deactivated, the brightness of the
display is lower between 10 PM and 6
AM.
• Day brightness:
– when the appliance is activated.
– if you touch a sensor field during
the night brightness (apart from
ON / OFF), the display goes back
to the day brightness mode for
the next 10 seconds.
– if the appliance is deactivated and
you set the function: Minute
Minder. When the function ends,
the display goes back to the night
brightness.
10.7
Cooling fan
When the appliance operates, the
cooling fan activates automatically to
keep the surfaces of the appliance cool.
If you deactivate the appliance, the
cooling fan can continue to operate until
the appliance cools down.
11.
HINTS AND TIPS
WARNING!
Refer to Safety chapters.
The temperature and baking
times in the tables are
guidelines only. They
depend on the recipes and
the quality and quantity of
the ingredients used.
11.1
Inner side of the door
In some models, on the inner side of
the door you can find:
• the numbers of the shelf positions.
• information about the heating
functions, recommended shelf
positions and temperatures for typical
dishes.
11.2
Advice for special heating
functions of the oven
Keep Warm
Use this function if you want to keep
food warm.
The temperature regulates itself
automatically to 80 °C.
Plate Warming
For warming plates and dishes.
Distribute plates and dishes evenly on
the wire shelf. Move stacks around after
half of the warming time (swap top and
bottom).
The automatic temperature is 70 °C.
Recommended shelf position: 3.
Dough Proving
You can use this automatic function with
any recipe for yeast dough you like. It
gives you a good atmosphere for rising.
Put the dough into a dish that is big
enough for rising and cover it with a wet
towel or plastic foil. Insert a wire shelf on
the first shelf position and put the dish in.
Close the door and set the function:
Dough Proving. Set the necessary time.
www.aeg.com
20
Summary of Contents for BP831460K
Page 1: ...EN User Manual Oven BP831460K ...
Page 41: ...ENGLISH 41 ...
Page 42: ...www aeg com 42 ...
Page 43: ...ENGLISH 43 ...


