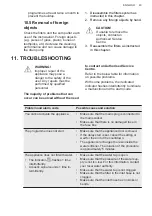
background image

Problem

Possible cause and solution

There are residues of deter‐

gent in the dispenser at the

end of the programme.

• The detergent tablet got stuck in the dispenser and

therefore was not completely washed away by water.

• Water cannot wash away the detergent from the dis‐

penser. Make sure that the spray arm is not blocked or

clogged.

• Make sure that items in the baskets do not impede the

lid of the detergent dispenser from opening.

Odours inside the appliance.

• Refer to "Internal cleaning".

Limescale deposits on the ta‐

bleware, on the tub and on the

inside of the door.

• The level of salt is low, check the refill indicator.

• The cap of the salt container is loose.

• Your tap water is hard. Refer to "The water soften‐

er".

• Even using multi-functional tabs use salt and set re‐

generation of the water softener. Refer to "The water

softener".

• If lime scale deposits still remain, clean the appliance

with appliance cleaners which are particularly suitable

for this purpose.

• Try different detergent.

• Contact the detergent manufacturer.

Dull, discoloured or chipped

tableware.

• Make sure that only dishwasher-safe items are wash‐

ed in the appliance.

• Load and unload the basket carefully. Refer to basket

loading leaflet.

• Place delicate items in the upper basket.

Refer to "Before first use"

"Daily use" or "Hints and

tips" for other possible

causes.

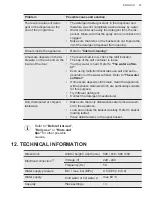
12. TECHNICAL INFORMATION

Dimensions

Width / height / depth (mm) 596 / 818 - 898 / 550

Electrical connection 

1)

Voltage (V)

220 - 240

Frequency (Hz)

50

Water supply pressure

Min. / max. bar (MPa)

0.5 (0.05) / 8 (0.8)

Water supply

Cold water or hot water 

2)

max 60 °C

Capacity

Place settings

13

ENGLISH

47

Summary of Contents for FD395V

Page 1: ...USER MANUAL NL Gebruiksaanwijzing 2 Afwasautomaat EN User Manual 26 Dishwasher FD395V ...

Page 2: ...odat u er optimaal van kunt profiteren Ga naar onze website voor Advies over gebruik brochures het oplossen van problemen onderhouds en reparatie informatie www aeg com support Registreer uw product voor een betere service www registeraeg com Koop accessoires verbruiksartikelen en originele reserveonderdelen voor uw apparaat www aeg com shop KLANTENSERVICE Gebruik altijd originele onderdelen Als u...

Page 3: ...e en complexe beperkingen dienen altijd uit de buurt van het apparaat te worden gehouden tenzij ze voortdurend onder toezicht staan Kinderen jonger dan 3 jaar dienen mits zij voortdurend onder toezicht staan bij het apparaat uit de buurt te worden gehouden Laat kinderen niet met het apparaat spelen Houd reinigingsmiddelen uit de buurt van kinderen Houd kinderen en huisdieren uit de buurt van het a...

Page 4: ...en afgedekt met bijv een vloerkleed Het apparaat moet met de nieuwe slangset worden aangesloten op een kraan Oude slangsets mogen niet opnieuw worden gebruikt 2 VEILIGHEIDSVOORSCHRIFTEN 2 1 Installatie WAARSCHUWING Alleen een erkende installatietechnicus mag het apparaat installeren Verwijder alle verpakkingsmaterialen Installeer en gebruik geen beschadigd apparaat Gebruik het apparaat niet voorda...

Page 5: ...tot het schoon en helder is Zorg ervoor dat er geen zichtbare waterlekken zijn tijdens en na het eerste gebruik van het apparaat De watertoevoerslang heeft een veiligheidsventiel en een omhulsel met een hoofdkabel aan de binnenkant WAARSCHUWING Gevaarlijke spanning Als de watertoevoerslang beschadigd is sluit dan onmiddellijk de waterkraan en haal de stekker uit het stopcontact Neem contact op met...

Page 6: ...tot deurconstructies printplaten elektronische displays drukschakelaars thermostaten en sensoren software en firmware inclusief resetsoftware Houd er rekening mee dat sommige van deze reserveonderdelen alleen beschikbaar zijn voor professionele reparateurs en dat niet alle reserveonderdelen relevant zijn voor alle modellen De volgende reserveonderdelen zullen beschikbaar zijn gedurende 10 jaar nad...

Page 7: ...e 5 Zoutreservoir 6 Luchtventilatie 7 Glansmiddeldoseerbakje 8 Afwasmiddeldoseerbakje 9 Bestekmand 10 Onderste korf 11 Bovenste korf 4 BEDIENINGSPANEEL 2 1 3 4 5 1 Aan uittoets Resetknop 2 Programma indicatielampjes 3 Indicatielampjes 4 Programmakeuzetoets 5 Delay Start toets NEDERLANDS 7 ...

Page 8: ... werking is 5 PROGRAMMA S De volgorde van de programma s in de tabel geven mogelijk hun volgorde op het bedieningspaneel niet weer Programma Type lading Mate van vervui ling Programmafasen 1 Vaatwerk Bestek Potten Pannen Normaal Licht aange koekt Voorspoelen Wassen 50 C Tussentijdse spoeling Laatste spoeling 60 C Drogen AirDry Vaatwerk Bestek Potten Pannen Normaal tot zwaar aangekoekt Voorspoelen ...

Page 9: ...015 15 1 De druk en temperatuur van het water de variaties in stroomtoevoer de opties en de hoeveelheid vaat kan de verbruikswaarden veranderen 2 Conform verordening 1016 2010 3 Conform verordening 2019 2022 Aanwijzingen voor testinstituten Om de nodige informatie te ontvangen over het uitvoeren van prestatietesten bijv volgens EN60436 stuurt u een e mail naar info test dishwasher production com V...

Page 10: ...erontharder De waterontharder verwijdert mineralen van de watertoevoer die een nadelige invloed hebben op de wasresultaten en het apparaat Hoe hoger het gehalte van deze mineralen des te harder is het water De waterhardheid wordt gemeten in de volgende gelijkwaardige schalen De waterontharder moet worden afgesteld op de hardheid van het water in uw woonplaats Uw waterleidingbedrijf kan u informere...

Page 11: ...en van de waterontharder wat 5 minuten duurt beginnen in dezelfde cyclus of aan het begin van het volgende programma Deze activiteit verhoogt het totale waterverbruik van een programma met 4 liter en het totale energieverbruik van een programma met 2 Wh Het spoelen van de waterontharder eindigt met een volledige afvoer Elke uitgevoerde waterontharderspoeling mogelijk meer dan één in dezelfde cyclu...

Page 12: ... en de overige programma indicatielampjes uit zijn Het indicatielampje geeft de huidige instelling aan is aan Melding dat het glansmiddelreservoir leeg is is aan is uit Melding dat het glansmiddelreservoir leeg is is uit 3 Druk op programmatoets om de instelling te wijzigen 4 Druk op de aan uitknop om de instelling te bevestigen 6 4 Geluidssignalen Er klinken geluidssignalen als het apparaat een s...

Page 13: ...ontharder juist is voor de waterhardheid in uw omgeving Indien niet stel dan de stand van de waterontharder juist in 2 Vul het zoutreservoir 3 Vul het glansspoelmiddeldoseerbakje 4 Draai de waterkraan open 5 Start een programma om resten te verwijderen die misschien nog in het apparaat zijn achtergebleven Gebruik geen afwasmiddel en plaats geen vaat in de korven Na het starten van het programma la...

Page 14: ...bsorberend doekje om te voorkomen dat er te veel schuim ontstaat 4 Sluit het deksel Zorg ervoor dat het ontgrendelknopje op zijn plaats dichtklikt U kunt het schuifje voor de vrij te geven hoeveelheid B instellen tussen stand 1 laagste hoeveelheid en stand 4 of 6 hoogste hoeveelheid 8 DAGELIJKS GEBRUIK 1 Draai de waterkraan open 2 Druk op de aan uittoets om het apparaat te activeren Zorg dat het a...

Page 15: ...dicatielampje brandt 3 Sluit de deur van het apparaat om het aftellen te starten Tijdens het aftellen is het niet mogelijk het programma te wijzigen Nadat het aftelproces voltooid is wordt het programma gestart De deur openen als het apparaat in werking is Als u de deur opent terwijl een programma loopt stopt het apparaat Dit kan het energieverbruik en de programmaduur beïnvloeden Als u de deur we...

Page 16: ...esparen Voor de beste reinigingsresultaten plaatst u items in de korven volgens de instructies in de gebruikershandleiding en overbelast u de korven niet Spoel de vaat niet eerst af Het verhoogt het water en energieverbruik Kies indien nodig een programma met voorwasfase Verwijder grotere voedselresten van de borden en lege bekers en glazen voordat u ze in het apparaat plaatst Week kookgerei met s...

Page 17: ...et glansspoelmiddeldoseerbakje gevuld zijn 3 Start het kortste programma met een spoelfase Voeg geen afwasmiddel toe en plaats vaat in de korven 4 Als het programma is voltooid wijzigt u de waterontharder in de waterhardheid van uw omgeving 5 Stel de hoeveelheid glansspoelmiddel in 6 De aanduiding leeg glansmiddelreservoir activeren 9 4 De korven inruimen Gebruik altijd de hele ruimte van de mandj...

Page 18: ...et stopcontact voordat u onderhoudshandelingen verricht Vuile filters en verstopte sproeiarmen verminderen de wasresultaten Controleer regelmatig de filters en reinig deze zo nodig 10 1 De filters reinigen Het filtersystem bestaat uit 3 delen C B A 1 Draai de filter B linksom en verwijder het 2 Verwijder de filter C uit de filter B 3 Verwijder de platte filter A 4 Was de filters 5 Zorg ervoor dat ...

Page 19: ...il de gaten verstopt Verstopte gaten kunnen onbevredigende wasresultaten opleveren 1 Trek de onderste sproeiarm naar boven om deze te verwijderen 2 Reinig de sproeiarm onder stromend water Gebruik een smal en puntig gereedschap bijv een tandenstoker om de vuildeeltjes uit de gaten te verwijderen 3 Duw de sproeiarm naar beneden om deze weer terug te plaatsen 10 3 Buitenkant reinigen Maak het appara...

Page 20: ...igingsprestaties en kunnen schade aan de afvoerpomp veroorzaken 1 Demonteer het filtersysteem volgens de instructies in dit hoofdstuk 2 Verwijder alle vreemde voorwerpen met de hand LET OP Als u de voorwerpen niet kunt verwijderen neem dan contact op met een erkend servicecentrum 3 Monteer de filters opnieuw volgens de instructies in dit hoofdstuk 11 PROBLEEMOPLOSSING WAARSCHUWING Onjuiste reparat...

Page 21: ...in de watertoevoerslang aanwezig zijn Het apparaat pompt geen water weg Het indicatielampje knippert 2 keer met tussenpozen Geluidssignaal klinkt 2 keer Verzeker u ervan dat de gootsteenafvoer niet verstopt is Controleer of het binnenfiltersysteem niet ver stopt is Verzeker u ervan dat de aftapslang geen knik ken of bochten heeft Het beschermingssysteem tegen wa terlekkage is aan Het indicatielamp...

Page 22: ...ultaten en energiebesparing Het programma duurt te lang Als de optie uitgestelde start is ingesteld an nuleert u deze functie of wacht u tot het aftel len is voltooid Kleine lekkage uit de deur van het ap paraat Het apparaat staat niet waterpas Draai aan de verstelbare pootjes indien van toepassing De deur van het apparaat is niet gecentreerd op de kuip Verstel de achterpoot indien van toepassing ...

Page 23: ...t glansmiddel is op of de dosering van glansmiddel is niet voldoende Stel de dosering van het glansmid del in op een hogere stand Plastic voorwerpen moeten mogelijk met een doek worden afgedroogd Activeer voor de beste droogprestatie AirDry We raden aan altijd glansmiddel te gebruiken zelfs in combinatie met wastabletten Witte strepen of een blauwe waas op glazen en servies goed De vrijgegeven hoe...

Page 24: ...dat de bo venste sproeiarm niet geblokkeerd of verstopt is Zorg dat voorwerpen in de rekken het openen van het klepje van het afwasmiddeldoseerbakje niet kunnen belemmeren Geuren in het apparaat Raadpleeg Reiniging binnenkant Kalkresten op het servies goed op de kuip en aan de binnenkant van de deur Het zoutniveau is laag controleer de bijvulaanduiding De dop van het zoutreservoir zit los U heeft ...

Page 25: ...het energielabel ter referentie samen met de gebruikershandleiding en alle andere documenten die bij dit apparaat worden geleverd Het is ook mogelijk om informatie gerelateerd aan de prestaties van het product in de EU EPREL databank te vinden via de link https eprel ec europa eu en de modelnaam en het productnummer kunt u vinden op het typeplaatje van het apparaat Zie het hoofdstuk Productbeschri...

Page 26: ...e advice brochures trouble shooter service and repair information www aeg com support Register your product for better service www registeraeg com Buy Accessories Consumables and Original spare parts for your appliance www aeg com shop CUSTOMER CARE AND SERVICE Always use original spare parts When contacting our Authorised Service Centre ensure that you have the following data available Model PNC ...

Page 27: ...upervised Children of less than 3 years of age should be kept away from the appliance unless continuously supervised Do not let children play with the appliance Keep detergents away from children Keep children and pets away from the appliance when the door is open Children shall not carry out cleaning and user maintenance of the appliance without supervision 1 2 General Safety This appliance is in...

Page 28: ...ied person must install this appliance Remove all the packaging Do not install or use a damaged appliance Do not use the appliance before installing it in the built in structure due to safety manner Follow the installation instructions supplied with the appliance Always take care when moving the appliance as it is heavy Always use safety gloves and enclosed footwear Do not install or use the appli...

Page 29: ...on the appliance Dishwasher detergents are dangerous Follow the safety instructions on the detergent packaging Do not drink and play with the water in the appliance Do not remove the dishes from the appliance until the programme is complete Some detergent may remain on the dishes Do not store items or apply pressure on the open door of the appliance The appliance can release hot steam if you open ...

Page 30: ...ther seals spray arms drain filters interior racks and plastic peripherals such as baskets and lids 2 7 Disposal WARNING Risk of injury or suffocation Disconnect the appliance from the mains supply Cut off the mains cable and discard it Remove the door catch to prevent children and pets to get closed in the appliance 3 PRODUCT DESCRIPTION The graphics below is just a general product overview For m...

Page 31: ...ndicator It is on when the salt container needs refilling It is always off while the programme operates Rinse aid indicator It is on when the rinse aid dispenser needs refilling It is always off while the programme operates 5 PROGRAMMES The order of the programmes in the table may not reflect their sequence on the control panel Programme Type of load Degree of soil Programme phases 1 Crockery Cutl...

Page 32: ...mpliance with the Ecodesign Comission Regulation EU 2019 2022 2 This is a programme for rinsing off food remains from the dishes It prevents odours forming in the appliance Do not use detergent with this programme 5 1 Consumption values Programme 1 Water l Energy kWh Duration min 9 9 0 9202 0 9363 2402 2273 11 1 13 6 1 052 1 285 160 9 6 11 7 0 886 1 083 90 9 2 11 2 0 556 0 680 30 3 4 4 2 0 012 0 0...

Page 33: ...ction mode the following way Press and hold the on off button until the appliance is in programme selection mode How to enter user mode Make sure the appliance is in programme selection mode To enter the user mode press and hold the programme button until the indicator flashes and the indicators and are on 6 2 The water softener The water softener removes minerals from the water supply which would...

Page 34: ...se twice during a programme Regeneration initiation has no impact on the cycle duration unless it occurs in the middle of a programme or at the end of a programme with a short drying phase In that cases the regeneration prolongs the total duration of a programme by additional 5 minutes Subsequently the rinsing of the water softener that lasts 5 minutes may begin in the same cycle or at the beginni...

Page 35: ...e How to deactivate the rinse aid empty notification Make sure the appliance is in user mode 1 Press the programme button immediately The indicator starts to flash 2 Wait until the indicator continues to flash and the remaining programme indicators are off The indicator shows the current setting is on Rinse aid empty notification is on is off Rinse aid empty notification is off 3 Press the program...

Page 36: ...at the current level of the water softener agrees with the hardness of the water supply If not adjust the level of the water softener 2 Fill the salt container 3 Fill the rinse aid dispenser 4 Open the water tap 5 Start a programme to remove any processing residuals that can still be inside the appliance Do not use detergent and do not put dishes in the baskets After starting the programme the app...

Page 37: ... aid dispenser MAX 1 2 3 4 A B D C CAUTION Only use rinse aid designed specifically for dishwashers 1 Press the release button D to open the lid C 2 Fill the dispenser A until the rinse aid reaches the marking MAX 3 Remove the spilled rinse aid with an absorbent cloth to prevent excessive foam formation 4 Close the lid Make sure that the release button locks into position You can turn the selector...

Page 38: ...shing 4 Close the appliance door to start the programme Starting a programme with delay start 1 Set a programme 2 Press the delay button to delay the start of the programme by 3 hours The indicator is on 3 Close the appliance door to start the countdown During the countdown it is not possible to change the programme When the countdown is complete the programme starts Opening the door while the app...

Page 39: ... arrange items in the baskets as instructed in the user manual and do not overload the baskets Do not pre rinse dishes by hand It increases the water and energy consumption When needed select a programme with a prewash phase Remove larger residues of food from the dishes and empty cups and glasses before putting them inside the appliance Soak or slightly scour cookware with firmly cooked on or bak...

Page 40: ...ness in your area 5 Adjust the released quantity of rinse aid 6 Activate the rinse aid empty notification 9 4 Loading the baskets Always use the whole space of the baskets Use the appliance to wash dishwasher safe items only Do not wash in the appliance items made of wood horn aluminium pewter and copper as they could crack warp get discoloured or pitted Do not wash in the appliance items that can...

Page 41: ...r system is made of 3 parts C B A 1 Turn the filter B counterclockwise and remove it 2 Remove the filter C out of filter B 3 Remove the flat filter A 4 Wash the filters 5 Make sure that there are no residues of food or soil in or around the edge of the sump 6 Put back in place the flat filter A Make sure that it is correctly positioned under the 2 guides 7 Reassemble the filters B and C 8 Put back...

Page 42: ...s 10 3 External cleaning Clean the appliance with a moist soft cloth Only use neutral detergents Do not use abrasive products abrasive cleaning pads or solvents 10 4 Internal cleaning Carefully clean the appliance including the rubber gasket of the door with a soft damp cloth To maintain the performance of your appliance use a cleaning product designed specifically for dishwashers at least once a ...

Page 43: ... problems With some problems the dedicated indicator flashes intermittently to indicate a malfunction and the alarm code Problem and alarm code Possible cause and solution You cannot activate the appliance Make sure that the mains plug is connected to the mains socket Make sure that there is no damaged fuse in the fuse box The programme does not start Make sure that the appliance door is closed If...

Page 44: ... tion sensor The indicator flashes 4 times intermittently Acoustic signal sounds 4 times in termittently Make sure that the filters are clean Switch the appliance off and on Malfunction of the wash pump or the drain pump The indicator flashes 5 times intermittently Acoustic signal sounds 5 times in termittently Switch the appliance off and on The temperature of the water inside the appliance is to...

Page 45: ... levelled Loosen or tight en the adjustable feet if applicable Parts of the tableware are protruding from the baskets Rattling knocking sounds from inside the appliance The tableware is not properly arranged in the baskets Refer to basket loading leaflet Make sure that the spray arms can rotate free ly The appliance trips the circuit beaker The amperage is insufficient to supply simulta neously al...

Page 46: ... and dishes The released quantity of rinse aid is not sufficient Ad just the rinse aid level to a higher level The quality of the rinse aid can be the cause The dishes are wet For the best drying performance activate AirDry The programme does not have a drying phase or has a drying phase with low temperature The rinse aid dispenser is empty The quality of the rinse aid can be the cause The quality...

Page 47: ...water soften er Even using multi functional tabs use salt and set re generation of the water softener Refer to The water softener If lime scale deposits still remain clean the appliance with appliance cleaners which are particularly suitable for this purpose Try different detergent Contact the detergent manufacturer Dull discoloured or chipped tableware Make sure that only dishwasher safe items ar...

Page 48: ...le to find information related to the performance of the product in the EU EPREL database using the link https eprel ec europa eu and the model name and product number that you can find on the rating plate of the appliance Refer to the chapter Product description For more detailed information about the energy label visit www theenergylabel eu 13 ENVIRONMENTAL CONCERNS Recycle materials with the sy...

Page 49: ......

Page 50: ......

Page 51: ......

Page 52: ...www aeg com shop 156800951 A 462020 ...

Reviews: