background image

3.

Press the on/off button to confirm

the setting.

6.5 

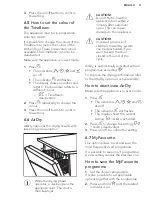
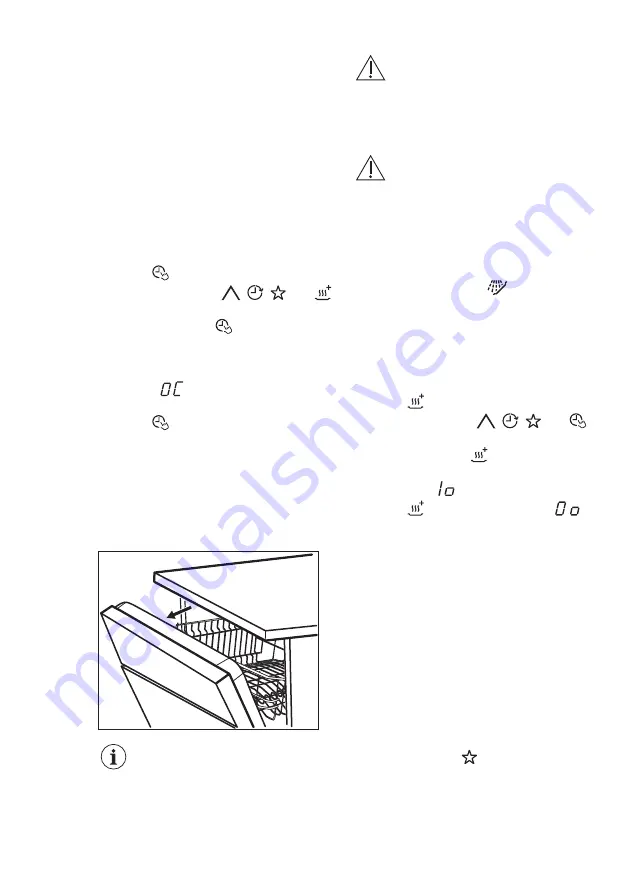
How to set the colour of

the TimeBeam

The appliance must be in programme

selection mode.
It is possible to change the colour of the

TimeBeam to match the colour of the

kitchen floor. There are several colours

available. The TimeBeam can also be

deactivated.
Make sure the appliance is in user mode.

1.

Press 

.

• The indicators 

 and 

go off.

• The indicator 

 still flashes.

• The display shows a number and

letter C. Each number refers to a

different colour.

 = TimeBeam

deactivated.

2.

Press 

 repeatedly to change the

colour.

3.

Press the on/off button to confirm

the setting.

6.6 

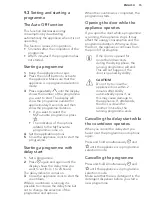
AirDry

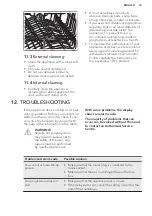
AirDry improves the drying results with

less energy consumption.

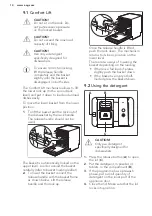
While the drying phase

operates, a device opens the

appliance door. The door is

then kept ajar.

CAUTION!

Do not try to close the

appliance door within 2

minutes after automatic

open. This can cause

damage to the appliance.

CAUTION!

In case of presence of

children, the AirDry system

can be deactivated if you

want to keep the door

closed in the end of the

cycle.

AirDry is automatically activated with all
programmes excluding 
To improve the drying performance refer

to the XtraDry option or activate AirDry.

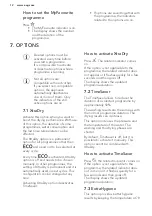
How to deactivate AirDry

Make sure the appliance is in user mode.

1.

Press 

.

• The indicators 

 and 

are off.

• The indicator 

 still flashes.

• The display shows the current

setting: 

 = AirDry activated.

2.

Press 

 to change the setting: 

= AirDry deactivated.

3.

Press on/off to confirm the setting.

6.7 

MyFavourite

This option allows to set and save the

most frequently used programme.
It is possible to save only 1 programme.

A new setting cancels the previous one.

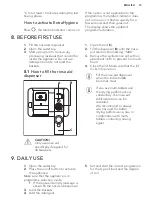
How to save the MyFavourite

programme

1.

Set the chosen programme.

It is also possible to set applicable

options together with the programme.

2.

Press and hold 

 until the related

indicator is on.

ENGLISH

11

Summary of Contents for FFE83800PM

Page 1: ...USER MANUAL EN User Manual Dishwasher FFE83800PM ...

Page 2: ... a few minutes reading to get the very best from it Visit our website for Get usage advice brochures trouble shooter service information www aeg com webselfservice Register your product for better service www registeraeg com CUSTOMER CARE AND SERVICE Always use original spare parts When contacting our Authorised Service Centre ensure that you have the following data available Model PNC Serial Numb...

Page 3: ...leaning and user maintenance of the appliance without supervision 1 2 General Safety This appliance is intended to be used in household and similar applications such as farm houses staff kitchen areas in shops offices and other working environments by clients in hotels motels bed breakfast and other residential type environments Do not change the specification of this appliance The operating water...

Page 4: ...nstruction supplied with the appliance Always take care when moving the appliance as it is heavy Always use safety gloves and enclosed footwear Make sure that the appliance is installed below and adjacent to safe structures 2 2 Electrical connection WARNING Risk of fire and electrical shock The appliance must be earthed Make sure that the parameters on the rating plate are compatible with the elec...

Page 5: ... dishes The appliance can release hot steam if you open the door while a programme operates Do not put flammable products or items that are wet with flammable products in near or on the appliance 2 5 Internal light WARNING Risk of injury This appliance has an internal lamp that comes on when you open the door and goes off when the door is closed The lamp in this appliance is not suitable for house...

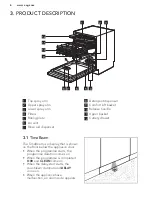
Page 6: ...ket 10 Release handle 11 Upper basket 12 Cutlery drawer 3 1 TimeBeam The TimeBeam is a display that is shown on the floor below the appliance door When the programme starts the programme duration comes on When the programme is completed 0 00 and CLEAN come on When the delay start starts the countdown duration and DELAY come on When the appliance has a malfunction an alarm code appears www aeg com ...

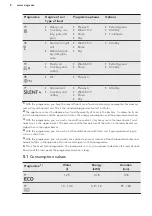
Page 7: ...d 5 MyFavourite touchpad 6 TimeSaver touchpad 7 XtraDry touchpad 8 ExtraHygiene touchpad 9 Indicators 5 PROGRAMMES Programme Degree of soil Type of load Programme phases Options P1 1 Normal soil Crockery and cutlery Prewash Wash 50 C Rinse Dry ExtraHygiene TimeSaver XtraDry P2 2 All Crockery cut lery pots and pans Prewash Wash from 45 C to 70 C Rinse Dry ExtraHygiene XtraDry P5 3 Mixed soil Crocke...

Page 8: ...sts the temperature and the quantity of water the energy consumption and the programme duration 3 With this programme you can wash a load with mixed soil Very heavy soil in the lower basket and normal soil in the upper basket The pressure and the temperature of the water in the lower basket are higher than in the upper basket 4 With this programme you can wash a half load dishwasher with fresh soi...

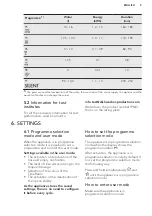
Page 9: ...ossible to set a programme and to enter the user mode Settings available in the user mode The activation or deactivation of the rinse aid empty notification The level of rinse aid according to the required dosage Selection of the colour of the TimeBeam The activation or the deactivation of the option AirDry As the appliance stores the saved settings there is no need to configure it before every cy...

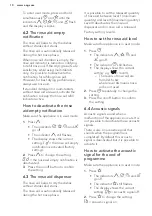
Page 10: ... aid dispenser The rinse aid helps to dry the dishes without streaks and stains The rinse aid is automatically released during the hot rinse phase It is possible to set the released quantity of rinse aid between level 1 minimum quantity and level 6 maximum quantity Level 0 deactivates the rinse aid dispenser and no rinse aid is released Factory setting level 4 How to set the rinse aid level Make s...

Page 11: ...iance door within 2 minutes after automatic open This can cause damage to the appliance CAUTION In case of presence of children the AirDry system can be deactivated if you want to keep the door closed in the end of the cycle AirDry is automatically activated with all programmes excluding To improve the drying performance refer to the XtraDry option or activate AirDry How to deactivate AirDry Make ...

Page 12: ...ng of XtraDry is permanent and it is automatically used in next cycles This configuration can be changed at any time Activating XtraDry option deactivates TimeSaver How to activate XtraDry Press The related indicator comes on If the option is not applicable to the programme the related indicator does not appear or it flashes quickly for a few seconds and then goes off The display shows the updated...

Page 13: ... Fill the dispenser B until the rinse aid reaches the marking MAX 3 Remove the spilled rinse aid with an absorbent cloth to prevent too much foam 4 Close the lid Make sure that the lid locks into position Fill the rinse aid dispenser when the indicator A becomes clear If you use multi tablets and the drying performance is satisfactory the rinse aid refill indication can be disabled We recommend to...

Page 14: ...level Load or unload the basket carefully refer to basket loading leaflet 2 To lower the basket connect the release handle with the basket frame as shown below Lift the release handle and the rack up Once the release handle is lifted push the rack down The mechanism returns to its basic position on the lower level There are two ways of lowering the basket depending on the loading If there is a ful...

Page 15: ... to start the countdown While a countdown is running it is possible to increase the delay time but not to change the selection of the programme and options When the countdown is completed the programme starts Opening the door while the appliance operates If you open the door while a programme is running the appliance stops It may affect the energy consumption and the programme duration When you cl...

Page 16: ...o the appliance Detergent tablets do not fully dissolve with short programs To prevent detergent residues on the tableware we recommend that you use the tablets with long programs Do not use more than the correct quantity of detergent Refer to the instructions on the detergent packaging 10 3 Loading the baskets Only use the appliance to wash items that are dishwasher safe Do not put in the applian...

Page 17: ... then the upper basket At the end of the program water can still remain on the sides and on the door of the appliance 11 CARE AND CLEANING WARNING Before maintenance deactivate the appliance and disconnect the mains plug from the main socket Dirty filters and clogged spray arms decrease the washing results Make a check regularly and if necessary clean them 11 1 Cleaning the filters The filter syst...

Page 18: ...ommend to clean regularly the upper spray arm to avoid soil to clog the holes Clogged holes can cause unsatisfactory washing results 1 Pull out the upper basket 2 To disengage the spray arm from the basket press the spray arm upwards in the direction indicated by the lower arrow and simultaneously turn it clockwise 3 Wash the spray arm under running water Use a thin pointed tool e g toothpick to r...

Page 19: ...lly the instructions on the packaging of the product 12 TROUBLESHOOTING If the appliance does not start or it stops during operation Before you contact an Authorised Service Centre check if you can solve the problem by yourself with the help of the information in the table WARNING Repairs not properly done may result in serious risk to the safety of the user Any repairs must be performed by qualif...

Page 20: ...for the end of the countdown The remaining time in the display increases and skips nearly to the end of program time This is not a defect The appliance is working correctly The options of the program have to be set again every time To save your favourite configuration use option MyFa vourite Small leak from the appli ance door The appliance is not levelled Loosen or tighten the ad justable feet if...

Page 21: ...tion with multi tablets There are whitish streaks or bluish layers on glasses and dishes The release quantity of rinse aid is too much Adjust the rinse aid level to a lower level The quantity of detergent is too much There are stains and dry water drops on glasses and dishes The released quantity of rinse aid is not sufficient Ad just the rinse aid level to a higher level The quality of the rinse ...

Page 22: ...rs which are particularly suitable for this purpose Try different detergent Contact the detergent manufacturer Dull discoloured or chipped tableware Make sure that only dishwasher safe items are washed in the appliance Load and unload the basket carefully Refer to basket loading leaflet Place delicate items in the upper basket Refer to Before first use Daily use or Hints and tips for other possibl...

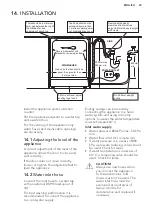
Page 23: ...the appliance allows the door to close and seal correctly If the door does not close correctly loosen or tighten the adjustable feet to level the appliance 14 2 Water inlet hose Connect the inlet hose to a water tap with an external BSP thread spout of 3 4 For best washing performance it is recommended to connect the appliance to a cold water supply Energy savings can be made by connecting the app...

Page 24: ... return valve If you connect the water drain hose to a trap spigot under the sink remove the plastic membrane If you do not remove the membrane remaining food can cause a blockage in the drain hose spigot Remove entire internal membrane 15 WARRANTY FOR SALES IN AUSTRALIA AND NEW ZEALAND ALL AEG BRANDED APPLIANCES This document sets out the terms and conditions of the product warranties for AEG App...

Page 25: ...bear the cost of transportation travel and delivery of the Appliance to and from Electrolux or its ASC If you reside outside of the service area you will bear the cost of a travel of an authorised representative b transportation and delivery of the Appliance to and from Electrolux or its ASC In all instances unless the Appliance is transported by Electrolux or an AEG authorised representative the ...

Page 26: ...ble to it 12 For Appliances and services provided in New Zealand the Appliances come with a guarantee pursuant to the provisions of the Consumer Guarantees Act the Sale of Goods Act and the Fair Trading Act 13 To enquire about claiming under this warranty please follow these steps a carefully check the operating instructions user manual and the terms of this warranty b have the model and serial nu...

Page 27: ...EE CALL 0800 10 66 20 OR EMAIL customercare electrolux co nz New Zealand only 16 ENVIRONMENTAL CONCERNS Recycle materials with the symbol Put the packaging in relevant containers to recycle it Help protect the environment and human health by recycling waste of electrical and electronic appliances Do not dispose of appliances marked with the symbol with the household waste Return the product to you...

Page 28: ...t or faulty servicing or repair works done by anyone other than an Electrolux authorised repairer or ASC iv normal wear and tear v power surges electrical storm damage or incorrect power supply vi incomplete or improper installation vii incorrect improper or inappropriate operation viii insect or vermin infestation ix failure to comply with any additional instructions supplied with the Appliance I...

Page 29: ...www aeg com au 117881890 A 172017 ...

Reviews: